Flutter Quick Start Guide
Learn how to quickly get started with your Flutter Integration.
Overview
The following section shows how to install, set up, and test your Flutter application.
Install
To add the CleverTap Flutter SDK to your project, edit your project's pubspec.yaml file:
dependencies:
    clevertap_plugin: 3.6.0
Run flutter packages get to install the SDK.
Now, in your Dart code, you can use:
import 'package:clevertap_plugin/clevertap_plugin.dart';Android Integration
NoteAs of Flutter SDK 4.0.0, the minimum supported Android version is Android 6.0. Devices running Android 5.x (API levels 21–22) are no longer supported. Update your app's minSdkVersion to 23 or higher before upgrading.
Add CleverTap Credentials
To associate your Android app with your CleverTap account, you must add your CleverTap credentials to the application's AndroidManifest.xml file. Follow the steps to add CleverTap credentials:
Add your CleverTap Account ID and Token to your AndroidManifest.xml within the
<meta-data
    android:name="CLEVERTAP_ACCOUNT_ID"
    android:value="Your CleverTap Account ID"/>
<meta-data
    android:name="CLEVERTAP_TOKEN"
    android:value="Your CleverTap Account Token"/>
<!-- IMPORTANT: To force use Google AD ID to uniquely identify  users, use the following meta tag. GDPR mandates that if you are using this tag, there is prominent disclousure to your end customer in their application. Read more about GDPR here - https://clevertap.com/blog/in-preparation-of-gdpr-compliance/ -->
<meta-data
    android:name="CLEVERTAP_USE_GOOGLE_AD_ID"
    android:value="1"/>
Credentials and AccessThe CleverTap Account ID and CleverTap Token are available as Project ID and Project Token respectively on the CleverTap dashboard. Member and Creator roles in the project don't have access to view the Passcode and Project Token of the account on the dashboard.
Add Region Code
To know how to add region code for Android in Flutter SDK, refer to Region Codes.
Enable Tracking by Adding Permissions
Add the snippet below in the AndroidManifest.xml file so the CleverTap SDK can access the internet.
<!-- Required to allow the app to send events and user profile information -->
<uses-permission android:name="android.permission.INTERNET"/>
<!-- Recommended so that CleverTap knows when to attempt a network call -->
<uses-permission android:name="android.permission.ACCESS_NETWORK_STATE"/>
Add Dependencies
Plugin Domain-Specific Language (DSL)To build a Flutter app for Android, you must apply Flutter's Gradle plugins. Previously, you would be required to use Gradle's legacy imperative
applyscript method to build a Flutter app for Android.
However, since the release of Flutter 3.16, you can apply these plugins using Gradle's declarativeplugins {}block which simplifies and standardizes the configuration process, reducing the chances of errors.For more information, refer to the official Flutter documentation and check out the CleverTap-Flutter sample app for guidance on migration.
- Add the following to your
dependenciessection inproject/build.gradle:
dependencies {
            classpath 'com.android.tools.build:gradle:8.6.1'
            classpath 'com.google.gms:google-services:4.4.1' //<--- Mandatory for using Firebase Messaging, skip if not using FCM
}- Add the following to your
dependenciessection inapp/build.gradle:
Migrating from ExoPlayer to AndroidX Media3Starting from CleverTap Flutter SDK v2.5.0, CleverTap supports AndroidX Media3 replacing the old ExoPlayer libraries (from Android SDK v8.1.0). ExoPlayer support will end in v5.0.0. To switch to AndroidX Media3, update these dependencies:
implementation 'com.google.firebase:firebase-messaging:21.0.0'
implementation 'androidx.core:core:1.3.0'
implementation 'androidx.fragment:fragment:1.3.6'

//MANDATORY for App Inbox
implementation 'androidx.appcompat:appcompat:1.3.1'
implementation 'androidx.recyclerview:recyclerview:1.2.1'
implementation 'androidx.viewpager:viewpager:1.0.0'
implementation 'com.google.android.material:material:1.4.0'
implementation 'com.github.bumptech.glide:glide:4.12.0'

//For CleverTap Android SDK v3.6.4 and above, add the following line of code
implementation 'com.android.installreferrer:installreferrer:2.2'

//Optional AndroidX Media3 Libraries for Audio/Video Inbox Messages. Audio/Video messages will be dropped without these dependencies

implementation "androidx.media3:media3-exoplayer:1.1.1"
implementation "androidx.media3:media3-exoplayer-hls:1.1.1"
implementation "androidx.media3:media3-ui:1.1.1"
implementation 'com.google.firebase:firebase-messaging:21.0.0'
implementation 'androidx.core:core:1.3.0'
implementation 'androidx.fragment:fragment:1.3.6'
//MANDATORY for App Inbox
implementation 'androidx.appcompat:appcompat:1.3.1'
implementation 'androidx.recyclerview:recyclerview:1.2.1'
implementation 'androidx.viewpager:viewpager:1.0.0'
implementation 'com.google.android.material:material:1.4.0'
implementation 'com.github.bumptech.glide:glide:4.12.0'
//For CleverTap Android SDK v3.6.4 and above, add the following line of code
implementation 'com.android.installreferrer:installreferrer:2.2'
//Optional ExoPlayer Libraries for Audio/Video Inbox Messages. Audio/Video messages will be dropped without these dependencies
implementation "com.google.android.exoplayer:exoplayer:2.19.1"
implementation "com.google.android.exoplayer:exoplayer-hls:2.19.1"
implementation "com.google.android.exoplayer:exoplayer-ui:2.19.1"- At the end of the
app/build.gradlefile, add the following:
apply plugin: 'com.google.gms.google-services' //skip if not using FCMSet Up Android's Application class
In your app's Android Application class, add the following code:
public class MyApplication extends FlutterApplication {
        @java.lang.Override
        public void onCreate() {
            ActivityLifecycleCallback.register(this); //<--- Must call this before super.onCreate()
            super.onCreate();
        }
    }
class MyApplication : FlutterApplication() {
override fun onCreate() {
ActivityLifecycleCallback.register(this)//<--- Add this before super.onCreate()
super.onCreate()
}
}If you do not have an Application class, add this to your AndroidManifest.xml file:
<application
        android:label="@string/app_name"
        android:icon="@drawable/ic_launcher"
        android:name="com.clevertap.android.sdk.Application">
iOS integration
Add CleverTap Credentials
To link your iOS app with your CleverTap account, add your CleverTap credentials to your application's Info.plist file.
Perform the following steps:
- Navigate to the
Info.plistfile in your project navigator.
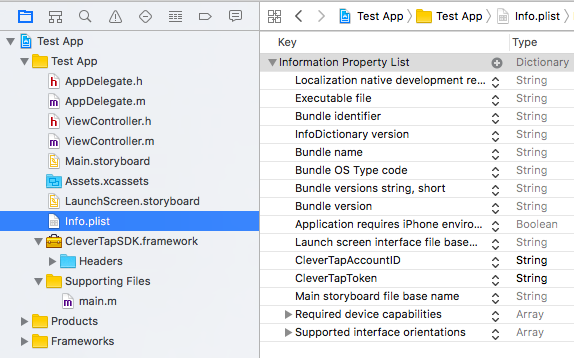
Information Property List in Info.plist File
- Create a key called CleverTapAccountID with the type string.
- Create a key called CleverTapToken with the type string.
- Insert the account ID and account token values from your CleverTap account. These values are available on the Settings page on the CleverTap dashboard.
Add Region Code
To know how to add region code for iOS in Flutter SDK, refer to Region Codes.
Initialize CleverTap SDK
- Initialize CleverTap SDK by adding the following code snippet to import the CleverTap header in your AppDelegate file:
#import "CleverTap.h"
 #import "CleverTapPlugin.h"
import CleverTapSDK
import clevertap_plugin- In your
didFinishLaunchingWithOptions:method, notify the CleverTap Flutter SDK of application launch:
[CleverTap autoIntegrate]; // integrate CleverTap SDK using the autoIntegrate option
[[CleverTapPlugin sharedInstance] applicationDidLaunchWithOptions:launchOptions];
CleverTap.autoIntegrate() // integrate CleverTap SDK using the autoIntegrate option
CleverTapPlugin.sharedInstance()?.applicationDidLaunch(options: launchOptions)
NoteIf you want to handle the clicks on the iOS Push notifications manually, remove the
[CleverTap autoIntegrate];line from your integration.
Web Integration
Initialize Flutter Web SDK
- Add the below script in the
index.htmlfile:<script src="./assets/packages/clevertap_plugin/assets/clevertap.js"></script> - Initialize CleverTap Flutter Web SDK using the
CleverTapPlugin.initmethod:CleverTapPlugin.init("CLEVERTAP_ACCOUNT_ID", "CLEVERTAP_REGION", "CLEVERTAP_TARGET_DOMAIN");
Following are the parameter details:
| Parameter | Required | Description |
|---|---|---|
CLEVERTAP_ACCOUNT_ID | Mandatory | Obtain this value from the Projects page on the CleverTap dashboard. |
CLEVERTAP_REGION | Optional | Should match the region of the CleverTap dashboard. Possible values: in1, us1, sg1, aps3, mec1. |
CLEVERTAP_TARGET_DOMAIN | Optional | The domain of the proxy server. |
token | Optional | Token for identity verification. |
options | Optional | A map of additional configuration options. Web platform only. See Supported options below. |
Supported Options
The options parameter accepts the following keys. These are passed through directly to the underlying CleverTap Web JS SDK, the Flutter layer does not validate them.
| Key | Type | Description |
|---|---|---|
enableEncryptionInTransit | boolean | Enables encryption for data sent to CleverTap. |
customId | String | Sets a custom CleverTap ID for the user. |
Example
Basic initialization:
CleverTapPlugin.init("CLEVERTAP_ACCOUNT_ID", "CLEVERTAP_REGION", "CLEVERTAP_TARGET_DOMAIN");With all parameters:
CleverTapPlugin.init(
  "CLEVERTAP_ACCOUNT_ID",
  "CLEVERTAP_REGION",
  "CLEVERTAP_TARGET_DOMAIN",
  "CLEVERTAP_TOKEN",
  {
    "enableEncryptionInTransit": true,
    "customId": "my-id",
  },
);
Add Region Code
To know how to add region code for Web in Flutter SDK, refer to Region Codes.
Run Your Application
Run your Flutter application and navigate to your CleverTap dashboard. If you integrate the CleverTap SDK successfully, you will see a new active user on the dashboard.
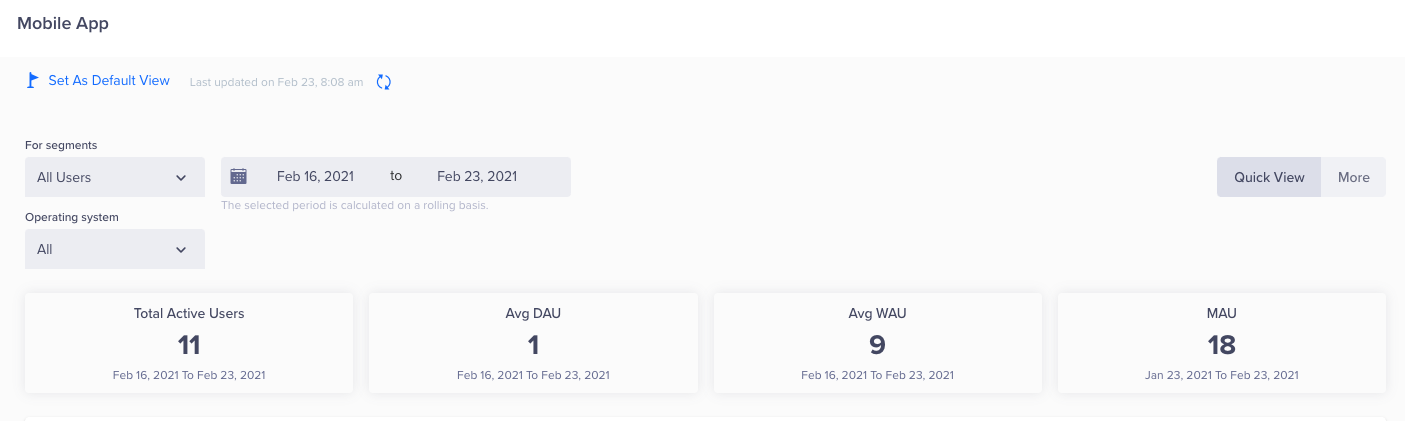
View Active User on the Dashboard
Flutter Integration
Track User Profiles
A user profile is automatically created in CleverTap for each user launching your application.
Initially, the user profile starts out as anonymous which means the profile does not contain any identifiable information about the user. You can enrich the profile with pre-defined attributes from the CleverTap data model, such as name and email. You can also add custom attributes that you define to extend the CleverTap data model. Create a User profile when the user logs in (On User Login):
var stuff = ["bags", "shoes"];
var profile = {
    'Name': 'Captain America',
    'Identity': '100',
    'Email': '[email protected]',
    'Phone': '+14155551234',
    'stuff': stuff
};
CleverTapPlugin.onUserLogin(profile);
When the Onuserlogin method is called, the user profile information is sent to CleverTap.
To see how this information displays within the CleverTap dashboard:
- Log in to the CleverTap dashboard.
- Click
Find Peopleunder theSegmenttab. In the By Identity box, enter the email you set on the user profile record and click Find.
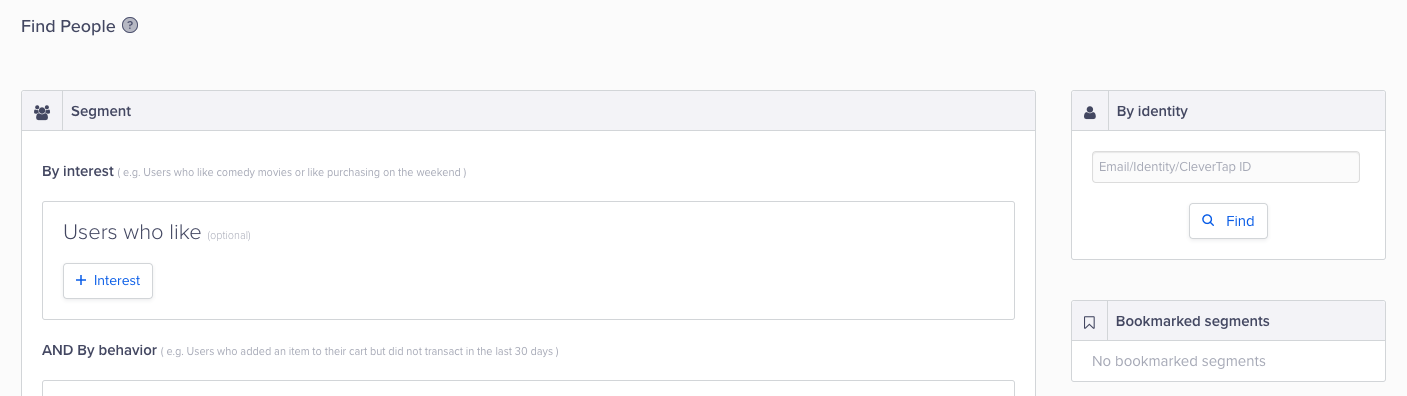
Find People
If CleverTap finds a user profile with this email, the user record is displayed. On that page, you will see name and email as pre-defined fields and any other custom fields.
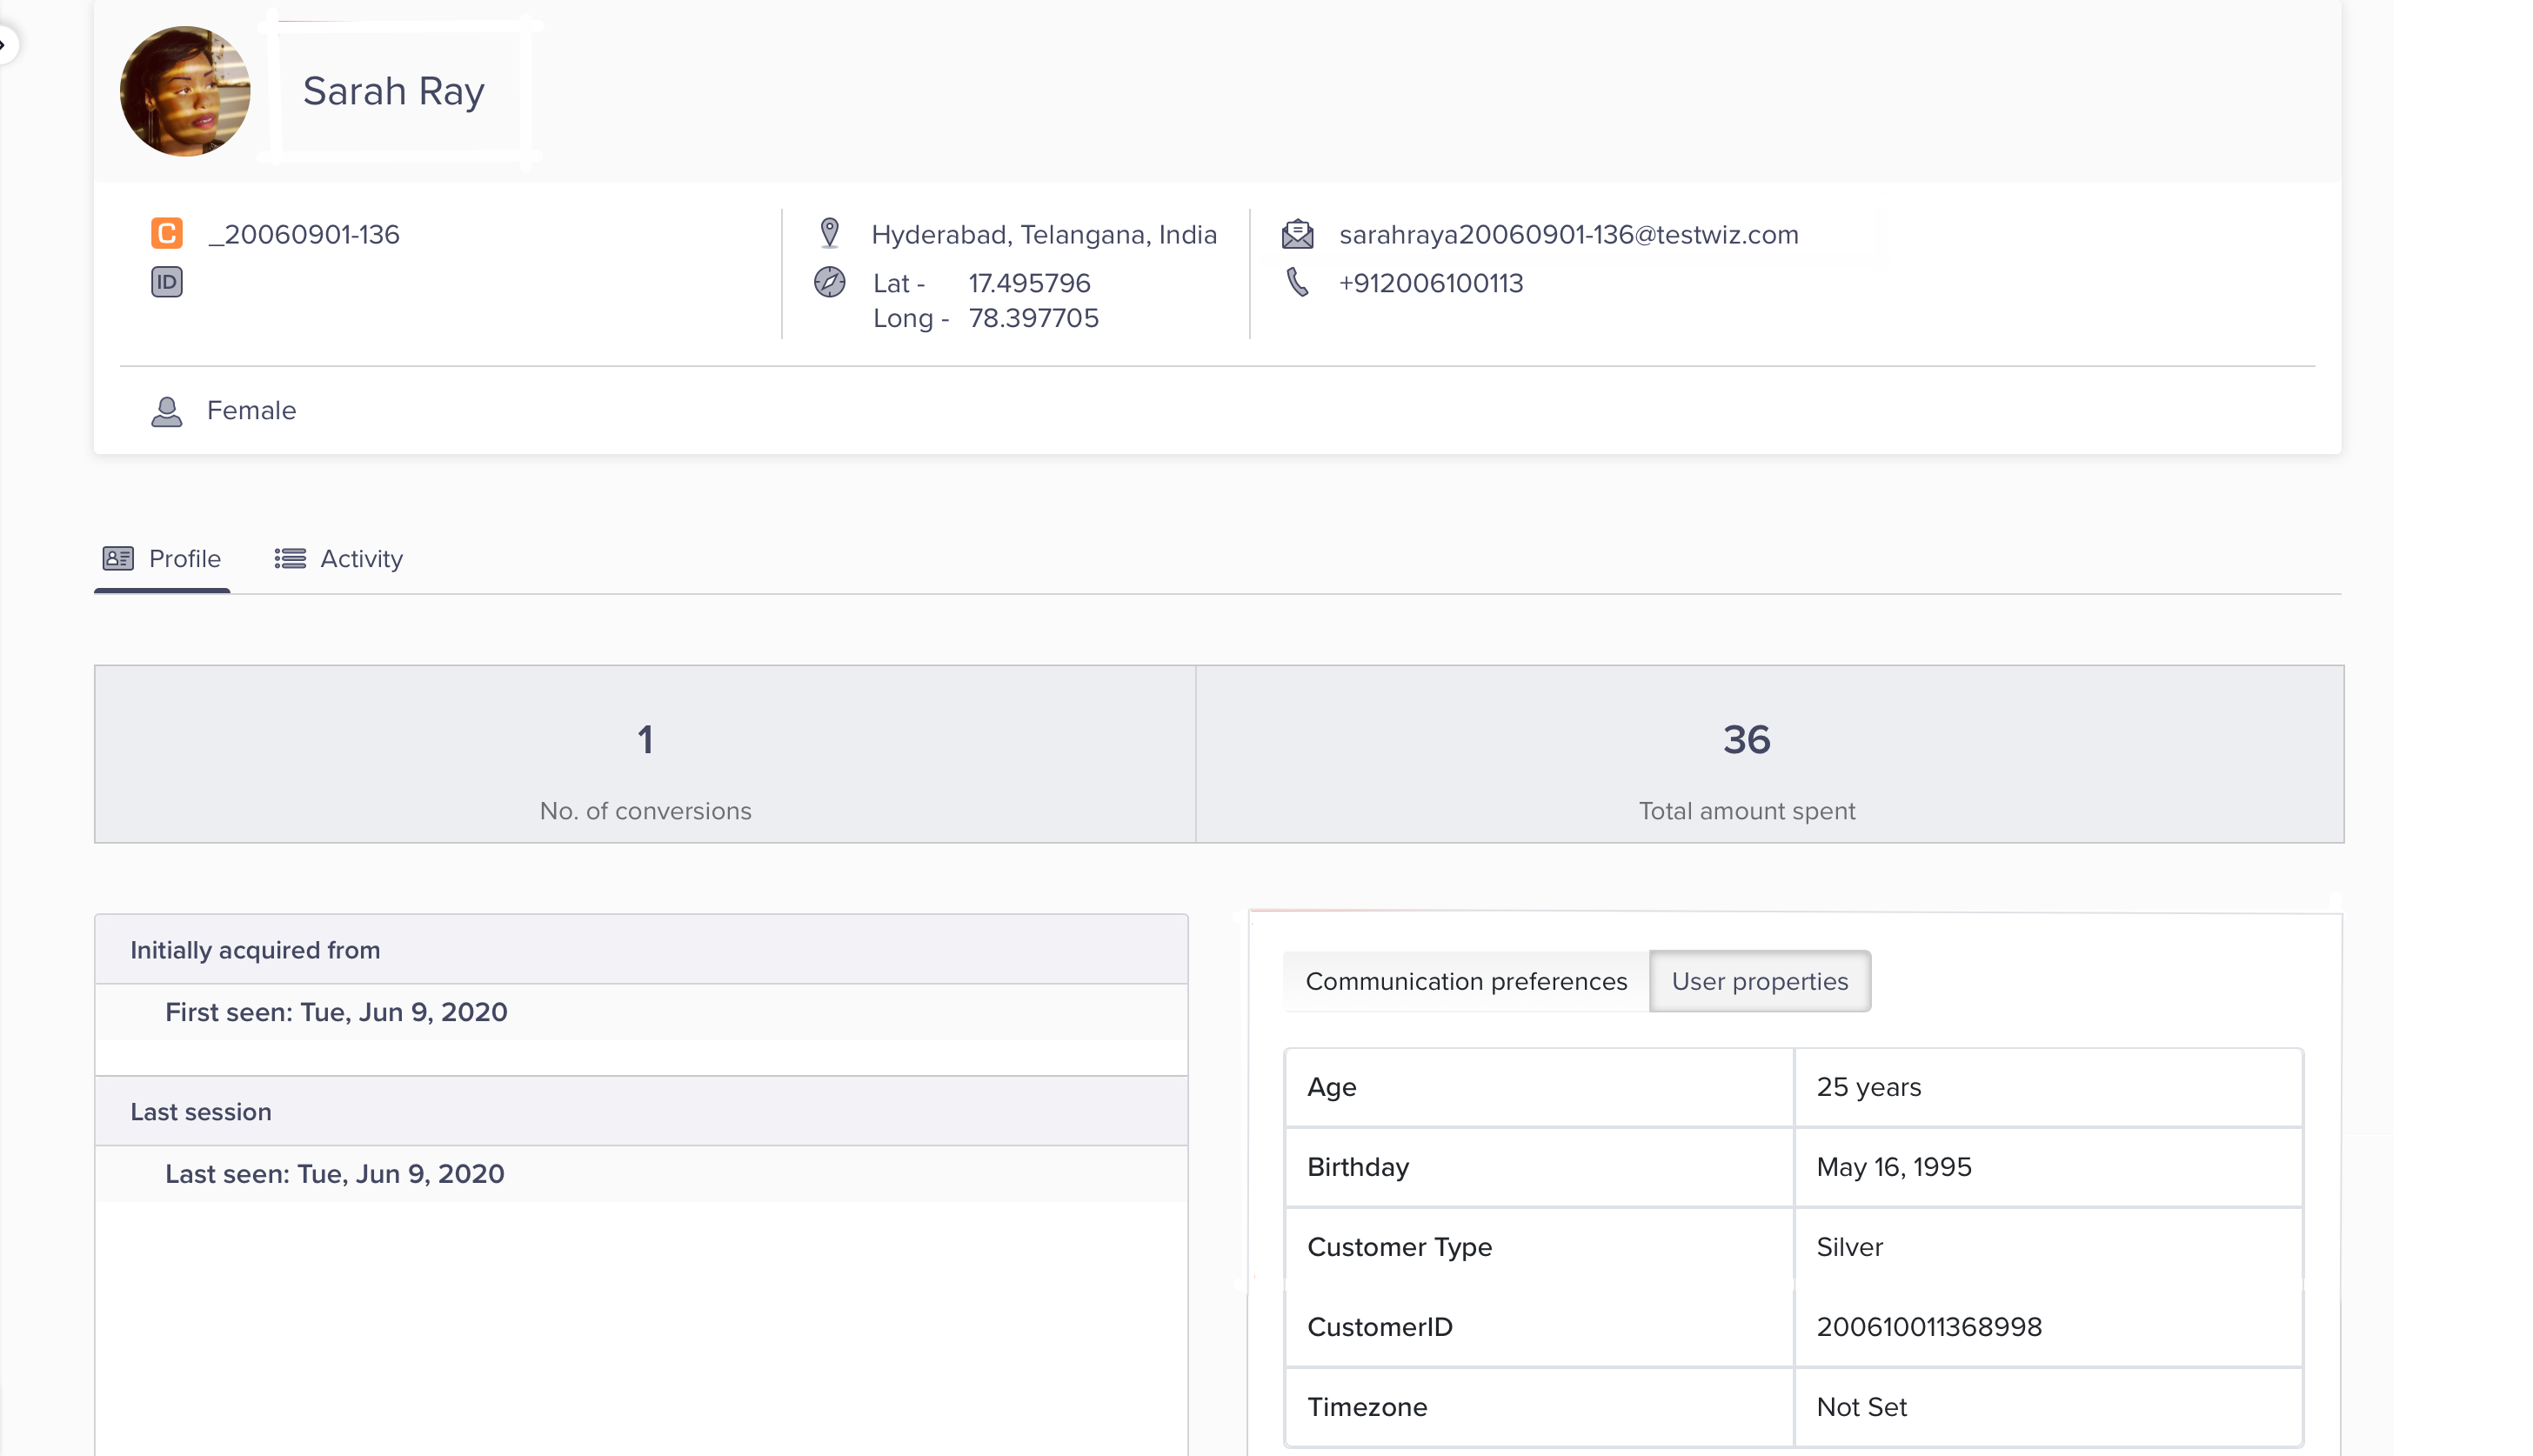
CleverTap User Profile
Update the User Profile
The Onuserlogin() method identifies the individual users on the device. However, you may need to add additional user properties to the user profile, such as gender, date of birth, and so on. You can update these properties with the profilePush() method. For more information, refer to our User Documentation.
Track User Events
After you integrate the CleverTap SDK, we automatically start tracking events, such as App Launch and Notification Viewed. In addition to the default events tracked by CleverTap, you can also track custom events.
To send custom events to CleverTap using our Flutter SDK, you will have to call the recordEvent method with the name of the custom event you want to track.
Record an event without event data:
CleverTapPlugin.recordEvent("Product Viewed",{});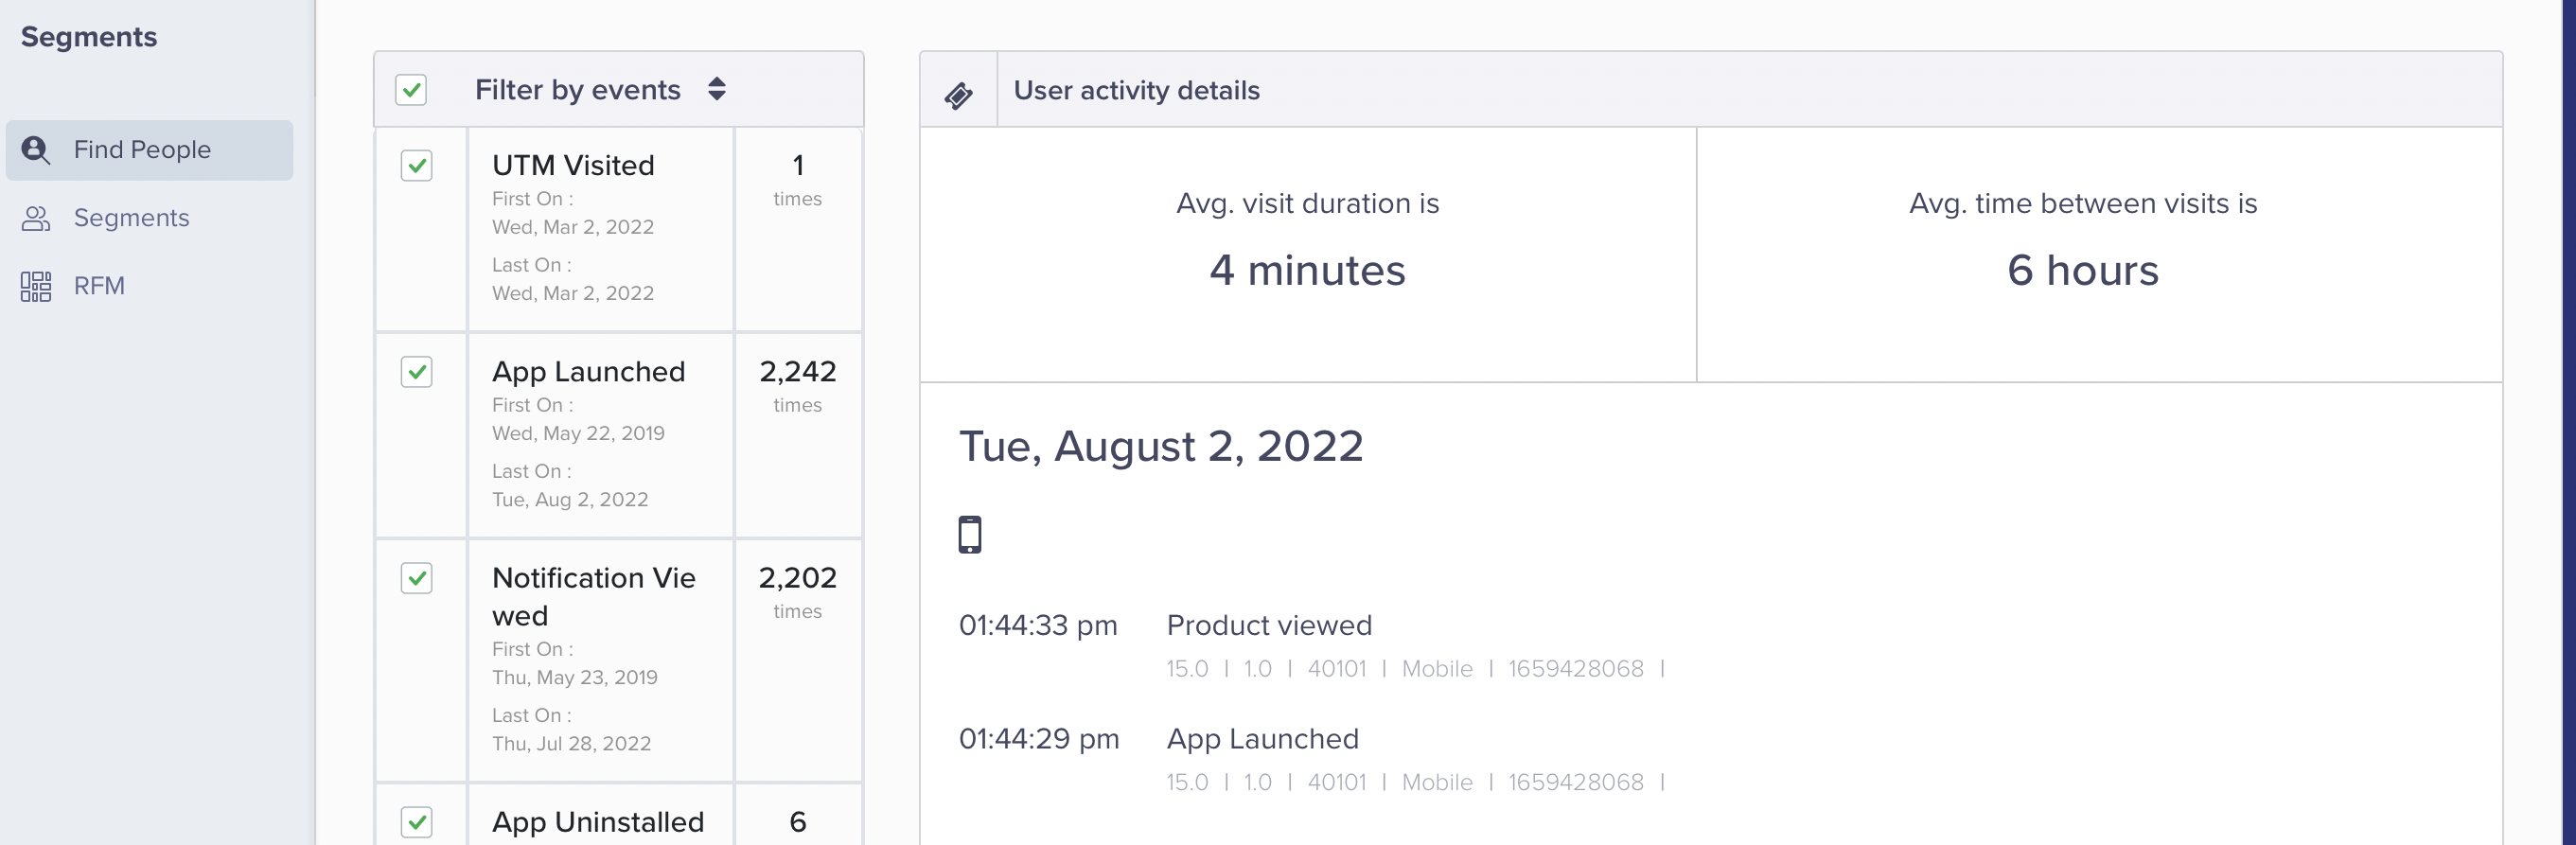
Track User Events
Record an event with event data:
var eventData = {
    // Key:    Value
   'first': 'partridge',
   'second': 'turtledoves'
};
CleverTapPlugin.recordEvent("Flutter Event", eventData);
Debugging the Flutter Application with CleverTap APIs
In order to log warnings or other important messages to the logging system, please refer to Flutter Debugging
GDPR Compliance
CleverTap provides APIs to support GDPR compliance. For more information, refer to Flutter GDPR Compliance
Sample Project Demonstrating Direct Implementation of CleverTap Features
For an example project of integrating CleverTap Flutter SDK and using all its features in your Flutter application, refer to the Github Flutter Example Project.
Next Steps
By completing this guide, you are now automatically tracking user events, such as app launches, and associating that information with profiles for each user. You have also learned how to debug, how to add information to a user profile, and how to track custom events.
Updated 5 days ago