Cordova Push
Learn how to handle push notifications in Cordova.
Push Notifications and Deep Links
This section describes how to set up push notifications and deep links for Cordova.
iOS
For more information on how to set up and register for push notifications, refer to Set up push notifications for your app.
- To set up a push notification for your iOS app, refer to the Apple Documentation.
- If you plan to use deep links, in the Apple Documentation.
- Call the following from your Javascript file.
CleverTap.registerPush();
Capacitor iOS with multiple push SDKsIf your app uses Capacitor and includes more than one push SDK (such as OneSignal, Firebase Messaging, or Braze), the default APNs token registration may be silently bypassed. In this case, you must manually forward the token in AppDelegate.swift. For more information on setup, refer Custom Push Token Registration: iOS (Capacitor).
Android
To use CleverTap's default Push Notifications service, add the following code to your AndroidManifest.xml file.
<application>
         ....
         ....
        <service android:name="com.clevertap.android.sdk.pushnotification.fcm.FcmMessageListenerService">
            <intent-filter>
                <action android:name="com.google.firebase.MESSAGING_EVENT" />
            </intent-filter>
        </service>

 </application>
Notification Trampolines in Android 12 and Above.Android has changed the push notifications handling for version 12 and above to improve performance. An app can no longer start an activity within a service or broadcast receiver. For more information, refer to Android 12 Push Changes.
Create Notification Channel
To create a notification channel, add the following code snippet:
CleverTap.createNotificationChannel("CtCS", "Clever Tap Cordova Testing", "CT Cordova Testing", 1, true);The notification channel importance can have any value from 1 to 5. A higher value means a more interruptive notification. For more information, refer to Notification Channel Importance Levels.
Delete Notification Channel
To delete a notification channel, add the following code snippet:
CleverTap.deleteNotificationChannel("CordovaTesting");Create a Group Notification Channel
To create a group notification channel, add the following code snippet:
CleverTap.createNotificationChannelGroup("groupId", "groupName");Delete a Group Notification Channel
To delete a group notification channel, add the following code snippet:
CleverTap.deleteNotificationChannelGroup("groupId");Use Activity as a Deep Link
To use any Activity as a deep link, add your custom URL scheme to the AndroidManifest.xml for that Activity.
<intent-filter android:label="@string/app_name">
                <action android:name="android.intent.action.VIEW" />
                <category android:name="android.intent.category.DEFAULT" />
                <category android:name="android.intent.category.BROWSABLE" />
                <data android:scheme="clevertapstarter" />
     </intent-filter>
For AndroidManifest.xml example, refer to the example AndroidManifest.xml file.
Push Notifications Permission
Starting from Android 13 and iOS 10.0, applications must request notification permission from the user before sending Push Notifications. All newly installed applications must seek user permission before they can send notifications.
Push Primer
A Push Primer explains the need for push notifications to your users and helps to improve your engagement rates. It is an InApp notification that you can show to your users before requesting notification permission.
Push Primer helps with the following:
- Allows you to educate your users on why you are asking for this permission before invoking a system dialog to seek user permission.
- Acts as a precursor to the hard system dialog and thus allows you to seek permission multiple times if previously denied without making your users search the device settings.
CleverTap React Native supports push primer for push notifications starting with the v0.9.5 release.
iOS and Android Versions for Push Primer
- The minimum supported version for the iOS platform is 10.0.
- The minimum supported version for the Android platform is Android 13.
The following are the two ways to handle the new push notification changes:
- Push Primer Using Half-Interstitial InApp Notification Template
- Push Primer Using In-App Alert Template
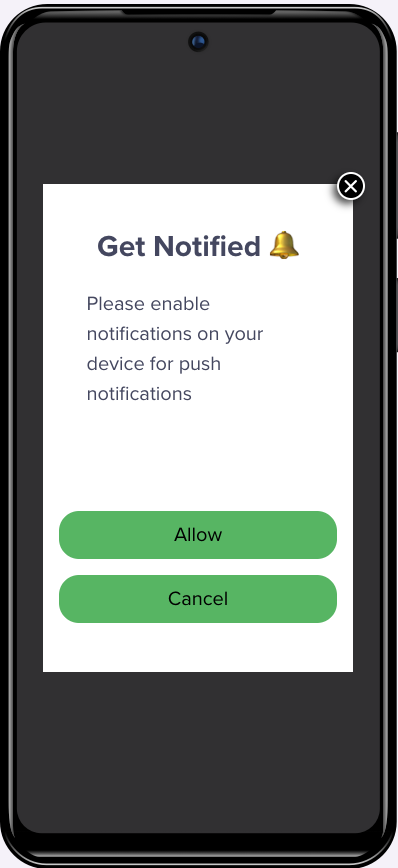
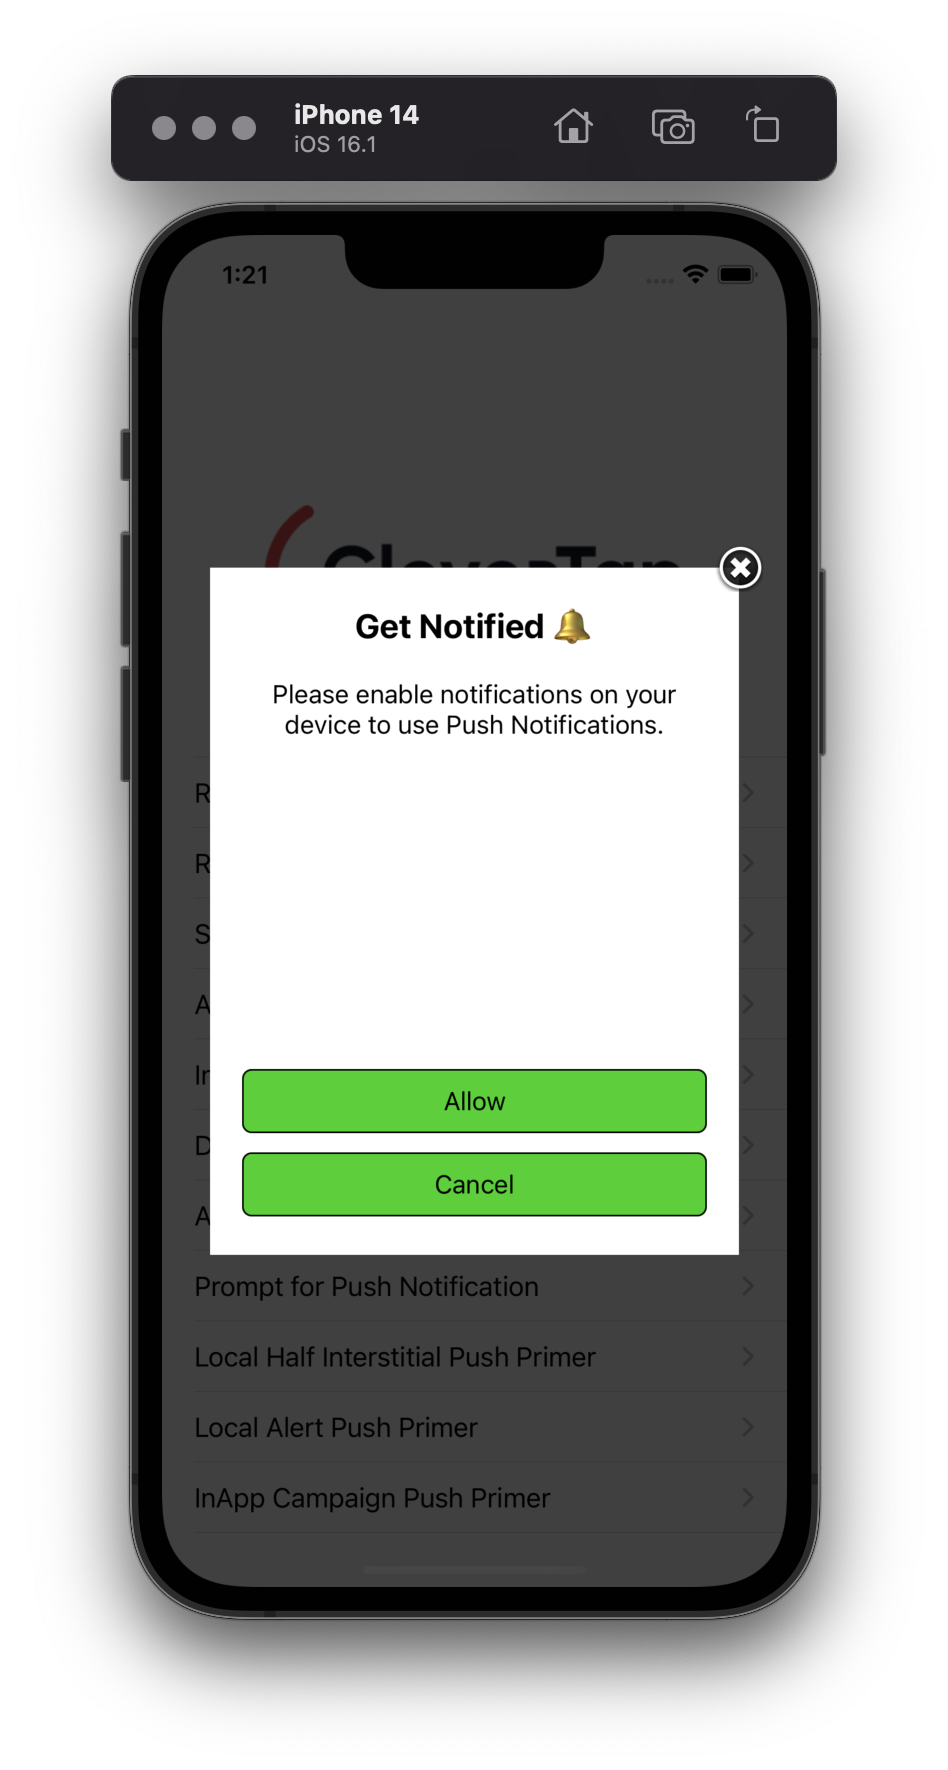
Push Primer Using Half-Interstitial InApp Template
Using this template, you can send a customized push primer notification with an image, text, and button. You can also modify the notification's text, button, and background color.
Refer to the following images for Push Primer using Half-Interstitial InApp Template:
- In Android
- In iOS
Add the following code to your Javascript file to create Push Primer using the Half-Interstitial InApp template:
let localInApp = {
inAppType: 'half-interstitial',
titleText: 'Get Notified',
messageText: 'Please enable notifications on your device to use Push Notifications.',
followDeviceOrientation: true,
positiveBtnText: 'Allow',
negativeBtnText: 'Cancel',
// Optional parameters:
backgroundColor: '#FFFFFF',
btnBorderColor: '#0000FF',
titleTextColor: '#0000FF',
messageTextColor: '#000000',
btnTextColor: '#FFFFFF',
btnBackgroundColor: '#0000FF',
btnBorderRadius: '2',
fallbackToSettings: true, // If true, opens OS notification settings when permission is denied
imageUrl: 'https://icons.iconarchive.com/icons/treetog/junior/64/camera-icon.png',
altText: 'Alternate Image'
};
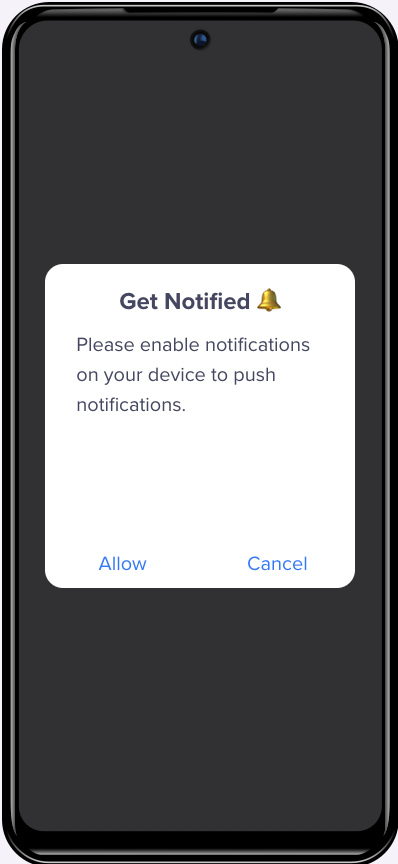
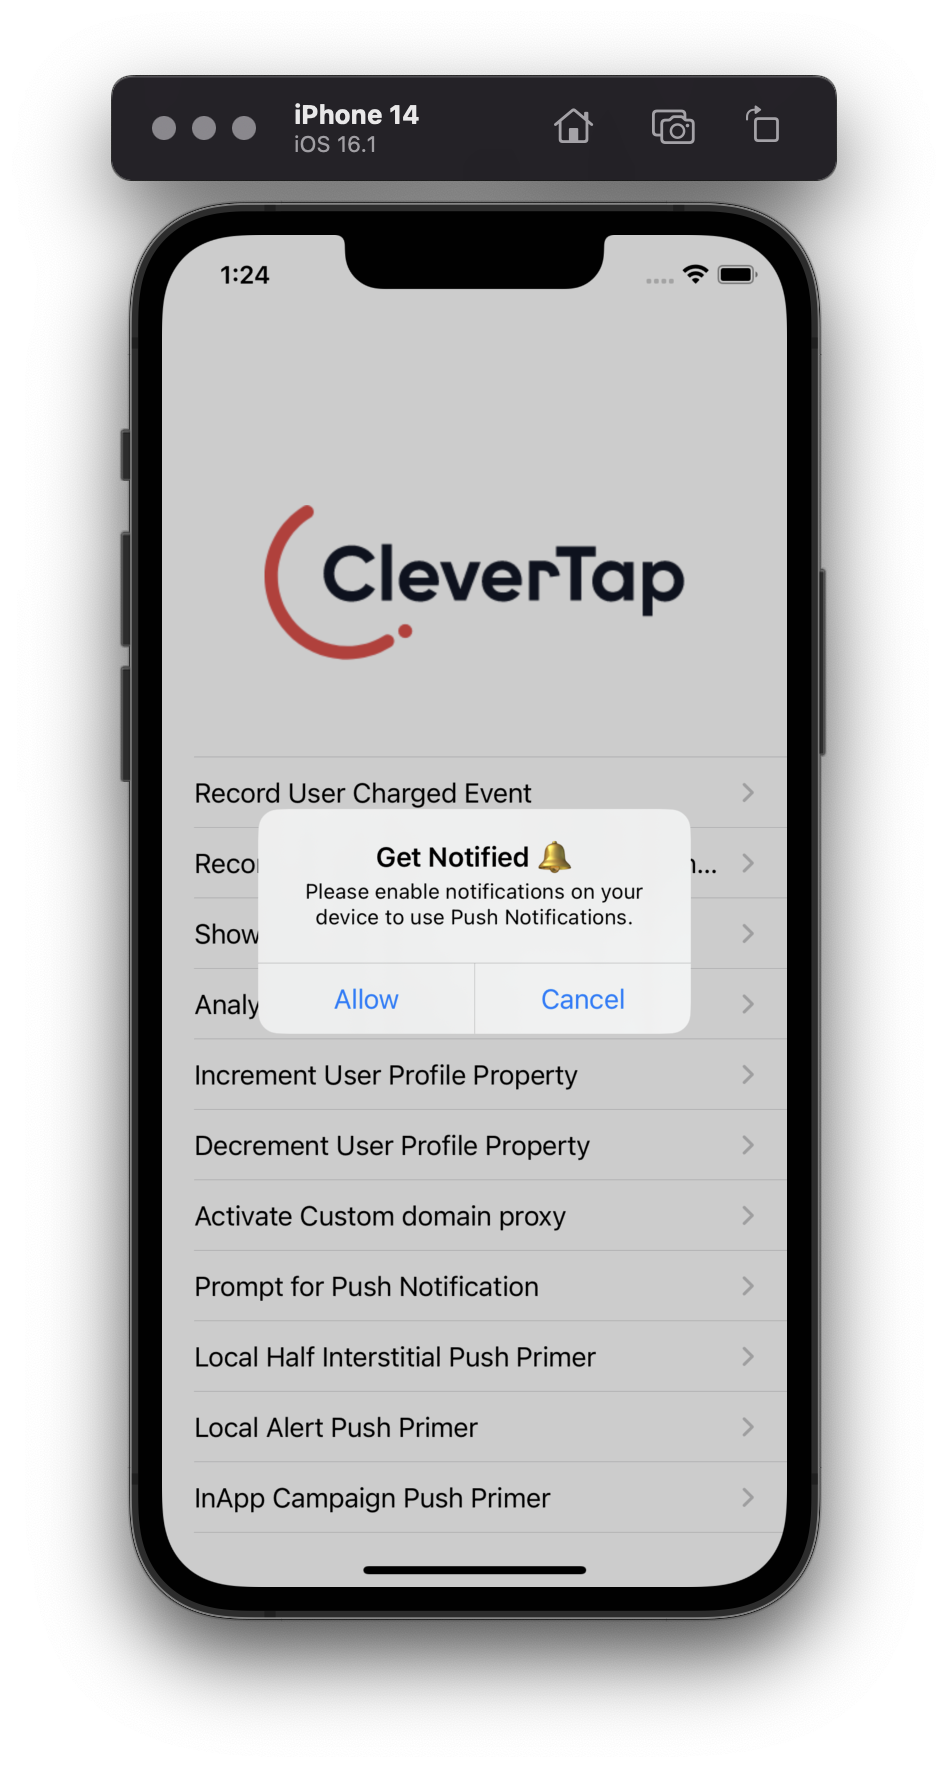
CleverTap.promptPushPrimer(localInApp);Push Primer using Alert InApp Template
Using this template, you can create a basic push primer notification with a title, message, and two buttons.
Refer to the following images for Push Primer using the Alert InApp template:
- In Android
- In iOS
Add the following code to your Javascript file to create a Push Primer using the Alert InApp template:
let localInApp = {
              inAppType: 'alert',
              titleText: 'Get Notified',
              messageText: 'Enable Notification permission',
              followDeviceOrientation: true,
              positiveBtnText: 'Allow',
              negativeBtnText: 'Cancel',
              fallbackToSettings: true, //Setting this parameter to true will open an in-App to redirect you to Mobile's OS settings page.
            };

CleverTap.promptPushPrimer(localInApp);
Method Description
The following table describes all the keys used to create In-App templates:
Key Name | Parameters | Description | Required |
|---|---|---|---|
| "half-interstitial" or "alert" |
| Required |
| String | Sets the title of the local in-app notification. | Required |
| String | Sets the subtitle of the local in-app notification. | Required |
| true or false |
| Required |
| String |
| Required |
| String |
| Required |
| true or false |
| Optional |
| Hex color as String | Sets the background color of the local in-app notification. | Optional |
| Hex color as String | Sets the border color of both positive and negative buttons. | Optional |
| Hex color as String | Sets the title text color of the local in-app notification. | Optional |
| Hex color as String | Sets the sub-title text color of the local in-app notification. | Optional |
| Hex color as String | Sets the color of text for both positive/negative buttons. | Optional |
| Hex color as String | Sets the background color for both positive/negative buttons. | Optional |
| String |
| Optional |
| true or false |
| Optional |
| String (URL) | Sets the image to be shown in the local in-app notification. Must be a valid URL pointing to an image resource. | Optional |
| String | Alternate text shown if the image cannot be loaded. Improves accessibility and provides fallback context. | Optional |
Invoke Notification Permission Dialog without Push Primer
You can call the push permission dialogue directly without a Push Primer using the promptForPushPermission(boolean) method. It takes a boolean value as a parameter.
- If the value is set to true and permission is denied, then the user is redirected to the app’s notification settings.
- If the value is set to false, the callback is sent stating that the permission is denied.
CleverTap.promptForPushPermission(true);Check the Push Notification Permission Status
The isPushPermissionGranted method can be used to check the status of the push notification permission for your application. The method returns the status of the push permission in the callback handler.
CleverTap.isPushPermissionGranted(val => log("isPushPermissionGranted value is " + val));
Available Callbacks for Push Primer
Based on whether the notification permission is granted or denied, the CleverTap Cordova SDK provides a callback with the permission status.
To receive the callback, you can register the onCleverTapPushPermissionResponseReceived callback:
document.addEventListener('onCleverTapPushPermissionResponseReceived', e => {
        log("onCleverTapPushPermissionResponseReceived")
        log(e.accepted) // grant or deny flag
    })
Updated 18 days ago