Unity Push Notifications
Learn how to configure push notifications.
Push Notifications
Push notifications are a critical channel for real-time user engagement. With the CleverTap Unity SDK, you can configure and manage push notifications for Android and iOS platforms. This guide explains how to set up platform-specific configurations, define notification behavior, and implement push primers to improve user opt-in rates and campaign effectiveness.
Prerequisites
Before implementing push notifications, ensure:
- You have integrated the CleverTap Unity SDK.
- You have set up Firebase Cloud Messaging (FCM) for Android. Refer to the Firebase Unity Setup Guide.
- You have configured Apple Push Notification service (APNs) for iOS.
Android Setup
To use CleverTap’s built-in support for push notifications with Firebase Messaging, add the following service inside your <application> tag in AndroidManifest.xml:
<application>
         ....
         ....
        <service android:name="com.clevertap.android.sdk.pushnotification.fcm.FcmMessageListenerService">
            <intent-filter>
                <action android:name="com.google.firebase.MESSAGING_EVENT" />
            </intent-filter>
        </service>

 </application>
This setup allows CleverTap to handle FCM messages with minimal integration.
Create Notification Channel
The CreateNotificationChannel method defines how a push notification should appear and behave, including its importance, sound, and LED lights. Creating a channel ensures that notifications are properly categorised and visible to the user.
CleverTap.CreateNotificationChannel("YourChannelId", "Your Channel Name", "Your Channel Description", 5, true);Delete Notification Channel
The DeleteNotificationChannel method removes a previously defined notification channel from the app. This is typically used when a channel is no longer required.
CleverTap.DeleteNotificationChannel("YourChannelId");Create a Group Notification Channel
The CreateNotificationChannelGroup method creates a group label under which multiple related notification channels can be organized. Grouping helps manage and display channels more cleanly in system settings.
CleverTap.CreateNotificationChannelGroup("YourGroupId", "Your Group Name");Delete a Group Notification Channel
The DeleteNotificationChannelGroup method deletes an existing group along with all notification channels assigned to it.
CleverTap.DeleteNotificationChannelGroup("YourGroupId");Create Custom Notification Icon
To set a custom notification icon (only for the small icon), add the following metadata entry in your AndroidManifest.xml.
<meta-data
    android:name="CLEVERTAP_NOTIFICATION_ICON"
    android:value="ic_stat_red_star"/> <!-- name of your file in the drawable directory without the file extension. -->
For more information about setting a small notification icon, refer to the Set the Small Notification Icon section.
iOS Setup
To set up and register for push notifications, proceed as follows:
- Follow the Unity iOS Push Setup to enable push for your app.
- Register for push from your Unity C# script:
CleverTap.RegisterPush();Push Primer
A Push Primer explains the need for push notifications for your users and helps improve your engagement rates. It is an In-App notification that you can show to your users before requesting notification permission.
Push Primer helps with the following:
- Allows you to educate your users on why you are asking for this permission before invoking a system dialog to seek user permission.
- Acts as a precursor to the complicated system dialog and thus allows you to seek permission multiple times if previously denied, without making your users search the device settings.
CleverTap Unity SDK supports push primer for push notifications starting with the v2.4.0 release.
iOS and Android Platform Compatibility for Push Primer
- The minimum supported version for the iOS platform is 10.0.
- The minimum supported version for the Android platform is Android 13.
The following are the two ways to handle the new push notification changes:
- Push Primer using Half Interstitial Local In-App: A rich, customizable in-app card with an image, title, message, and action buttons. Ideal for branded onboarding and higher user engagement.
- Push Primer using Alert Local In-App: A lightweight, system-style dialog box with a title, message, and buttons. Best suited for quick, unobtrusive permission requests.
Push Primer using Half Interstitial Local In-App
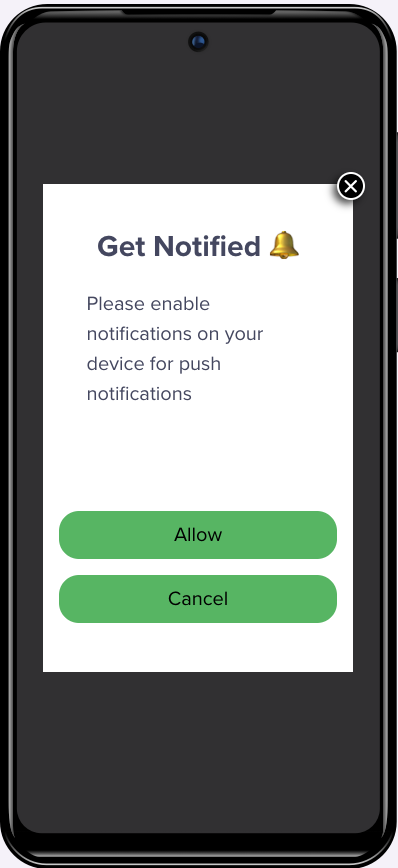
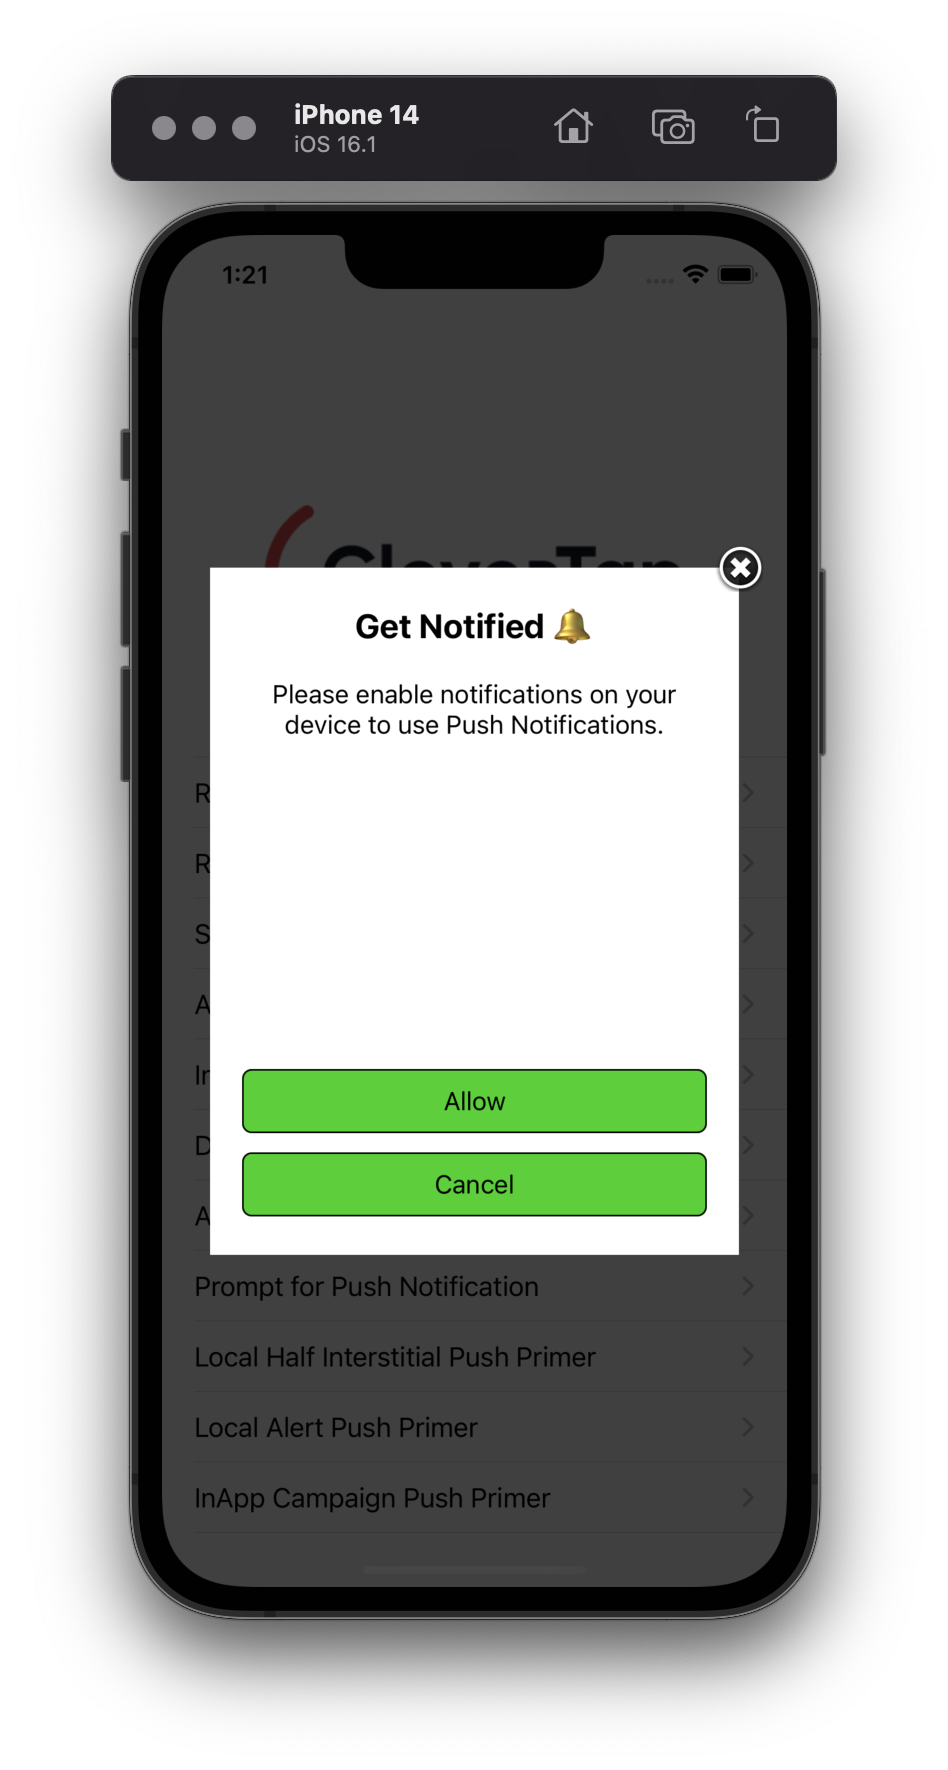
Use this template when you want a visually rich experience ideal for first-time users or branded onboarding flows. Refer to the following images for Push Primer using Half-Interstitial In-App Template:
- Android

Push Primer Using Half-Interstitial In-App Template in Android
- iOS

Push Primer Using Half-Interstitial In-App Template in iOS
Add the following code to your C# file to create Push Primer using the Half-Interstitial In-App template:
Dictionary<string, object> item = new Dictionary<string, object>();
item.Add("inAppType", "half-interstitial");
item.Add("titleText", "Get Notified");
item.Add("messageText", "Please enable notifications on your device to use Push Notifications.");
item.Add("followDeviceOrientation", true);
item.Add("positiveBtnText", "Allow");
item.Add("negativeBtnText", "Cancel");
item.Add("backgroundColor", "#FFFFFF");
item.Add("btnBorderColor", "#0000FF");
item.Add("titleTextColor", "#0000FF");
item.Add("messageTextColor", "#000000");
item.Add("btnTextColor", "#FFFFFF");
item.Add("btnBackgroundColor", "#0000FF");
item.Add("imageUrl", "https://icons.iconarchive.com/icons/treetog/junior/64/camera-icon.png");
item.Add("btnBorderRadius", "2");
item.Add("fallbackToSettings", true);
CleverTap.PromptPushPrimer(item);
Push Primer using Alert Local In-App
Using this template, you can create a basic push primer notification with a title, message, and two buttons ideal for mid-session nudges.
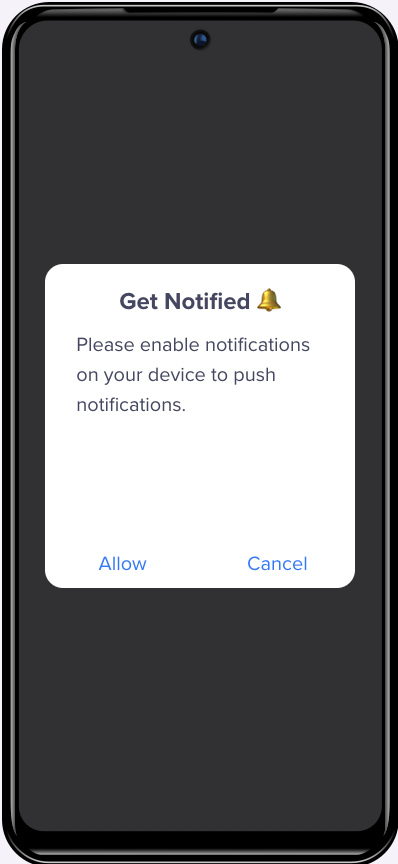
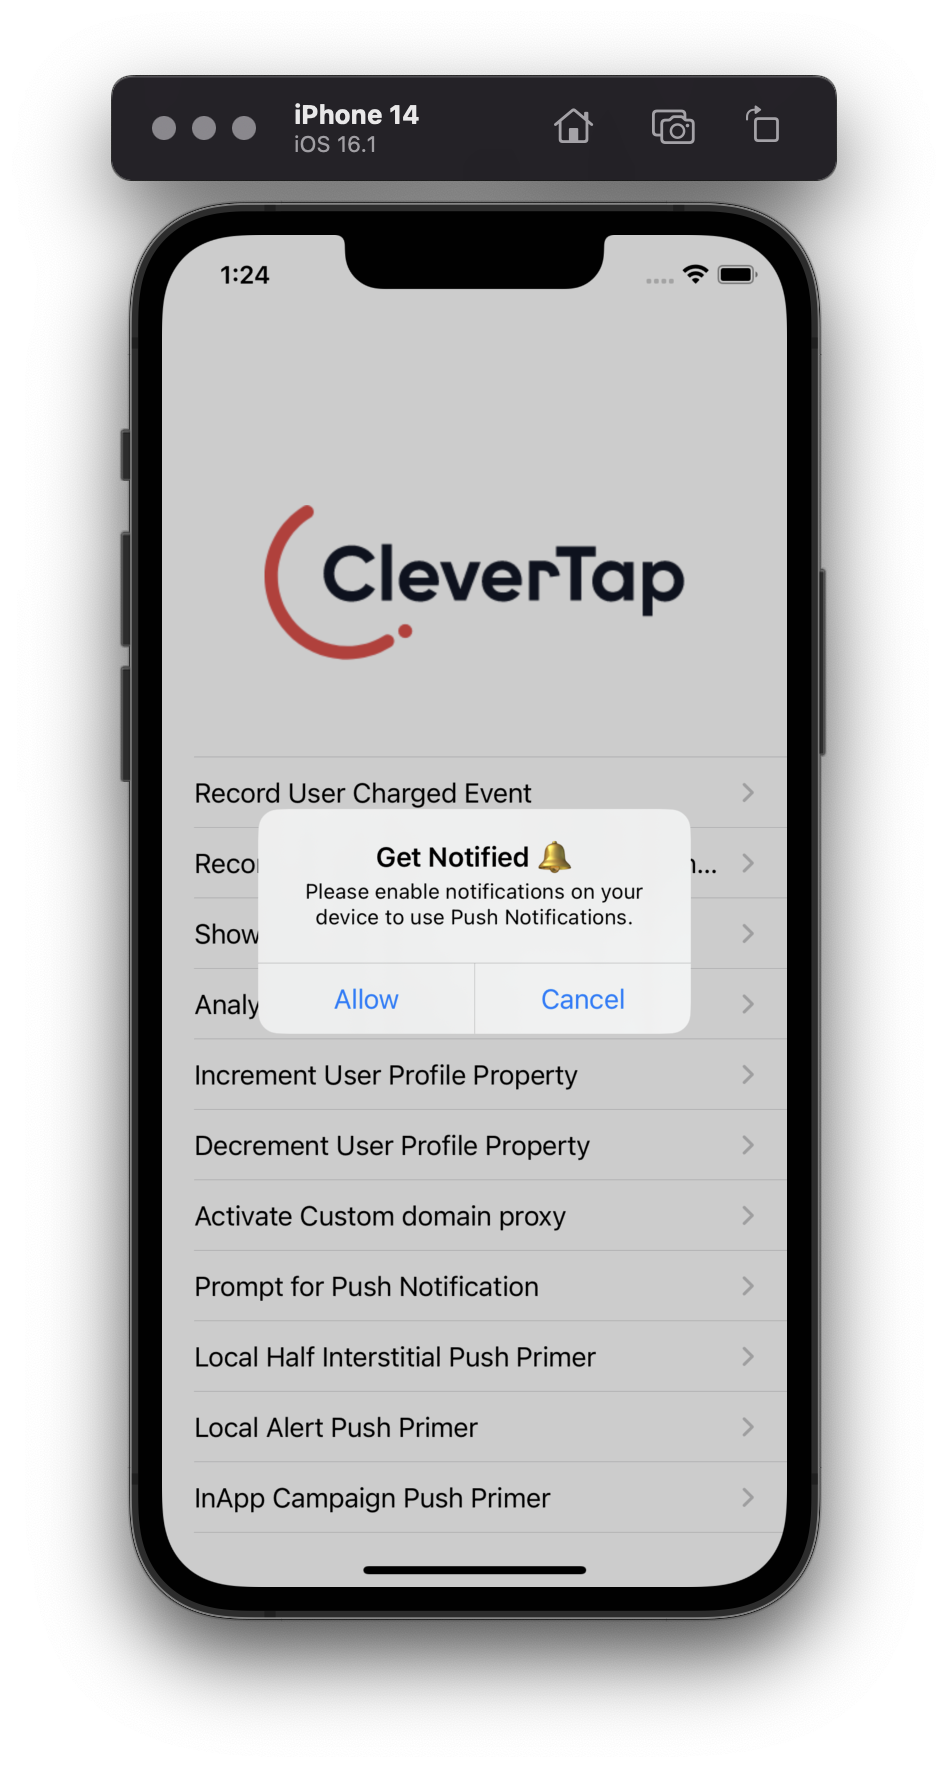
Refer to the following images for Push Primer using the Alert In-App template:
- Android

Push Primer using Alert InApp Template in Android
- iOS

Push Primer using Alert InApp Template in iOS
Add the following code to your C# file to create a Push Primer using the Alert InApp template:
Dictionary<string, object> item = new Dictionary<string, object>();
item.Add("inAppType", "alert");
item.Add("titleText", "Get Notified");
item.Add("messageText", "Please enable notifications on your device to use Push Notifications.");
item.Add("followDeviceOrientation", true);
item.Add("fallbackToSettings", true);
CleverTap.PromptPushPrimer(item);
Invoke Notification Permission Dialog without Push Primer
You can call the push permission dialogue directly without a Push Primer using the PromptForPushPermission(boolean) method. It takes a boolean value as a parameter.
- If the value is set to true and permission is denied, then the user is redirected to the app’s notification settings.
- If the value is set to false, the callback is sent stating that the permission is denied.
CleverTap.PromptForPushPermission(false);Check the Push Notification Permission Status
The IsPushPermissionGranted method can be used to check the status of the push notification permission for your application. The method returns the status of the push permission.
bool isPushPermissionGranted = CleverTap.IsPushPermissionGranted();Available Callbacks for Push Primer
Based on whether the notification permission is granted or denied, the CleverTap Unity Native SDK provides a callback with the permission status.
// returns the status of the push permission response after it's granted/denied
void CleverTapOnPushPermissionResponseCallback(string message) {
 //Ensure to create the `CreateNotificationChannel` once notification permission is granted to register for receiving push notifications for Android 13+ devices.
	Debug.Log("unity received push permission response: " + (!String.IsNullOrEmpty(message) ? message : "NULL"));
}
Debugging Tips
Use the following tips to troubleshoot push notification issues across Android and iOS:
- Verify SDK Initialization: Confirm that the CleverTap Unity SDK is correctly integrated and initialized in your app.
- Check Permission Status: Use
IsPushPermissionGranted()to verify if push permission is enabled. - Log Push Callbacks: Use
Debug.Log()to trace callback responses likeCleverTapOnPushPermissionResponseCallback.
Android
- Ensure
google-services.jsonis added correctly. - Verify
FcmMessageListenerServiceis declared inAndroidManifest.xml. - Check that
CreateNotificationChannel()is called after permission is granted (for Android 13+). - Use
adb logcat | grep CleverTapto inspect SDK logs.
iOS
- Confirm APNs is configured in your Apple Developer account.
- Ensure push entitlements are included in your provisioning profile.
- Use Xcode > Devices > Console to review push logs.
For advanced troubleshooting, refer to the Unity SDK Troubleshooting Guide
Updated about 2 months ago
