API Quick Start Guide
Understand how to perform CleverTap API requests.
We provide a REST API that lets you create, read, update, and delete data in CleverTap.
This guide shows you how to authenticate with the CleverTap API, create a CleverTap user profile, and quickly get a CleverTap user profile.
Get CleverTap Account Credentials to Authenticate API Requests
CleverTap uses a header-based authentication model to authenticate requests to the API. Every CleverTap API call should include your Project ID (Account ID) and Account Passcode as the request headers.
Perform the following steps to get CleverTap Account credentials:
- Log into your CleverTap Account and click Settings on the dashboard.
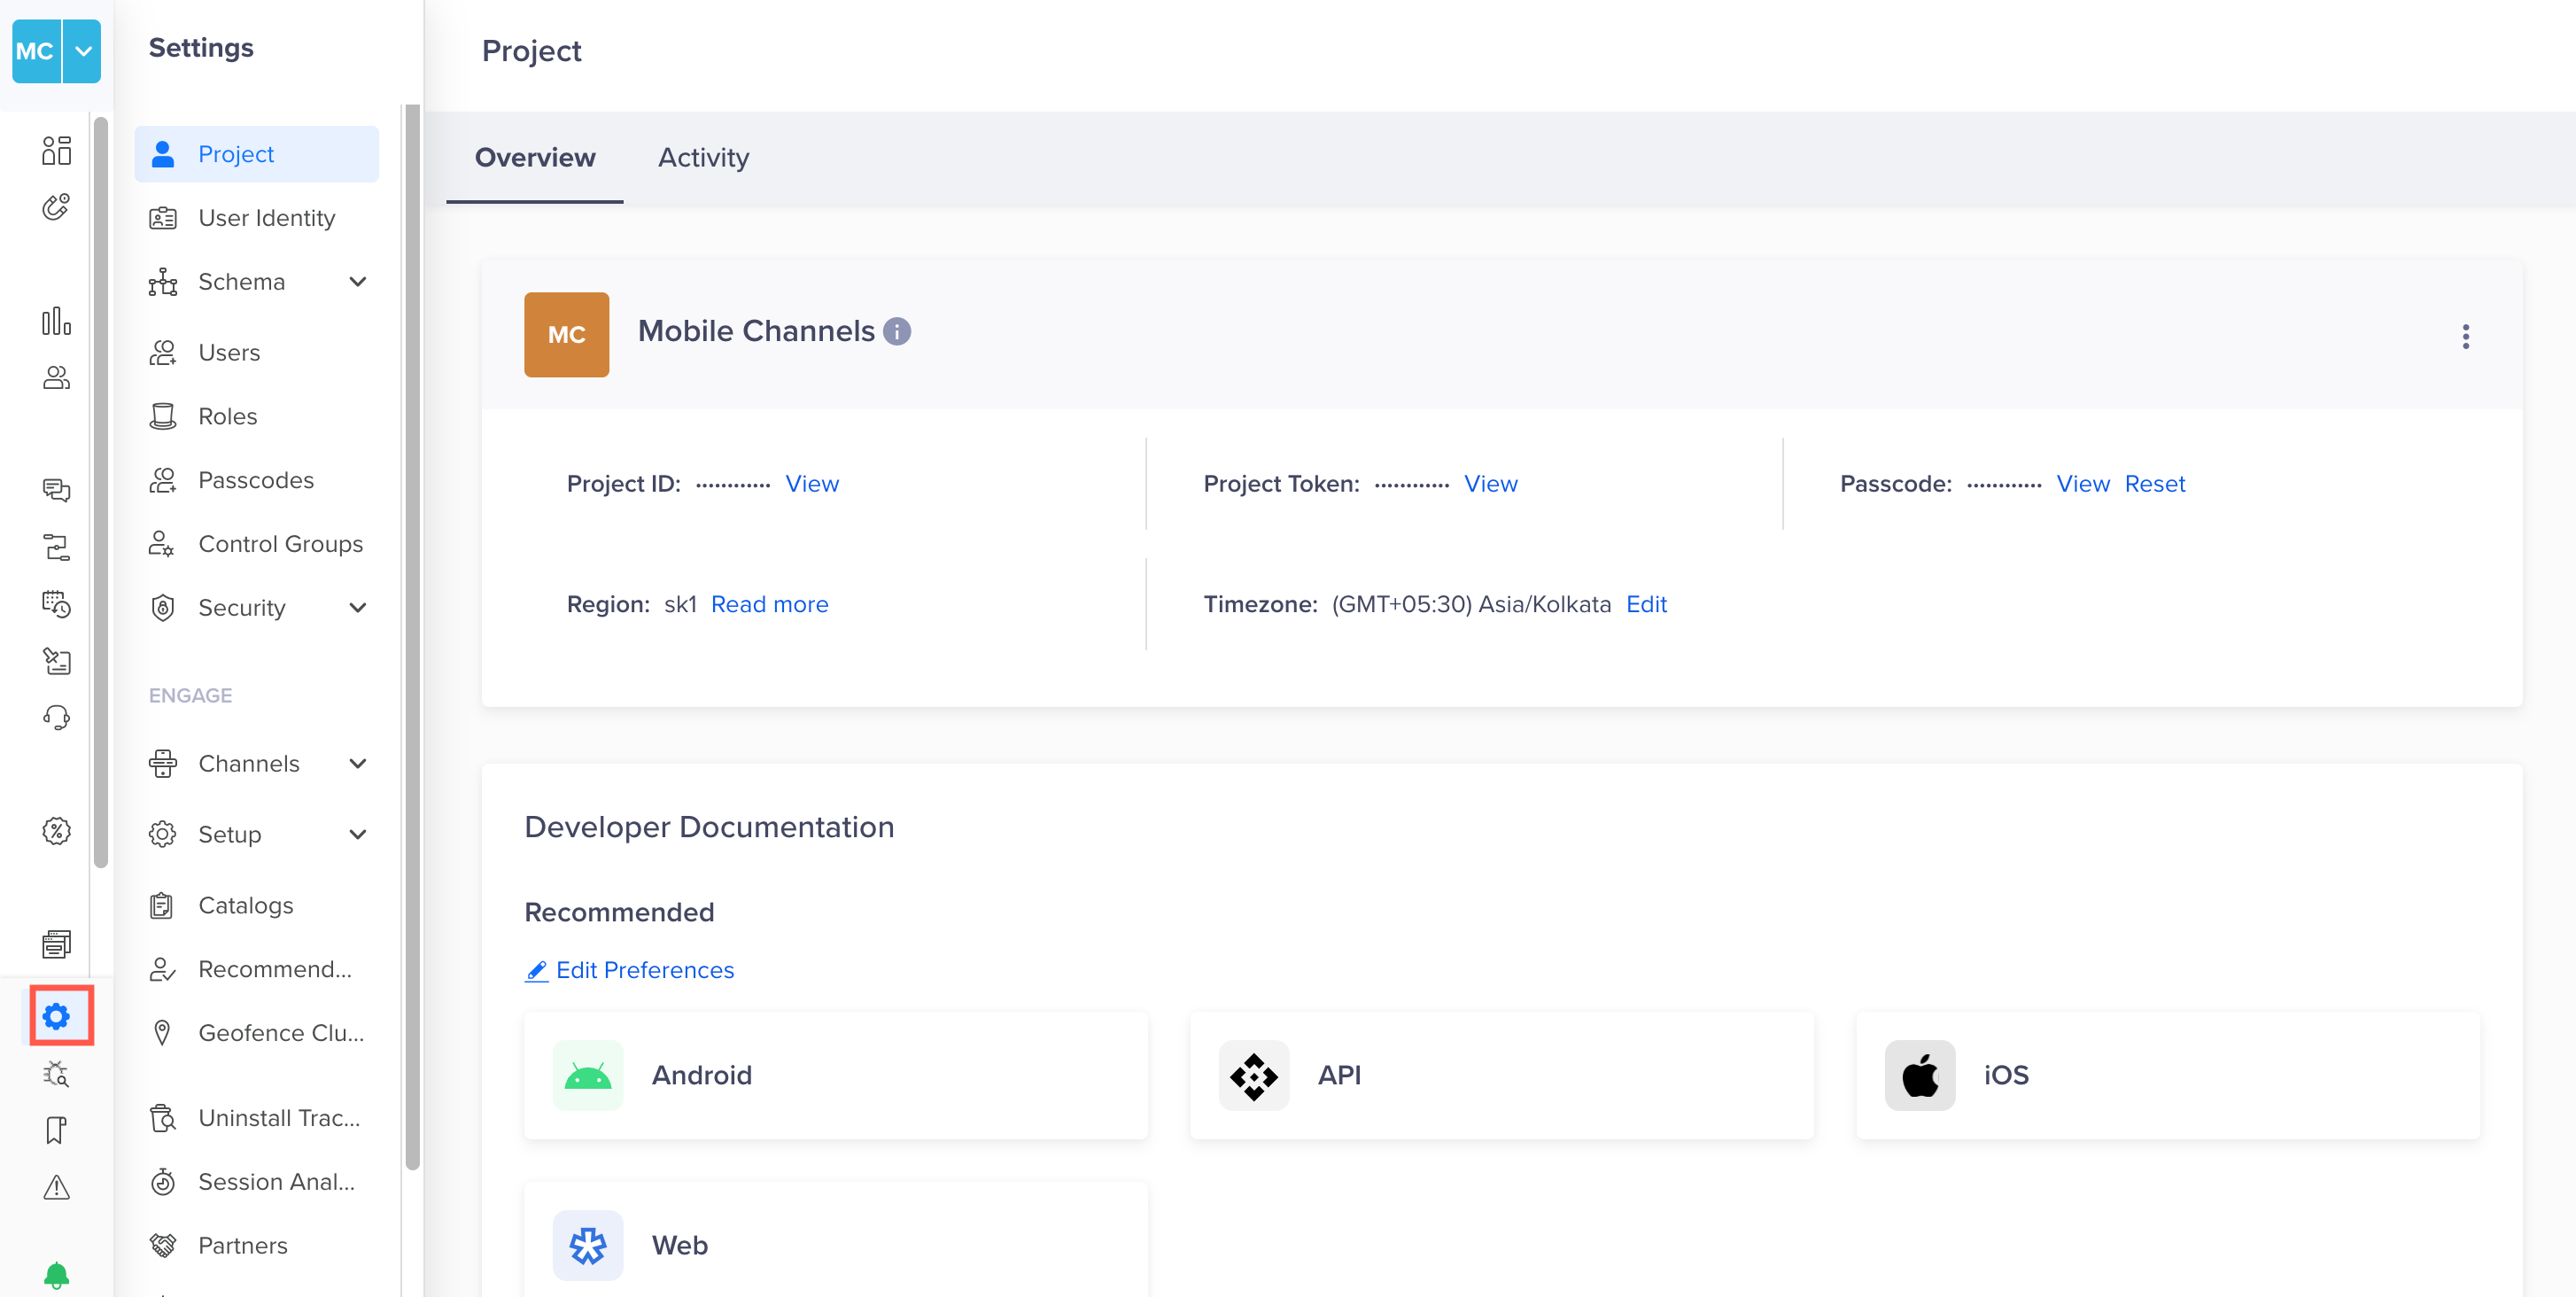
CleverTap Dashboard Settings
- Click Project . Save the values of Project ID and Passcode. We will need this information in the next two steps.
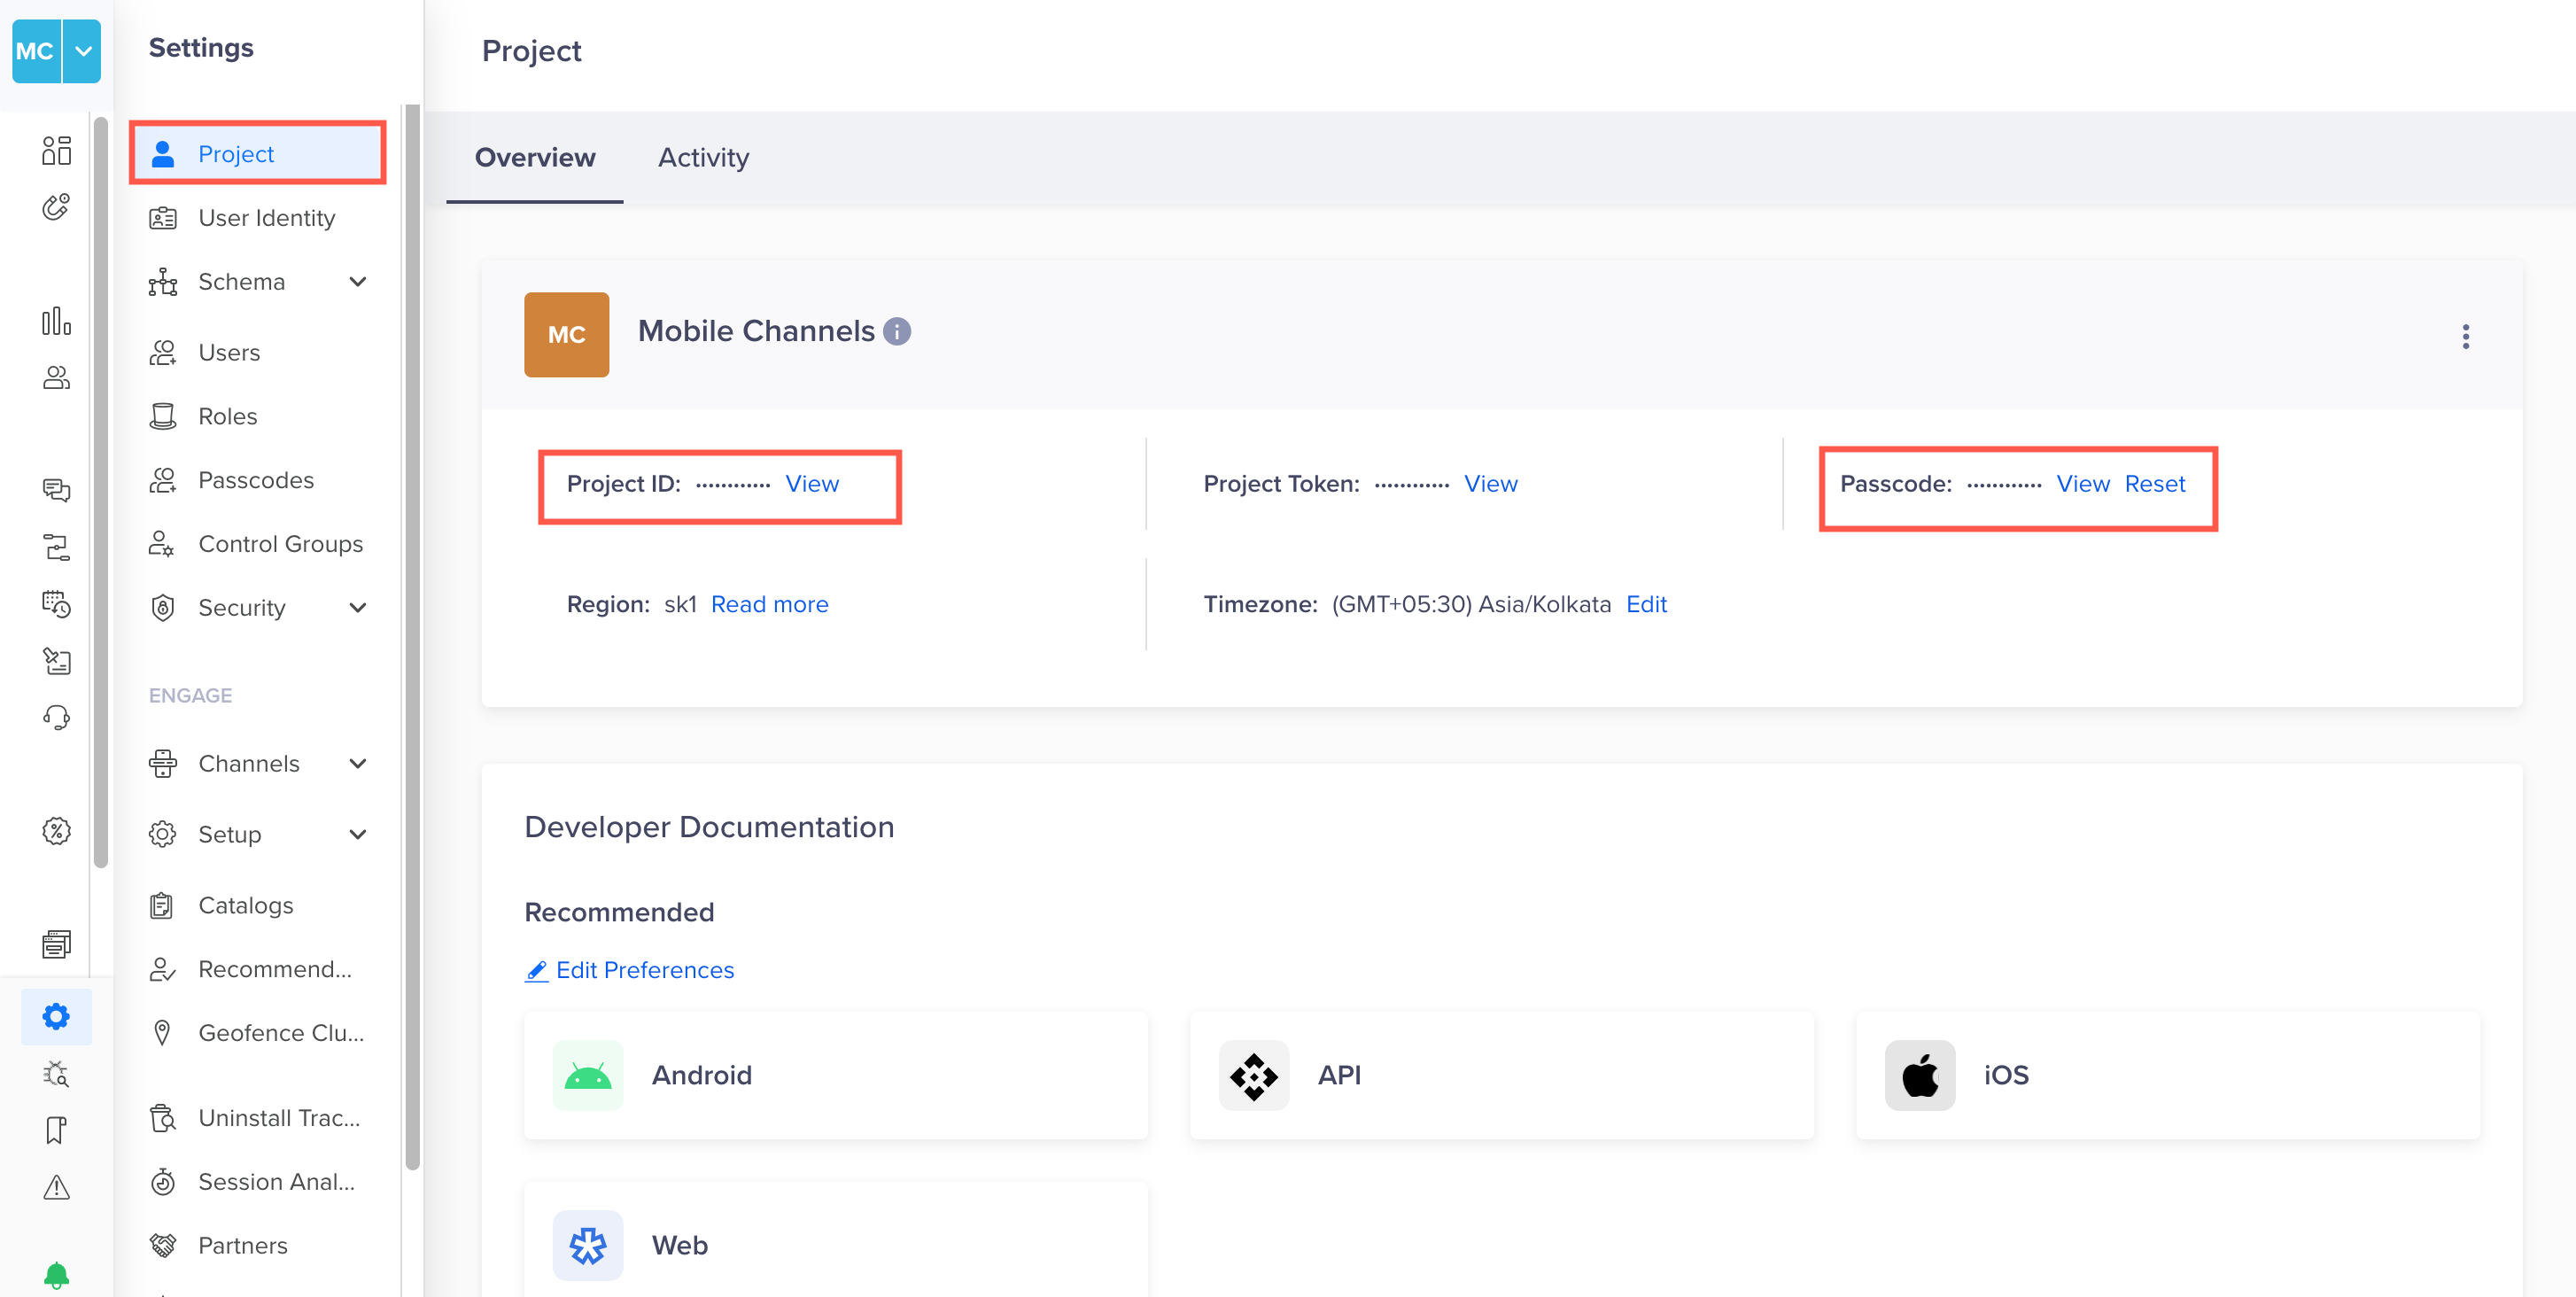
View Project Credentials
Create Account PasscodeYou can also create an account passcode from the Projects page by clicking the +Passcode link. On clicking, you are navigated to the Passcodes page. For more information about the steps involved, refer to Create Account Passcode.
Create a CleverTap User Profile with the API
After you integrate our SDK, we will create a user profile for each person who launches your app or visits your website. You can also create or update CleverTap user profiles with our API.
A CleverTap user profile has a set of default fields, such as email, phone number, and language.
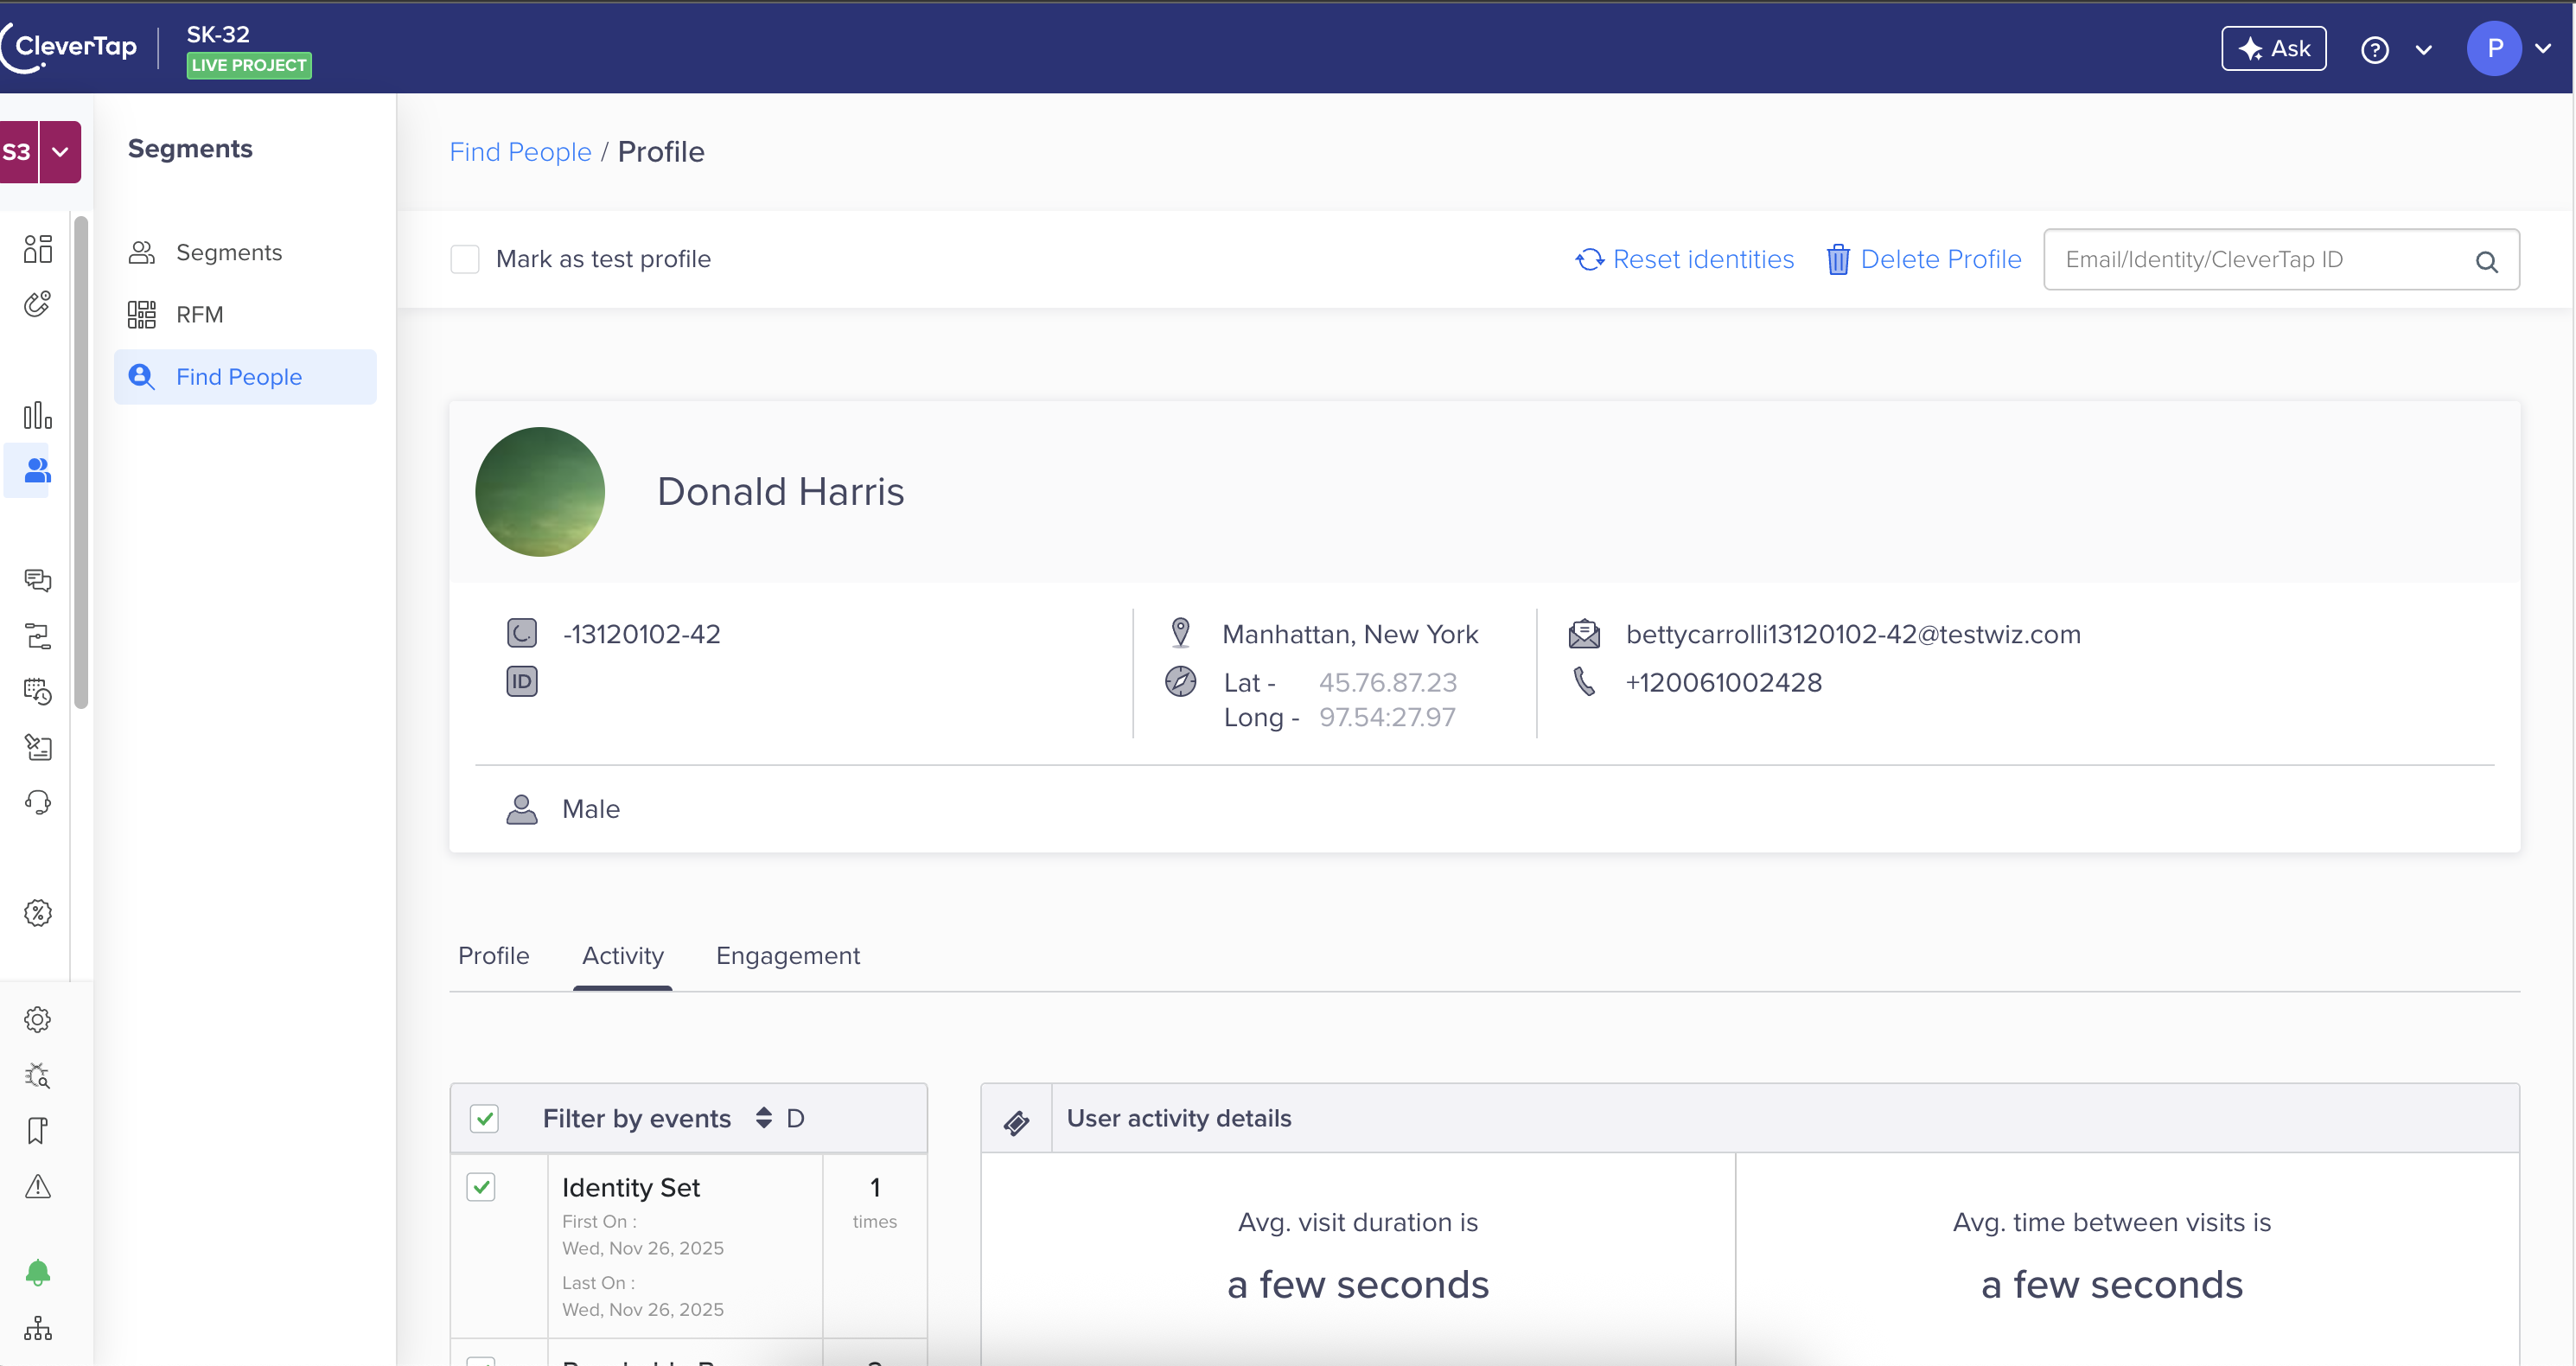
CleverTap User Profile
You can also extend the default user profile by adding custom fields that are specific to your business. For example, if you offer a subscription service in your app, you can create a custom profile field to track what type of plan the user purchased.
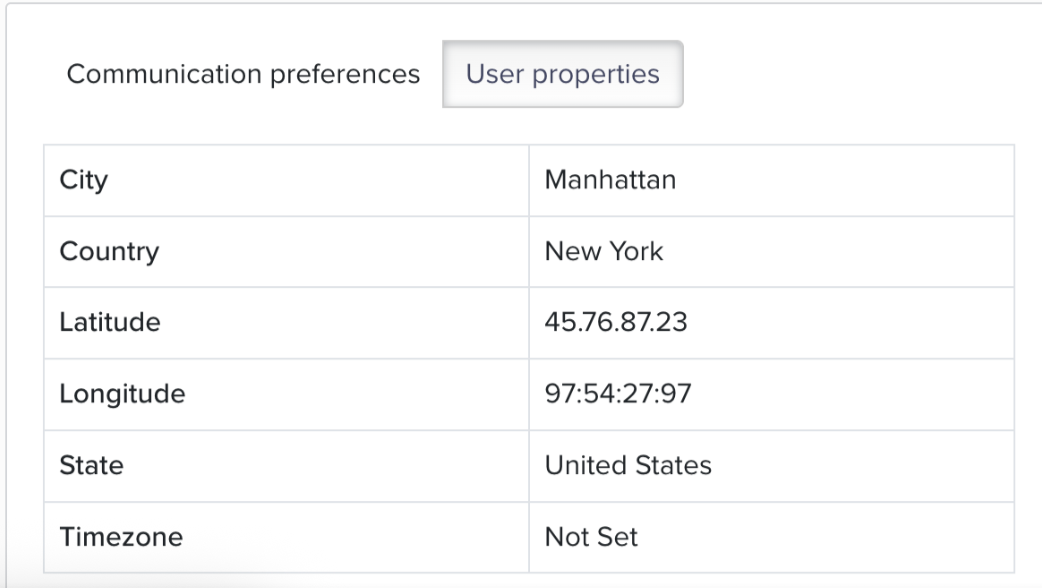
User Profile Properties
To create a new user profile in CleverTap, make a request to the Upload User Profile API.
For example, we can create a user profile with the email [email protected], the name George Montana, and the customer type Silver using the following steps:
- Run the cURL request on your terminal. Here is an example cURL request for the accounts in the India region:
curl -X POST -d '{"d":[{"identity":"[email protected]","type":"profile","profileData":{"Name": "George Montana", "Customer Type": "Silver"}}]}' "https://in1.api.clevertap.com/1/upload" \
-H "X-CleverTap-Account-Id: ACCOUNT_ID" \
-H "X-CleverTap-Passcode: PASSCODE" \
-H "Content-Type: application/json; charset=utf-8"
require 'net/http'
require 'uri'
require 'json'
uri = URI.parse("https://api.clevertap.com/1/upload")
request = Net::HTTP::Post.new(uri)
request.content_type = "application/json; charset=utf-8"
request["X-Clevertap-Account-Id"] = "ACCOUNT_ID"
request["X-Clevertap-Passcode"] = "PASSCODE"
request.body = JSON.dump({
"d" => [
{
"identity" => "[email protected]",
"type" => "profile",
"profileData" => {
"Name" => "George Montana",
"Customer Type" => "Silver"
}
}
]
})
req_options = {
use_ssl: uri.scheme == "https",
}
response = Net::HTTP.start(uri.hostname, uri.port, req_options) do |http|
http.request(request)
endimport requests
headers = {
'X-CleverTap-Account-Id': 'ACCOUNT_ID',
'X-CleverTap-Passcode': 'PASSCODE',
'Content-Type': 'application/json; charset=utf-8',
}
data = '{"d":[{"identity":"[email protected]","type":"profile","profileData":{"Name": "George Montana", "Customer Type": "Silver"}}]}'
response = requests.post('https://api.clevertap.com/1/upload', headers=headers, data=data)<?php
include('vendor/rmccue/requests/library/Requests.php');
Requests::register_autoloader();
$headers = array(
'X-CleverTap-Account-Id' => 'ACCOUNT_ID',
'X-CleverTap-Passcode' => 'PASSCODE',
'Content-Type' => 'application/json; charset=utf-8'
);
$data = '{"d":[{"identity":"[email protected]","type":"profile","profileData":{"Name": "George Montana", "Customer Type": "Silver"}}]}';
$response = Requests::post('https://api.clevertap.com/1/upload', $headers, $data);var request = require('request');
var headers = {
'X-CleverTap-Account-Id': 'ACCOUNT_ID',
'X-CleverTap-Passcode': 'PASSCODE',
'Content-Type': 'application/json; charset=utf-8'
};
var dataString = '{"d":[{"identity":"[email protected]","type":"profile","profileData":{"Name": "George Montana", "Customer Type": "Silver"}}]}';
var options = {
url: 'https://api.clevertap.com/1/upload',
method: 'POST',
headers: headers,
body: dataString
};
function callback(error, response, body) {
if (!error && response.statusCode == 200) {
console.log(body);
}
}
request(options, callback);type Payload struct {
D []struct {
Identity string `json:"identity"`
Type string `json:"type"`
ProfileData struct {
Name string `json:"Name"`
CustomerType string `json:"Customer Type"`
} `json:"profileData"`
} `json:"d"`
}
data := Payload{
// fill struct
}
payloadBytes, err := json.Marshal(data)
if err != nil {
// handle err
}
body := bytes.NewReader(payloadBytes)
req, err := http.NewRequest("POST", "https://api.clevertap.com/1/upload", body)
if err != nil {
// handle err
}
req.Header.Set("X-Clevertap-Account-Id", "ACCOUNT_ID")
req.Header.Set("X-Clevertap-Passcode", "PASSCODE")
req.Header.Set("Content-Type", "application/json; charset=utf-8")
resp, err := http.DefaultClient.Do(req)
if err != nil {
// handle err
}
defer resp.Body.Close()To know the API endpoint based on the region of your account, refer to Region.
Python VersionThe recommended version for Python is 2.7 as we do not support the latest version at this time.
- Replace the values for the headers
X-CleverTap-Account-IdandX-CleverTap-Passcodewith your CleverTap account credentials obtained from the second step in Get CleverTap Account Credentials to Authenticate API Requests. - If the API request is successful, you will see the below response: If the request is not successful, you will see the errors in the response.
{
    "status": "success",
    "processed": 1,
    "unprocessed": []
}
Get a CleverTap User Profile with the API
You can get a CleverTap user profile with the API. In this example, we will get the CleverTap user profile for the one we created in the previous section.
Make a request to the Get User Profile API for the user identified by the email george.montana@clevertap using the below steps:
- Run the cURL request on your terminal. Here is an example cURL request for the accounts in the India region:
curl "https://in1.api.clevertap.com/1/[email protected]" \
-H "X-CleverTap-Account-Id: ACCOUNT_ID" \
-H "X-CleverTap-Passcode: PASSCODE" \
-H "Content-Type: application/json"
require 'net/http'
require 'uri'
uri = URI.parse("https://api.clevertap.com/1/[email protected]")
request = Net::HTTP::Get.new(uri)
request.content_type = "application/json"
request["X-Clevertap-Account-Id"] = "ACCOUNT_ID"
request["X-Clevertap-Passcode"] = "PASSCODE"
req_options = {
use_ssl: uri.scheme == "https",
}
response = Net::HTTP.start(uri.hostname, uri.port, req_options) do |http|
http.request(request)
endimport requests
headers = {
'X-CleverTap-Account-Id': 'ACCOUNT_ID',
'X-CleverTap-Passcode': 'PASSCODE',
'Content-Type': 'application/json',
}
params = (
('email', '[email protected]'),
)
response = requests.get('https://api.clevertap.com/1/profile.json', headers=headers, params=params)<?php
include('vendor/rmccue/requests/library/Requests.php');
Requests::register_autoloader();
$headers = array(
'X-CleverTap-Account-Id' => 'ACCOUNT_ID',
'X-CleverTap-Passcode' => 'PASSCODE',
'Content-Type' => 'application/json'
);
$response = Requests::get('https://api.clevertap.com/1/[email protected]', $headers);var request = require('request');
var headers = {
'X-CleverTap-Account-Id': 'ACCOUNT_ID',
'X-CleverTap-Passcode': 'PASSCODE',
'Content-Type': 'application/json'
};
var options = {
url: 'https://api.clevertap.com/1/[email protected]',
headers: headers
};
function callback(error, response, body) {
if (!error && response.statusCode == 200) {
console.log(body);
}
}
request(options, callback);req, err := http.NewRequest("GET", "https://api.clevertap.com/1/[email protected]", nil)
if err != nil {
// handle err
}
req.Header.Set("X-Clevertap-Account-Id", "ACCOUNT_ID")
req.Header.Set("X-Clevertap-Passcode", "PASSCODE")
req.Header.Set("Content-Type", "application/json")
resp, err := http.DefaultClient.Do(req)
if err != nil {
// handle err
}
defer resp.Body.Close()To know the API endpoint based on the region of your account, refer to Region.
- Replace the values for the headers
X-CleverTap-Account-IdandX-CleverTap-Passcodewith your CleverTap account credentials obtained from the second step in Get CleverTap Account Credentials to Authenticate API Requests. - If the API request is successful, you will see the below response: If the request is not successful, you will see the errors in the response.
{
  "record": {
    "platformInfo": [
      {
        "df": {

        },
        "objectId": "Aa1bb2-b0jaa-z8QXgAM9w",
        "platform": "Web"
      }
    ],
    "identity": "[email protected]",
    "name": "George Montana",
    "email": "[email protected]",
    "all_identities": [
      "[email protected]"
    ],
    "profileData": {
      "customertype": "Silver"
    }
  },
  "status": "success"
}
Next Step
Congratulations! on making your first requests with the CleverTap API.
Refer to API Reference to learn more about all the CleverTap APIs.
Updated 7 months ago