mParticle Web Integration
Learn how to integrate mParticle Web SDK with CleverTap.
Overview
You can integrate mParticle Web SDK with CleverTap to control the flow of information from the web SDK. You can send the following information to the CleverTap dashboard:
- Push User Information
- Push Events
- Integrate Push Notifications
Prerequisites
The following are the prerequisites to perform this integration:
- A CleverTap account
- An mParticle account
- A functional website
Integration
For CleverTap mParticle Web integration, the following are the major steps:
- Add Event Output.
- Connect the Input Feed and Output Event on the mParticle dashboard.
- Integrate the mParticle Web SDK.
Add Event Output
To add an event output:
- Navigate to Setup > Outputs from the mParticle dashboard.
- Click Add Event Output and select CleverTap from the dropdown list.

- After selecting, CleverTap Default Group is added under the Events tab of the Outputs page.

- Click the
 icon to add event configuration. The Output: Event Configuration popup opens.

- Enter the following details and click Save to save the details:
| Field | Description |
|---|---|
| Configuration Name | Enter the name to identify your configuration uniquely. |
| Use the same settings for Development & Production | Select this option if you want to apply the same configuration settings for your production and development projects. OR Select PROD or DEV to apply these configuration settings to the respective project. |
| Account ID, Account Passcode, and Account Token | Enter these details to authenticate your CleverTap account. Navigate to the Settings > Project page from the CleverTap dashboard to obtain these details. |
| Region | Enter the region of your CleverTap account. For more information, refer to Region. |
The Output Configuration Saved message is displayed at the top of the Output page.
Connect Input Feed and Output Event on mParticle Dashboard
To connect input feed and output event on the mParticle dashboard:
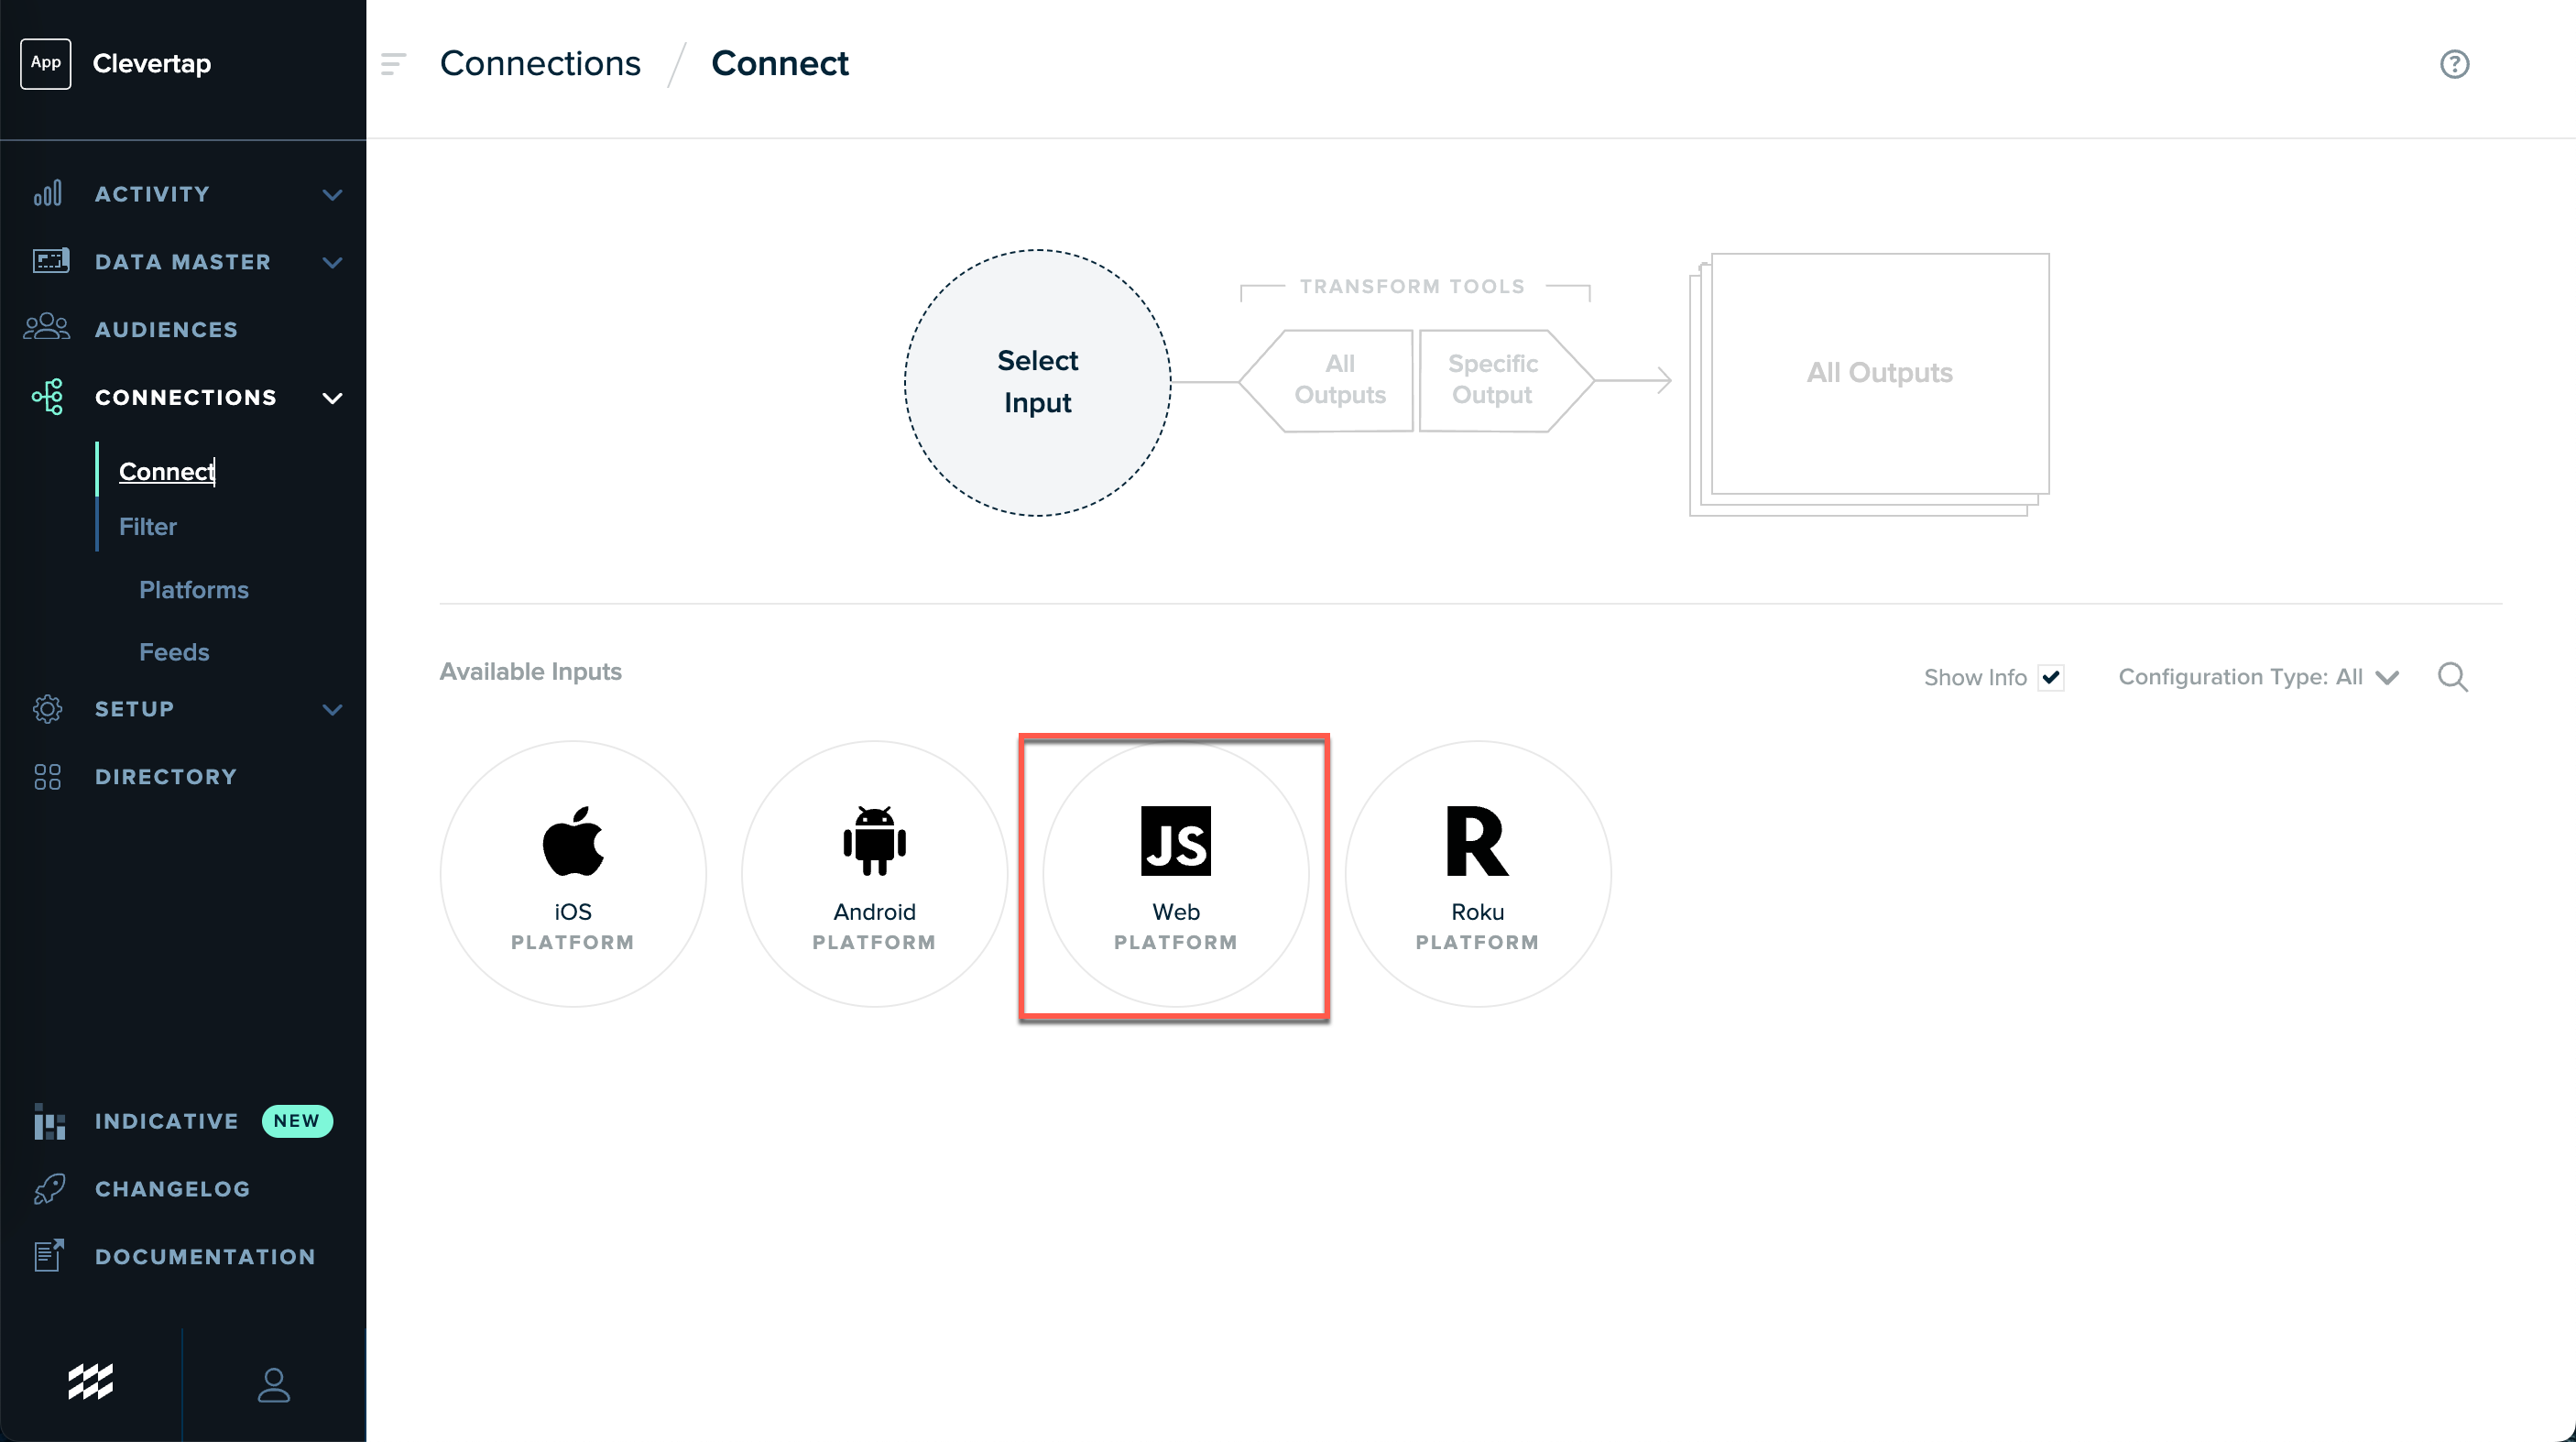
- Navigate to the Connections > Connect page from the mParticle dashboard.
- Select Web from Available Inputs.
- Click Connect Output. The Connect Output pop-up opens.
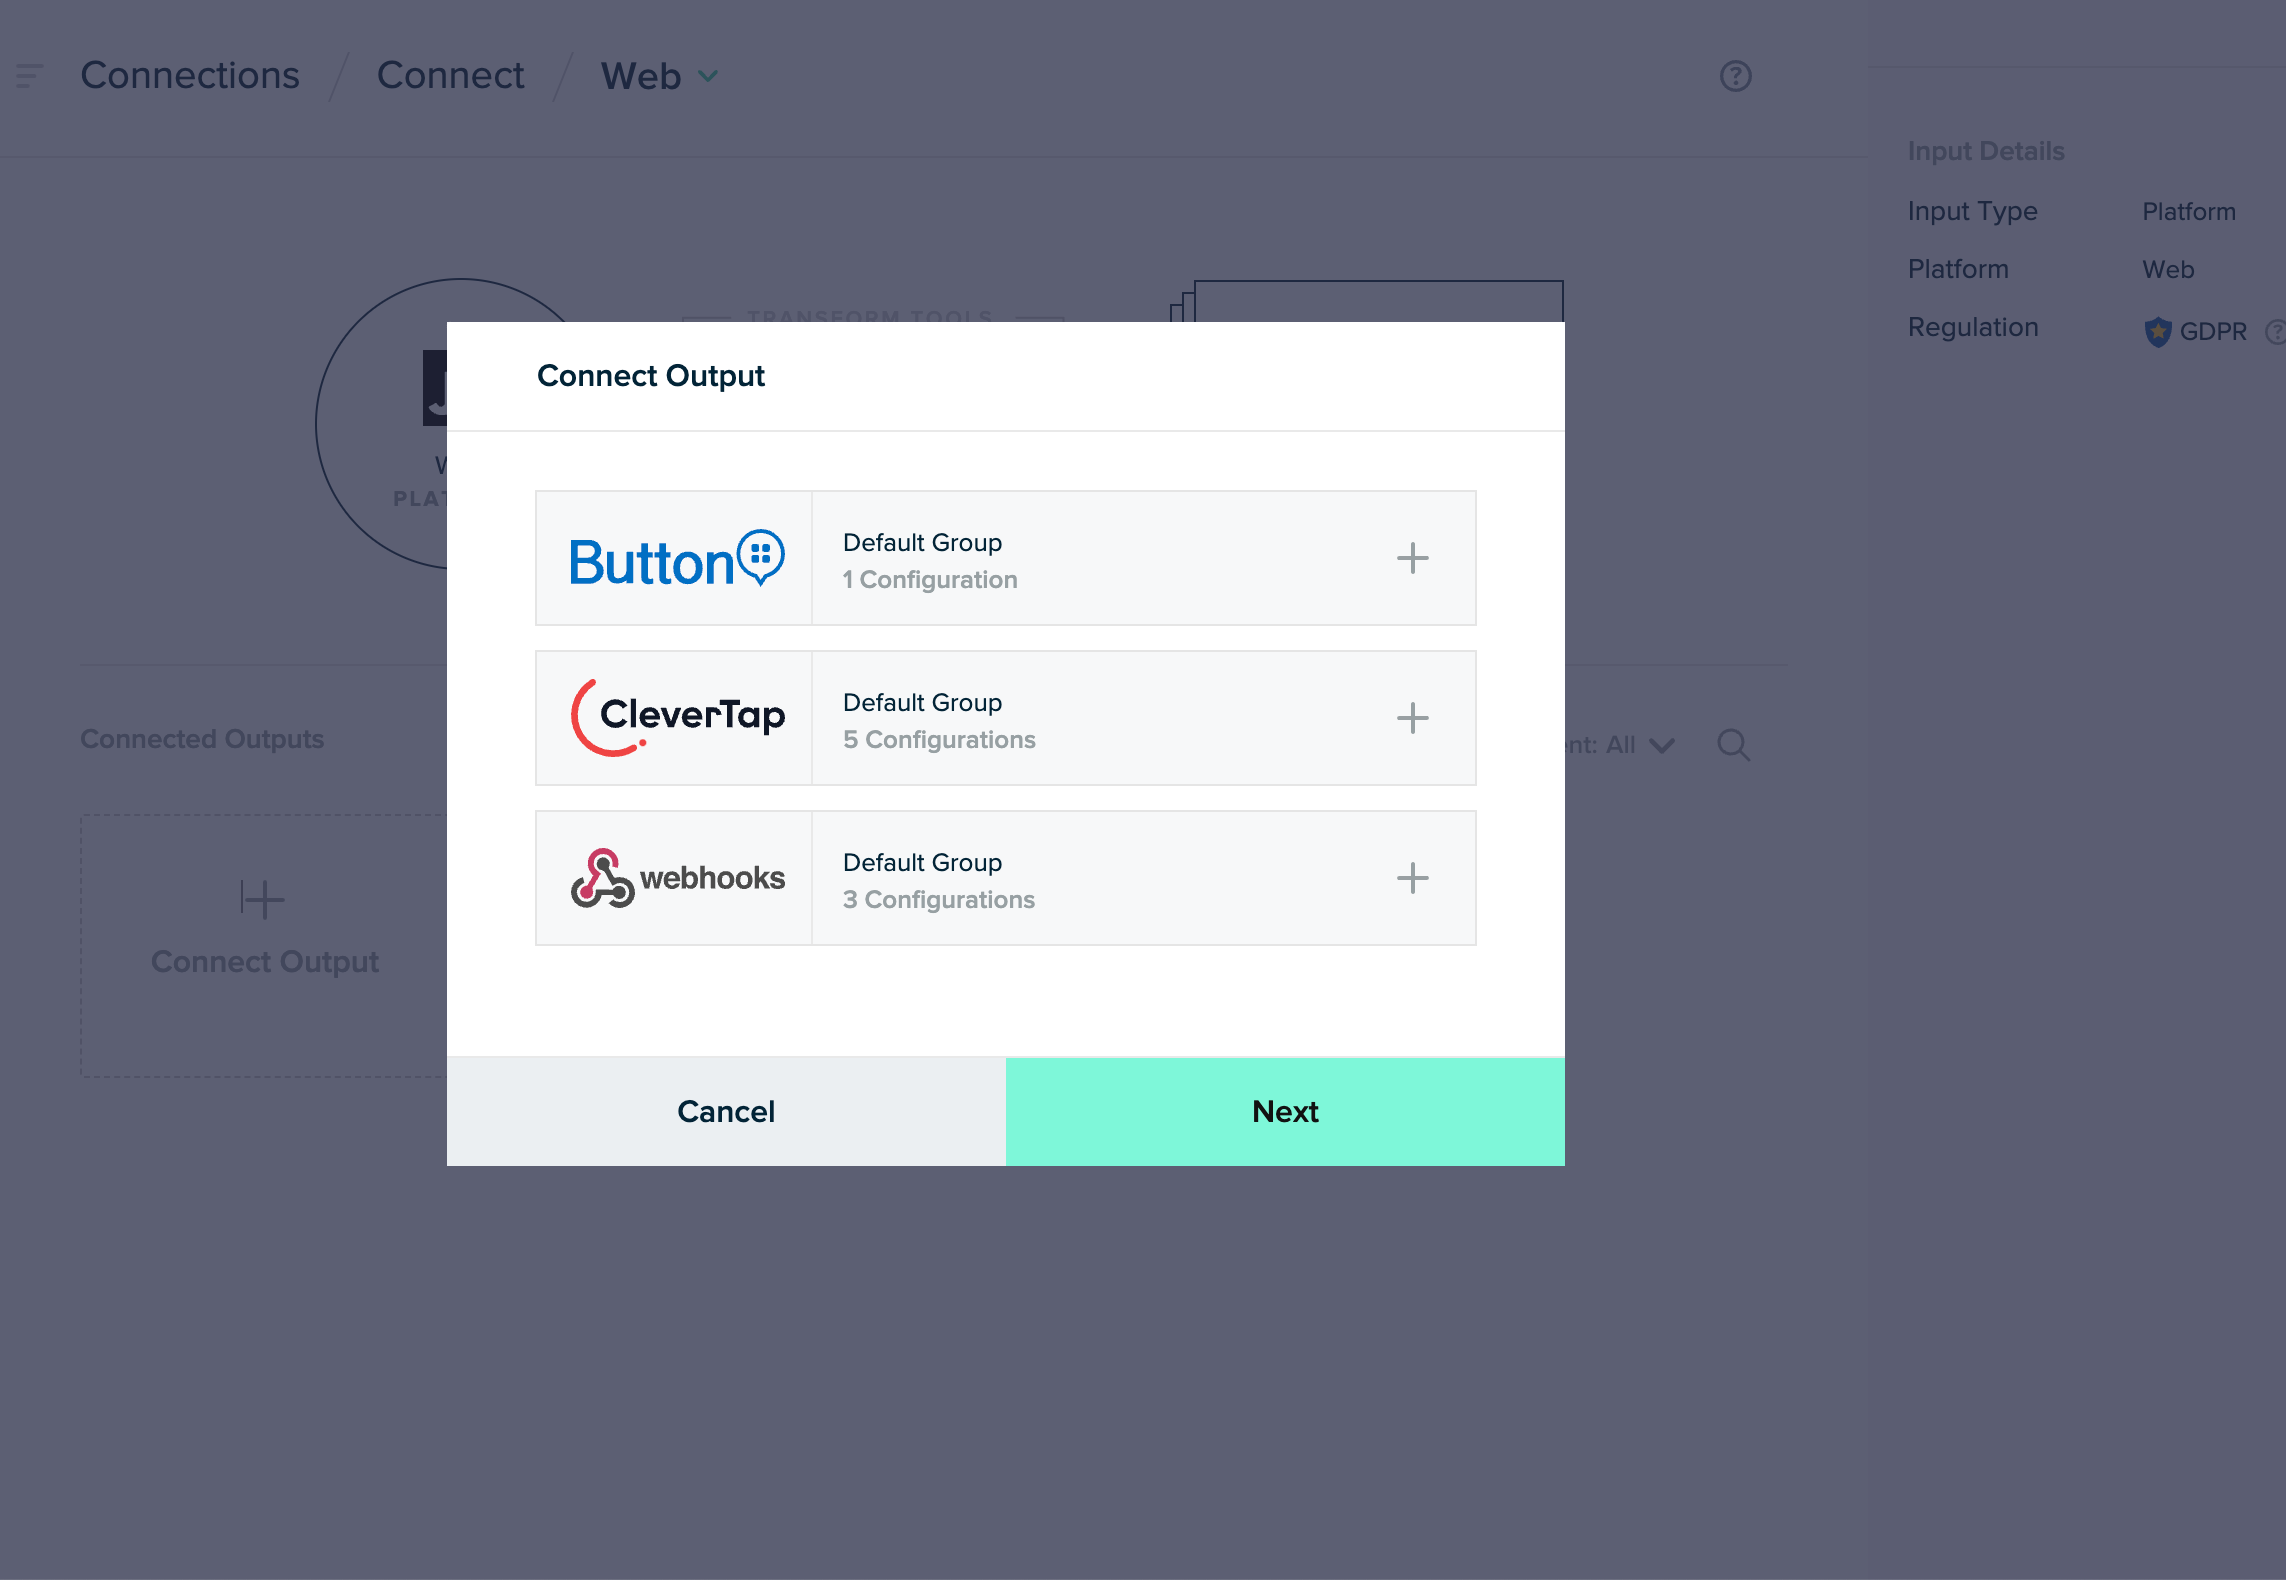
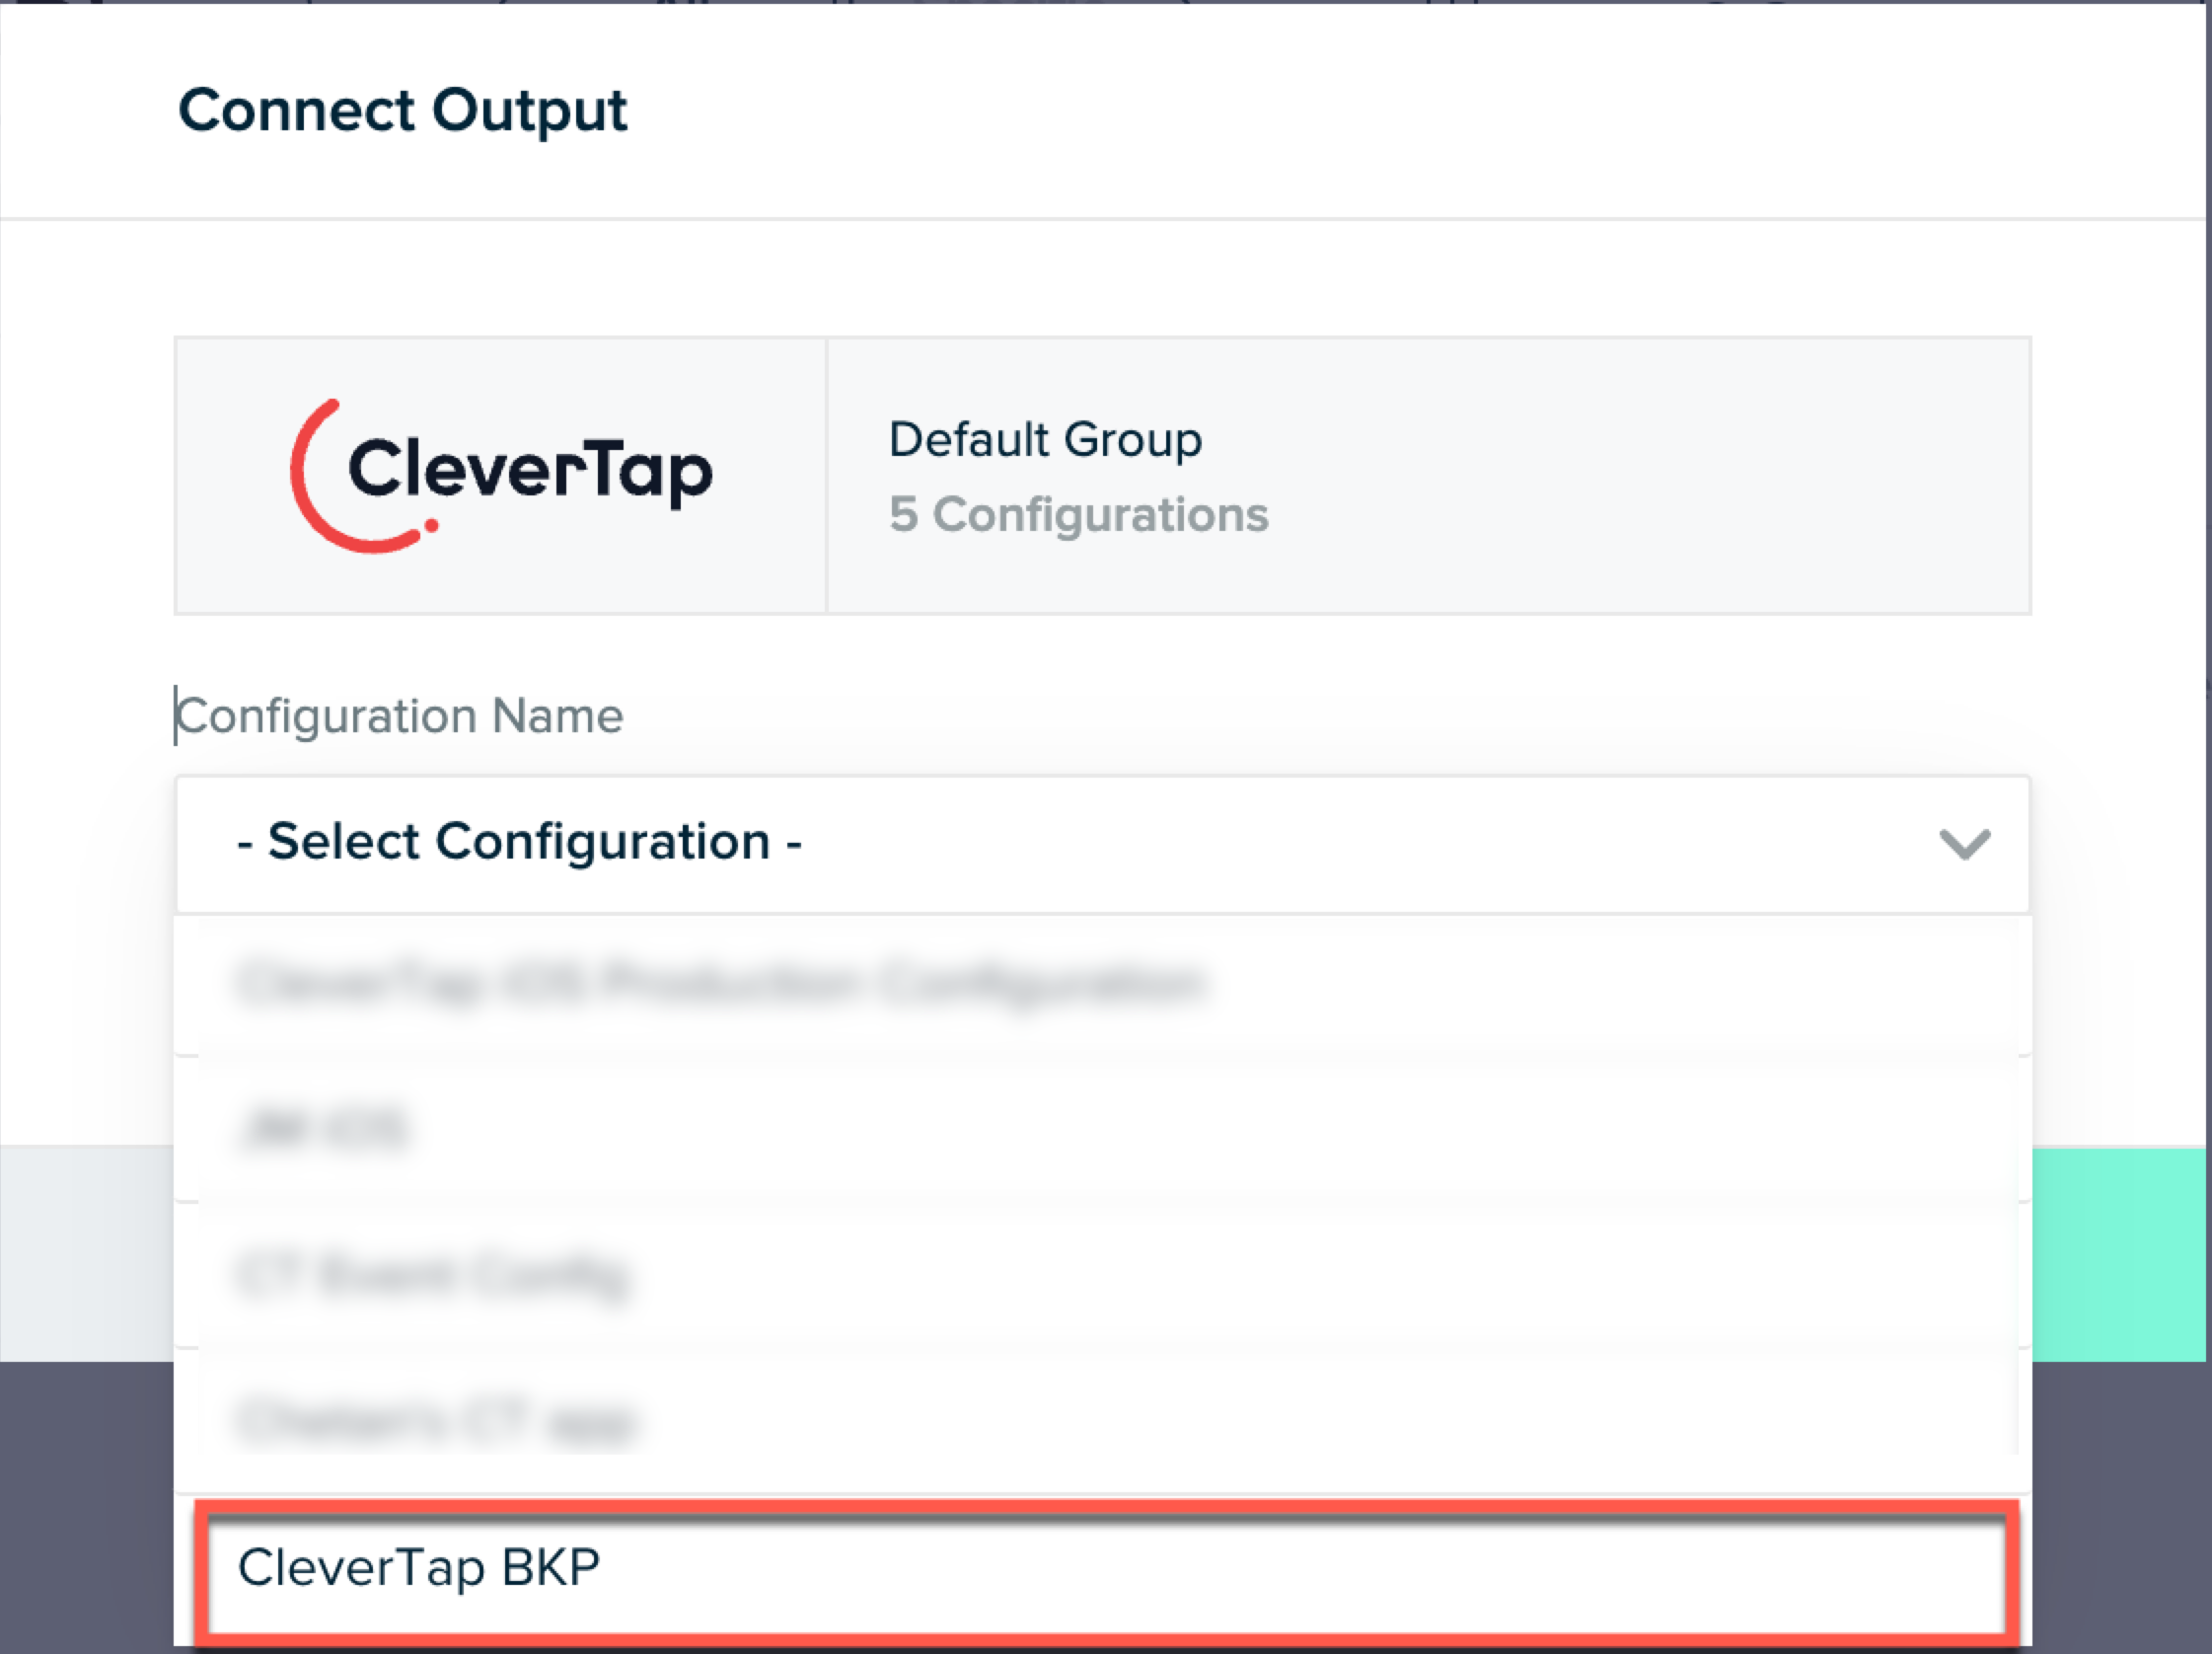
- Select CleverTap and then select the Configuration Name you want to connect.
- Toggle the Connection Status to forward data to the CleverTap dashboard.
- Select Customer ID from the User ID dropdown list.
- (Optional) Select Min Platform Version.
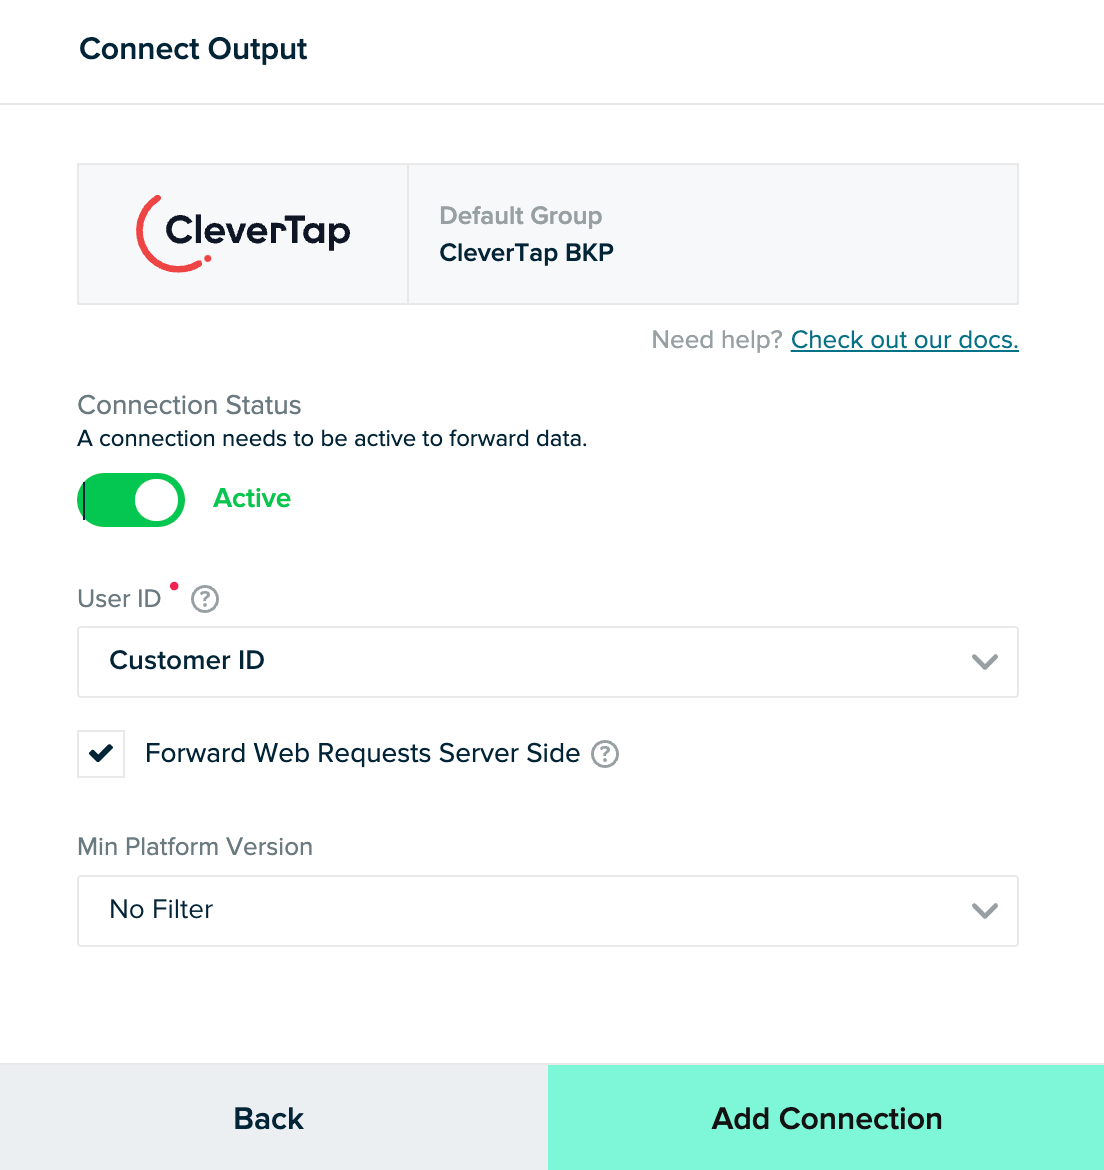
- Click Add Connection and click Done.
- (Optional) Set up the forwarding rule for your output. It allows you to control the data you want to forward to the CleverTap dashboard.

- (Optional) Enter the percentage of the user base for which you want to event data to help control the cost.
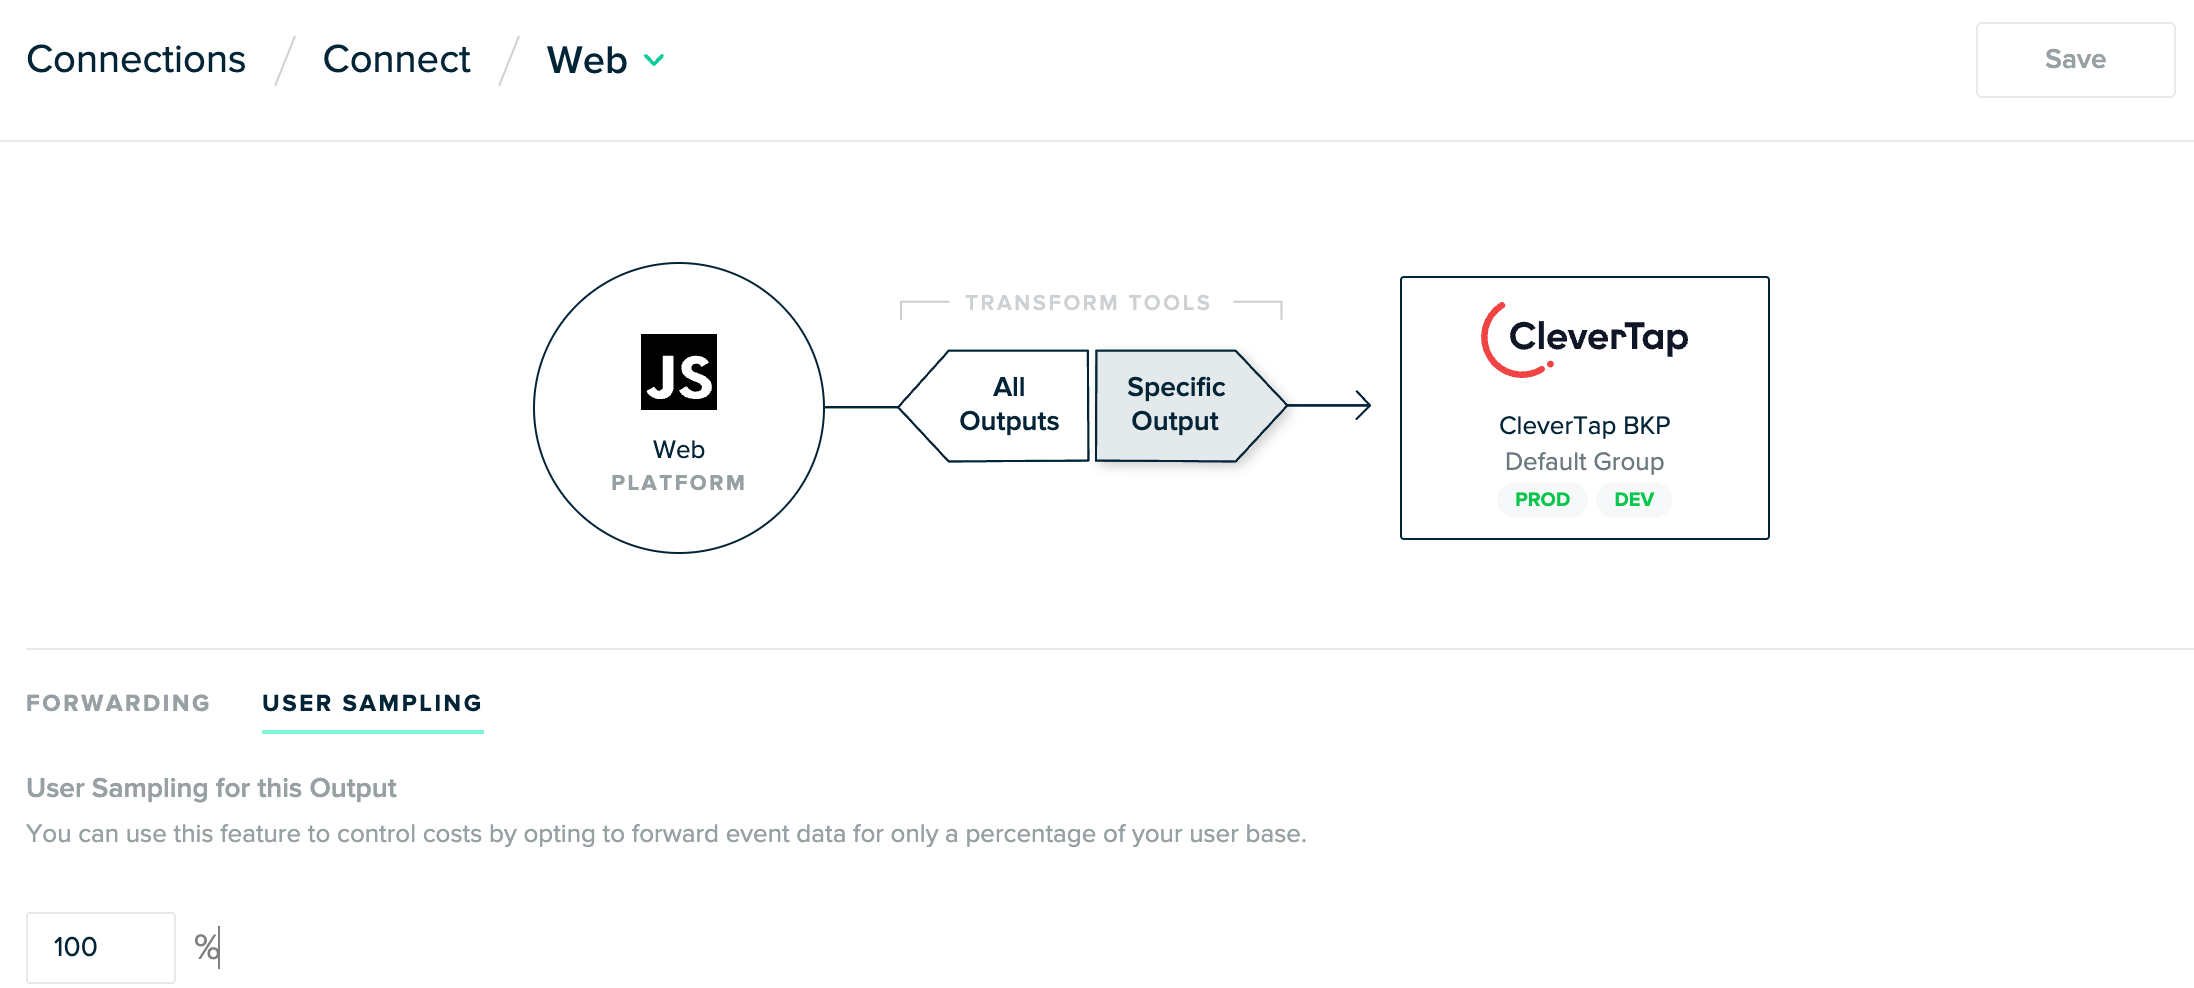
- Click Save.
Integrate the mParticle Web SDK
To integrate mParticle Web SDK, add the following code snippet into the <head> tag of your website:
<script type = "text/javascript" >
// Configures the SDK. Note the settings below for isDevelopmentMode and logLevel.
    window.mParticle = {
        config: {
            isDevelopmentMode: true,
            logLevel: verbose;
        },
    };
    (function(t) {
        window.mParticle = window.mParticle || {};
        window.mParticle.EventType = {
            Unknown: 0,
            Navigation: 1,
            Location: 2,
            Search: 3,
            Transaction: 4,
            UserContent: 5,
            UserPreference: 6,
            Social: 7,
            Other: 8
        };
        window.mParticle.eCommerce = {
            Cart: {}
        };
        window.mParticle.Identity = {};
        window.mParticle.config = window.mParticle.config || {};
        window.mParticle.config.rq = [];
        window.mParticle.config.snippetVersion = 2.3;
        window.mParticle.ready = function(t) {
            window.mParticle.config.rq.push(t)
        };
        var e = ["endSession", "logError", "logBaseEvent", "logEvent", "logForm", "logLink", "logPageView", "setSessionAttribute", "setAppName", "setAppVersion", "setOptOut", "setPosition", "startNewSession", "startTrackingLocation", "stopTrackingLocation"];
        var o = ["setCurrencyCode", "logCheckout"];
        var i = ["identify", "login", "logout", "modify"];
        e.forEach(function(t) {
            window.mParticle[t] = n(t)
        });
        o.forEach(function(t) {
            window.mParticle.eCommerce[t] = n(t, "eCommerce")
        });
        i.forEach(function(t) {
            window.mParticle.Identity[t] = n(t, "Identity")
        });

        function n(e, o) {
            return function() {
                if (o) {
                    e = o + "." + e
                }
                var t = Array.prototype.slice.call(arguments);
                t.unshift(e);
                window.mParticle.config.rq.push(t)
            }
        }
        var dpId, dpV, config = window.mParticle.config,
            env = config.isDevelopmentMode ? 1 : 0,
            dbUrl = "?env=" + env,
            dataPlan = window.mParticle.config.dataPlan;
        dataPlan && (dpId = dataPlan.planId, dpV = dataPlan.planVersion, dpId && (dpV && (dpV < 1 || dpV > 1e3) && (dpV = null), dbUrl += "&plan_id=" + dpId + (dpV ? "&plan_version=" + dpV : "")));
        var mp = document.createElement("script");
        mp.type = "text/javascript";
        mp.async = true;
        mp.src = ("https:" == document.location.protocol ? "https://jssdkcdns" : "http://jssdkcdn") + ".mparticle.com/js/v2/" + t + "/mparticle.js" + dbUrl;
        var c = document.getElementsByTagName("script")[0];
        c.parentNode.insertBefore(mp, c)
    })
    // Insert your API key below
    ("REPLACE WITH API KEY");
</script>
For more details on how to fetch API Key, refer to Obtain API Key in mParticle documentation.
You can also integrate mParticle Web SDK using the package manager.
npm i @mparticle/web-sdk
Push User Information
After installing an app on a device, your user is assigned an anonymous profile. The first time the application identifies the user on the device, the anonymous history on the device is associated with the newly identified user.
For more information about how user information is pushed to the mParticle dashboard, refer to Track Users under mParticle documentation.
Push Events
To learn how to push event data whenever you want to capture any user action in your application, refer to Track Events under mParticle documentation.
Integrate Push Notifications
For more information about integrating Push Notification on your website, refer to Web Push Notifications.
Updated 7 months ago