RudderStack Native iOS Integration
Overview
The RudderStack iOS SDK allows the following from your iOS applications and sends it to CleverTap via RudderStack:
- Push User Profiles
- Push Events
- Integrate Push Notifications
Prerequisites
The following are the prerequisites for performing this integration:
- A CleverTap account
- A RudderStack account
- A functional iOS app
Integration
For CleverTap RudderStack iOS integration, the following are the major steps:
- Set Up Source and Destination at RudderStack.
- Install SDK in the Native application.
- Initialize the RudderStack Client.
Set Up Source and Destination at RudderStack
To set up the source and destination at RudderStack:
- Navigate to Connect > Sources from the RudderStack dashboard.
- Click New source to add a new source and then select iOS from the list of sources.
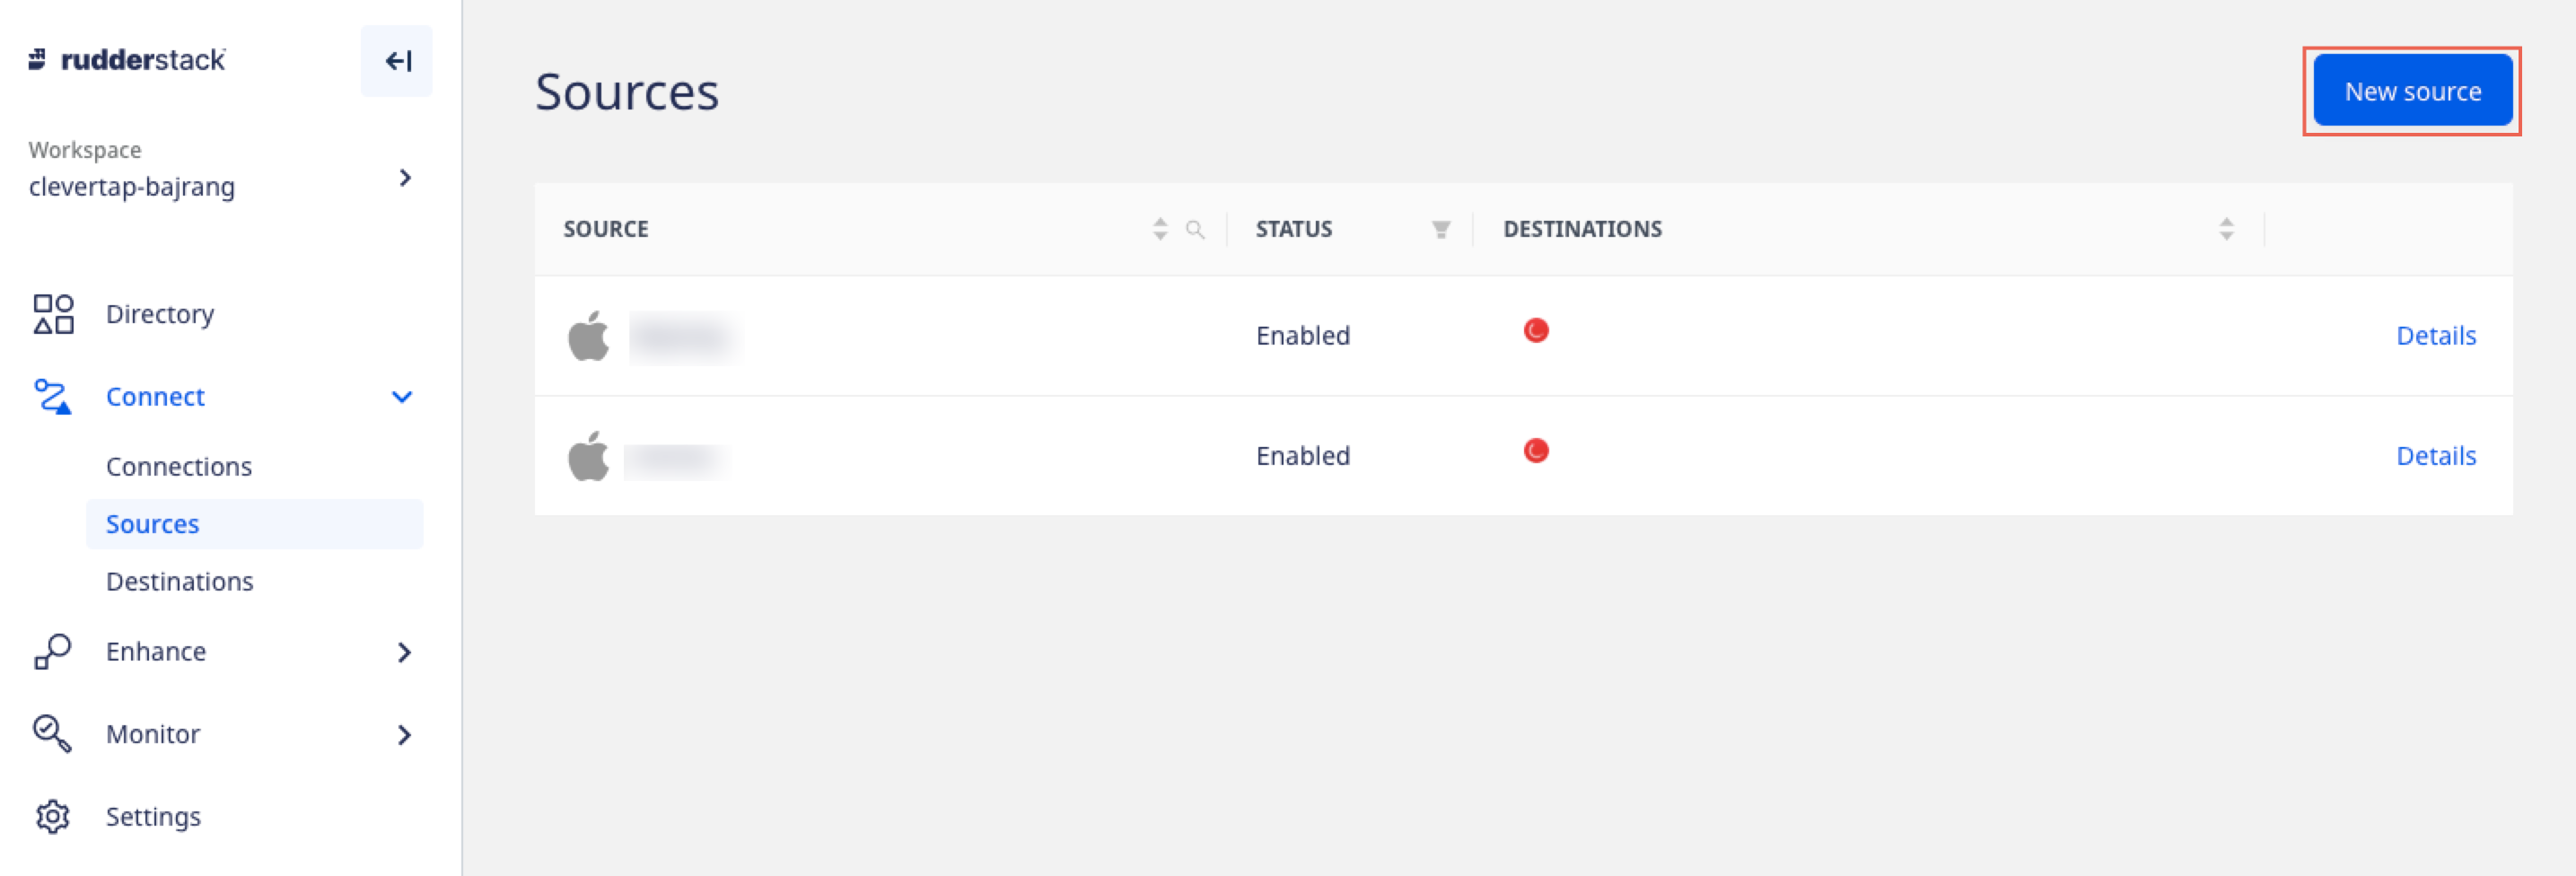
Add New iOS Source
- Enter the source name under Name this source field to identify it within your workspace and click Continue. The Write Key for this source displays, as shown in the following figure:
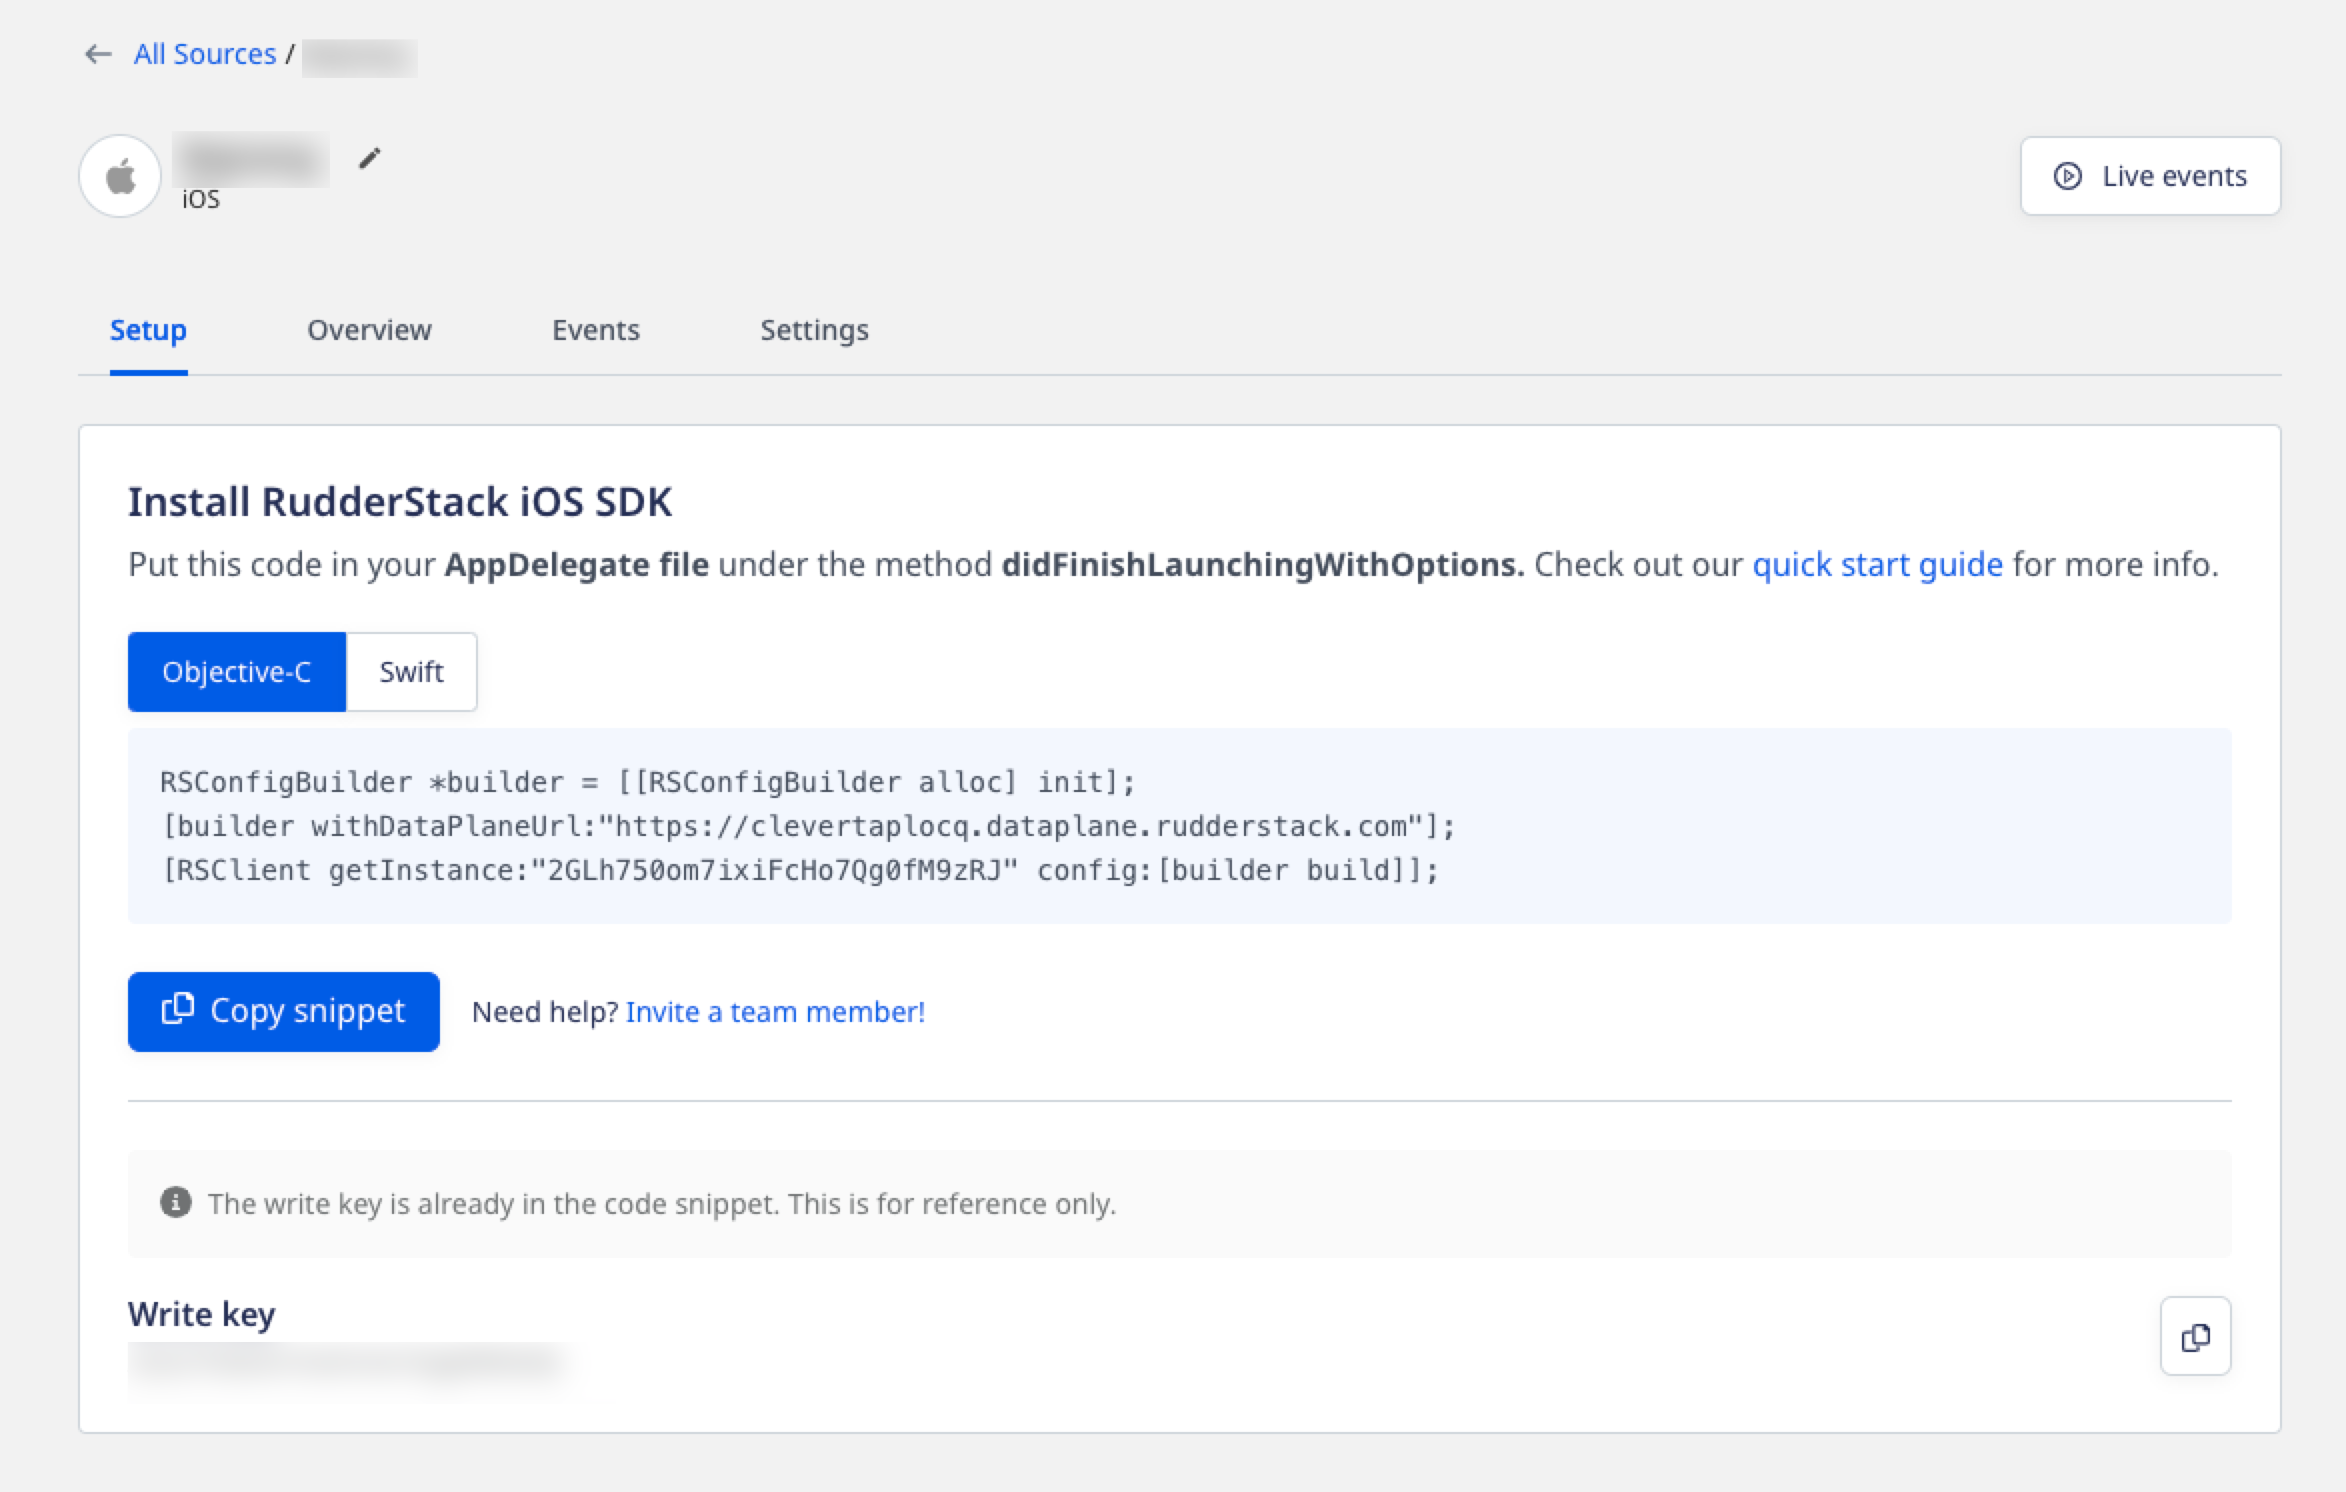
Obtain Write Key for iOS
- Click Add Destination and select the following options from the dropdown as per your requirement:
- Use Existing Destination: Select from the list of available destinations.
- Create new Destination: Create a new destination for your source.
- Select CleverTap from the destination list and click Continue.
- Enter the destination name under Name the destination field to identify it in your workspace and click Continue. The Connection Settings page displays.
- Enter the following CleverTap details:
- Account ID: A unique ID generated for your account. It is available under Settings > Project as the Project ID.
- Passcode: A unique code generated for your account. It is available under Settings > Project as the Passcode.
- Token: A unique code generated for your account. It is available under Settings > Project as Token.
- Region: Server Only. This is the region assigned to your CleverTap account. Refer to the following table to identify it:
| CleverTap Dashboard URL | Region |
|---|---|
| https://in1.dashboard.clevertap.com/login.html#/ | India |
| https://sg1.dashboard.clevertap.com/login.html#/ | Singapore |
| https://us1.dashboard.clevertap.com/login.html#/ | US |
| https://sk1.dashboard.clevertap.com/login.html#/ | South Korea |
| https://eu1.dashboard.clevertap.com/login.html#/ | None |
| https://aps3.dashboard.clevertap.com/login.html#/ | Indonesia |
| https://mec1.dashboard.clevertap.com/login.html#/ | Middle East (UAE) |
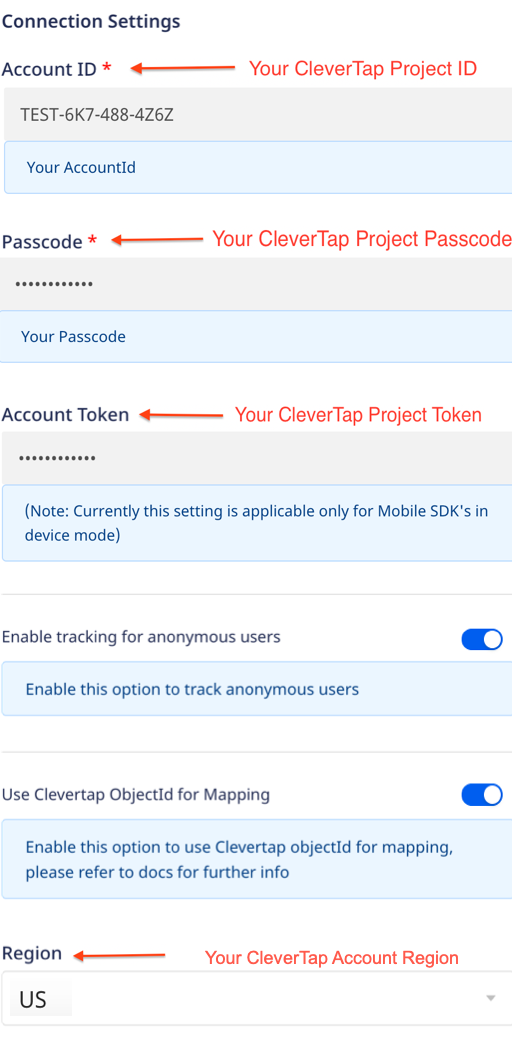
Enter CleverTap Details
- Select the Enable tracking for anonymous user option to track anonymous users in CleverTap.
- Select the Use Clevertap ObjectId for Mapping option under React Native SDK settings section.
This option enables both CleverTapobjectIdandidentityto map events from RudderStack to CleverTap. - Click Continue. The Transformation settings page displays.
- Select No transformation needed if you do not want to customize JavaScript code functions to implement specific use cases on your event data.
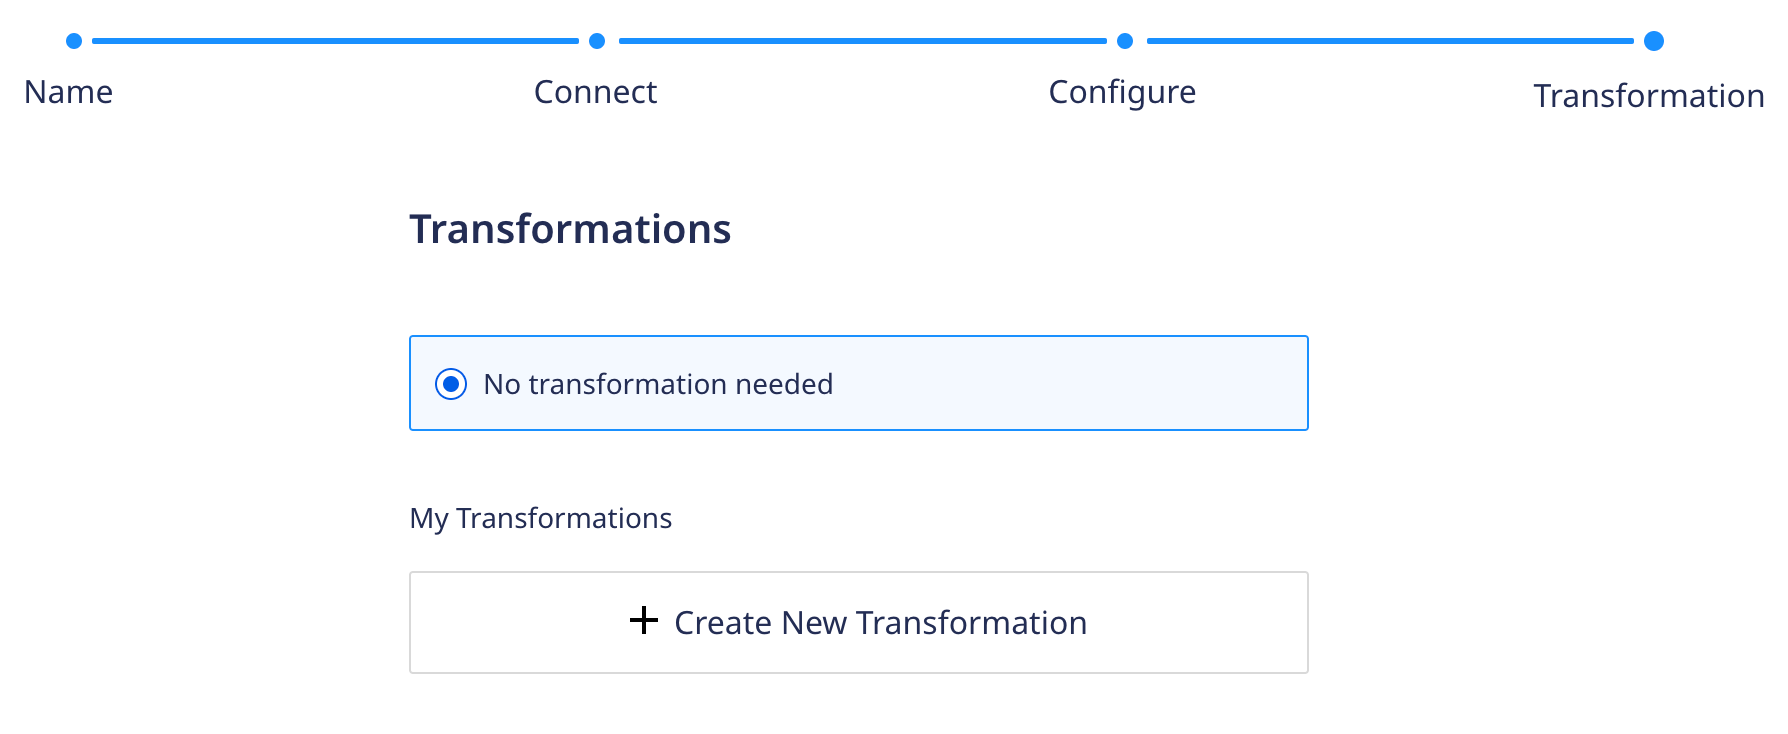
Select Transformations
- Click Continue. The connection is now established between source and destination. You can check if the connection is enabled under Connect > Connections.

View the Connection
For more information, refer to RudderStack Documentation.
Install SDK in Native Application
Rudder-CleverTap integration is available through CocoaPods. To install it:
- Add the following line of code to your Podfile:
pod 'Rudder-CleverTap'
pod 'Rudder'- Open the iOS project folder and install all the pod files by running the following command from the terminal:
pod install.
Initialize RudderStack Client
To initialize the RudderStack client:
- Import the module that you added in the above step to your code as follows:
#import "RudderCleverTapIntegration.h"
#import <Rudder/Rudder.h>
#import <RudderCleverTapFactory.h>- Add the following code in your
AppDelegate.mfile under thedidFinishLaunchingWithOptionsmethod.
RSConfigBuilder *builder = [[RSConfigBuilder alloc] init];
[builder withDataPlaneUrl:<YOUR_DATA_PLANE_URL>];
[builder withFactory:[RudderCleverTapFactory instance]];
[RSClient getInstance:<YOUR_WRITE_KEY> config:[builder build]];| Parameter | Description |
|---|---|
YOUR_DATA_PLANE_URL | Navigate to Connect > Connections page from the RudderStack dashboard to get this data plane URL. |
YOUR_WRITE_KEY | Navigate to the Connect > Source page from the RudderStack dashboard and click Details to get this information. |
trackAppLifecycleEvents | Allows you to track Rudderstack SDK to capture the Lifecycle events. |
logLevel | Allows you to check the application log when developing the application. |
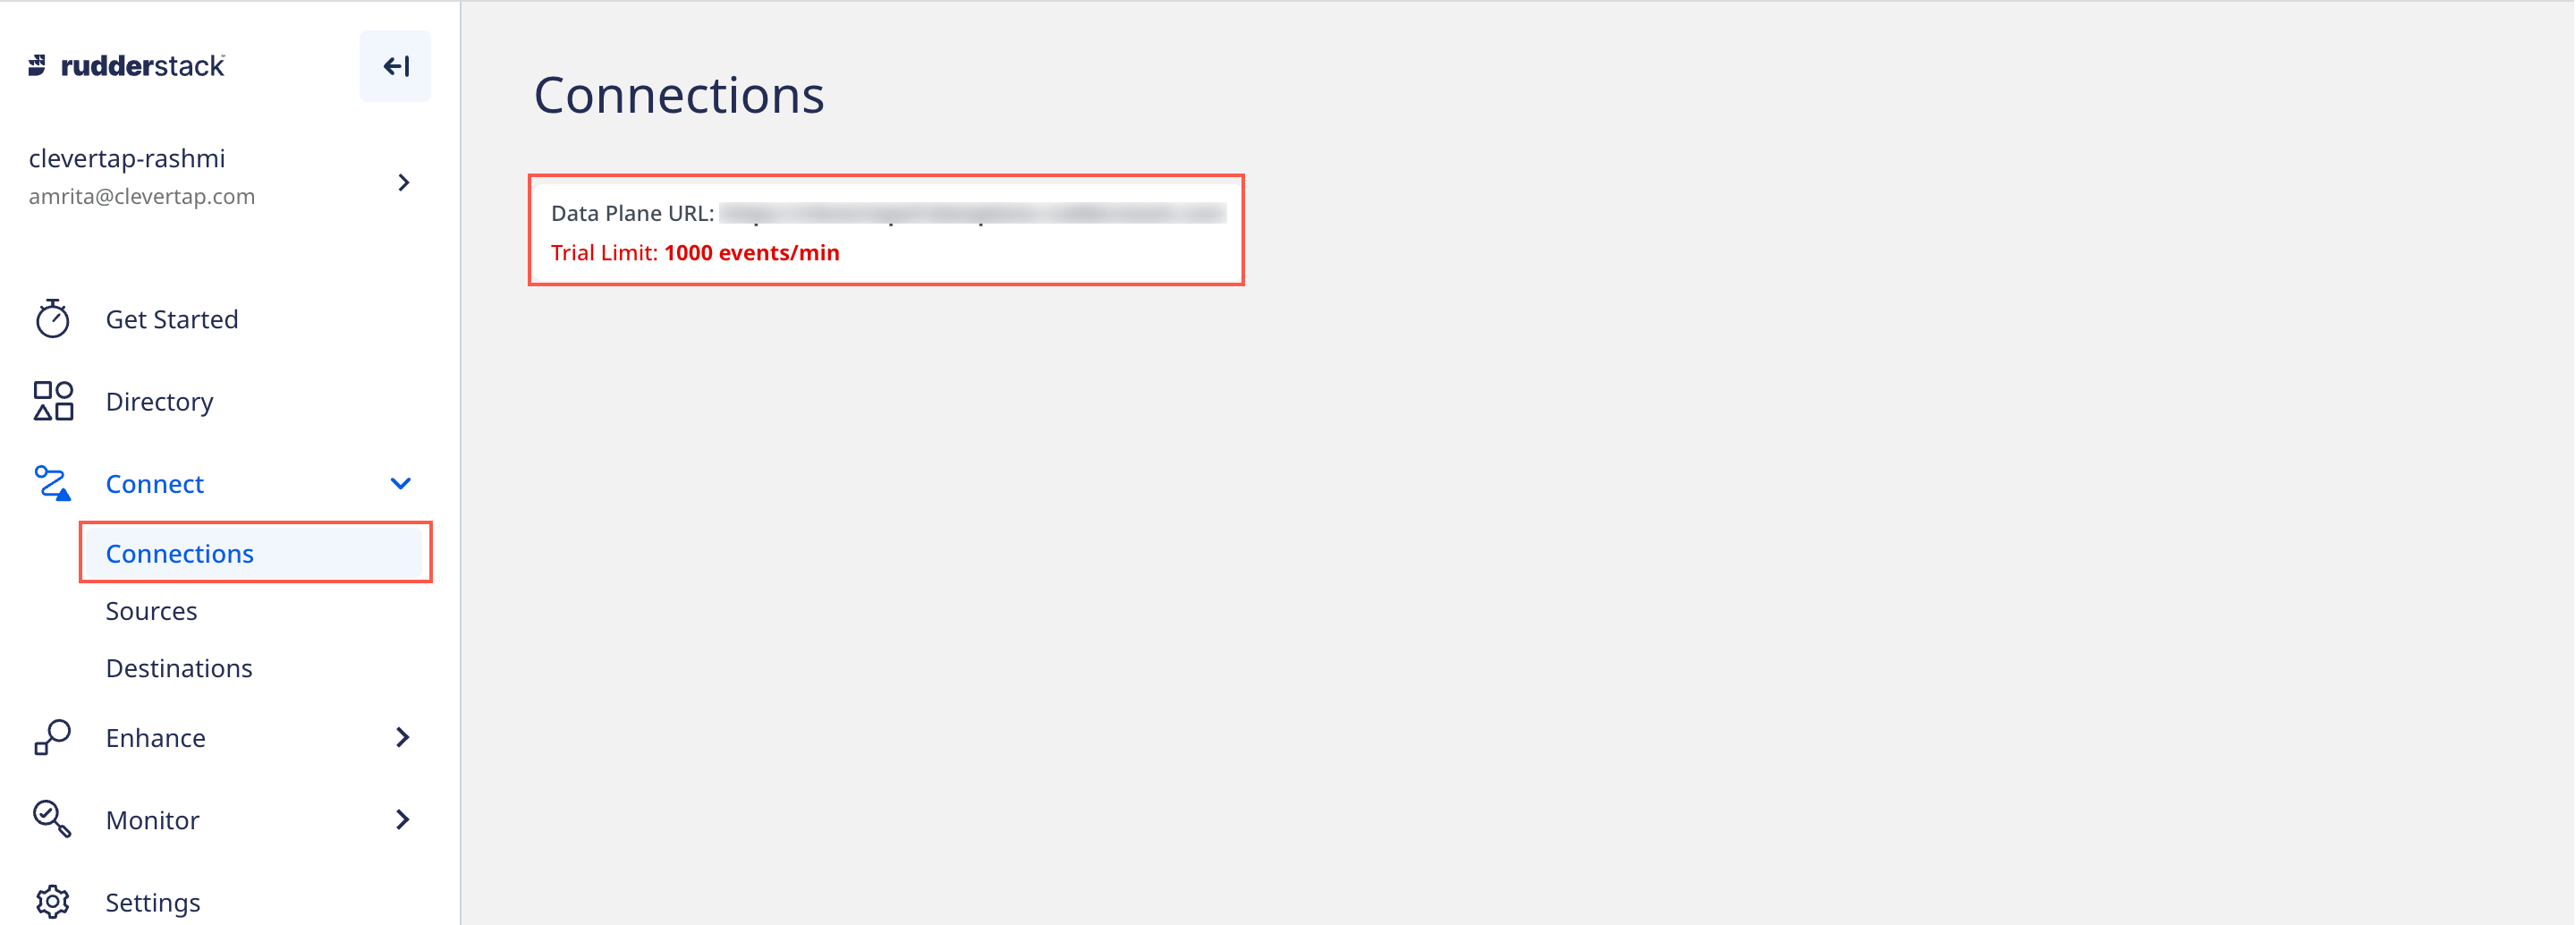
Obtain Data Plane URL

Obtain RudderStack Write Key
For more information, refer to Adding Device Mode Integration in Rudderstack.
Push User Information
You can call the identify method for pushing user profiles whenever you want to identify the user in your application, that is, when a user logs in or registers to your application or when you want to update any user information. After installing an app on a device, your user is assigned an anonymous profile. The first time when the application identifies the user on the device, the anonymous history on the device is associated with the newly identified user. You can call this method as follows:
[[RSClient sharedInstance] identify:@"test_user123"
                                          traits:@{@"name": @"first last",
                                                   @"pincode": @"700065",
                                                   @"country": @"India",
                                                   @"state" : @"WB",
                                                   @"city" : @"Durgapur",
                                                   @"email": @"[email protected]",
                                                   @"phone": @"+918250294239",
                                                   @"gender": @"M",
                                                   @"Education":@"Graduate",
                                                   @"Employed":@"Y",
                                                   @"Married":@"N"
                                          }
Replace test_user123 with your database User ID (Unique Identifier of the user). For more information, refer to RudderStack Identify.
Push Events
You can call rudderClient.track() for pushing events whenever you want to capture any user action in your application. For example, when a user adds any product, and you want to capture this event, then call this method and pass the following parameters:
- Event: For example, Product Added
- Event Properties: Pass the product id or any other property.
Event Property Data Types
- The value of a property can be of type Integer, Long, Double, Float, Character, String, a Boolean.
- The Date value must always be passed as the
NSDateobject only.
Calling a push method may vary based on the type of event as follows:
- Applicable for all events except the Order Completed event:
[[RSClient sharedInstance] track:@"Product Added" properties:@{
          @"product_id" : @"product_001"
}];- Order Completed event (equivalent to the Charged event in CleverTap)
rudderClient.track("Order Completed", {
      checkout_id: "12345",
      order_id: "1234",
      affiliation: "Apple Store",
      'Payment mode': "Credit Card",
      total: 20,
      revenue: 15.0,
      shipping: 22,
      tax: 1,
      discount: 1.5,
      coupon: "Games",
      currency: "USD",
      products: [
        {
          product_id: "123",
          sku: "G-32",
          name: "Monopoly",
          price: 14,
          quantity: 1,
          category: "Games",
          url: "https://www.website.com/product/path",
          image_url: "https://www.website.com/product/path.jpg",
        },
        {
          product_id: "345",
          sku: "F-32",
          name: "UNO",
          price: 3.45,
          quantity: 2,
          category: "Games",
        },
        {
          product_id: "125",
          sku: "S-32",
          name: "Ludo",
          price: 14,
          quantity: 7,
          category: "Games",
          brand: "Ludo King"
        },
      ],
    });
Integrate Push Notification in iOS
The following are the two major steps to integrating push notifications into iOS:
Add Dependency
To add a dependency, get the Auth Key file and upload it to the CleverTap dashboard. For more information, refer to How to Create an iOS APNs Auth Key.
Enable Push Notification
To enable Push Notification:
- Add Push Notification as a capability by navigating to Target > Signing & Capabilities of your app when opened in Xcode.
- Enable Background Modes/Remote notifications by navigating to Targets > Your App > Capabilities > Background Modes and select Remote notifications.
- Add the following code in the
AppDelegatefile of the application code to register the push notifications:
#import <UserNotifications/UserNotifications.h>
// register for push notifications
    UNUserNotificationCenter* center = [UNUserNotificationCenter currentNotificationCenter];
    center.delegate = self;
    [center requestAuthorizationWithOptions:(UNAuthorizationOptionAlert | UNAuthorizationOptionSound | UNAuthorizationOptionBadge)
                          completionHandler:^(BOOL granted, NSError * _Nullable error) {
        if (granted) {
            dispatch_async(dispatch_get_main_queue(), ^(void) {
                [[UIApplication sharedApplication] registerForRemoteNotifications];
            });
        }
}];- Add the following handlers to handle the tokens and push notifications accordingly:
#import "RudderCleverTapIntegration.h"

- (void)application:(UIApplication *)application didRegisterForRemoteNotificationsWithDeviceToken:(NSData *)deviceToken {
    [[RudderCleverTapIntegration alloc] registeredForRemoteNotificationsWithDeviceToken:deviceToken];
}

- (void)application:(UIApplication *)application didReceiveRemoteNotification:(NSDictionary *)userInfo fetchCompletionHandler:(void (^)(UIBackgroundFetchResult))completionHandler {
    [[RudderCleverTapIntegration alloc] receivedRemoteNotification:userInfo];
    completionHandler(UIBackgroundFetchResultNoData);
}

- (void)userNotificationCenter:(UNUserNotificationCenter *)center willPresentNotification:(UNNotification *)notification withCompletionHandler:(void (^)(UNNotificationPresentationOptions))completionHandler {
    completionHandler(UNAuthorizationOptionSound | UNAuthorizationOptionAlert | UNAuthorizationOptionBadge);
}

- (void)userNotificationCenter:(UNUserNotificationCenter *)center didReceiveNotificationResponse:(UNNotificationResponse *)response withCompletionHandler:(void (^)(void))completionHandler {
    [[RudderCleverTapIntegration alloc] receivedRemoteNotification:response.notification.request.content.userInfo];
}
Updated about 2 months ago
