Segment React-Native Integration
Learn how to perform CleverTap Segment React-Native integration.
Overview
The Segment React Native SDK allows you to track event data from your React Native applications and send it to CleverTap via Segment.
Prerequisites
The following are the prerequisites for performing this integration:
- A CleverTap account
- A Segment account
- A functional React Native application
Integration
For CleverTap Segment React Native integration, the following are the significant steps:
- Add Destination in Segment Dashboard
- Install SDK in React-Native Application
- Initialize the Segment Client
Add Destination in Segment
Destinations are the business tools or applications to which Segment forwards your data. Adding Destinations allows you to act on your data and learn more about your customers in real time.
To add CleverTap details in Segment:
- Go to Destinations in the Segment application.
- Click on Add Destination and select CleverTap.
- In the Destination Catalog/CleverTap page, click on Configure CleverTap.
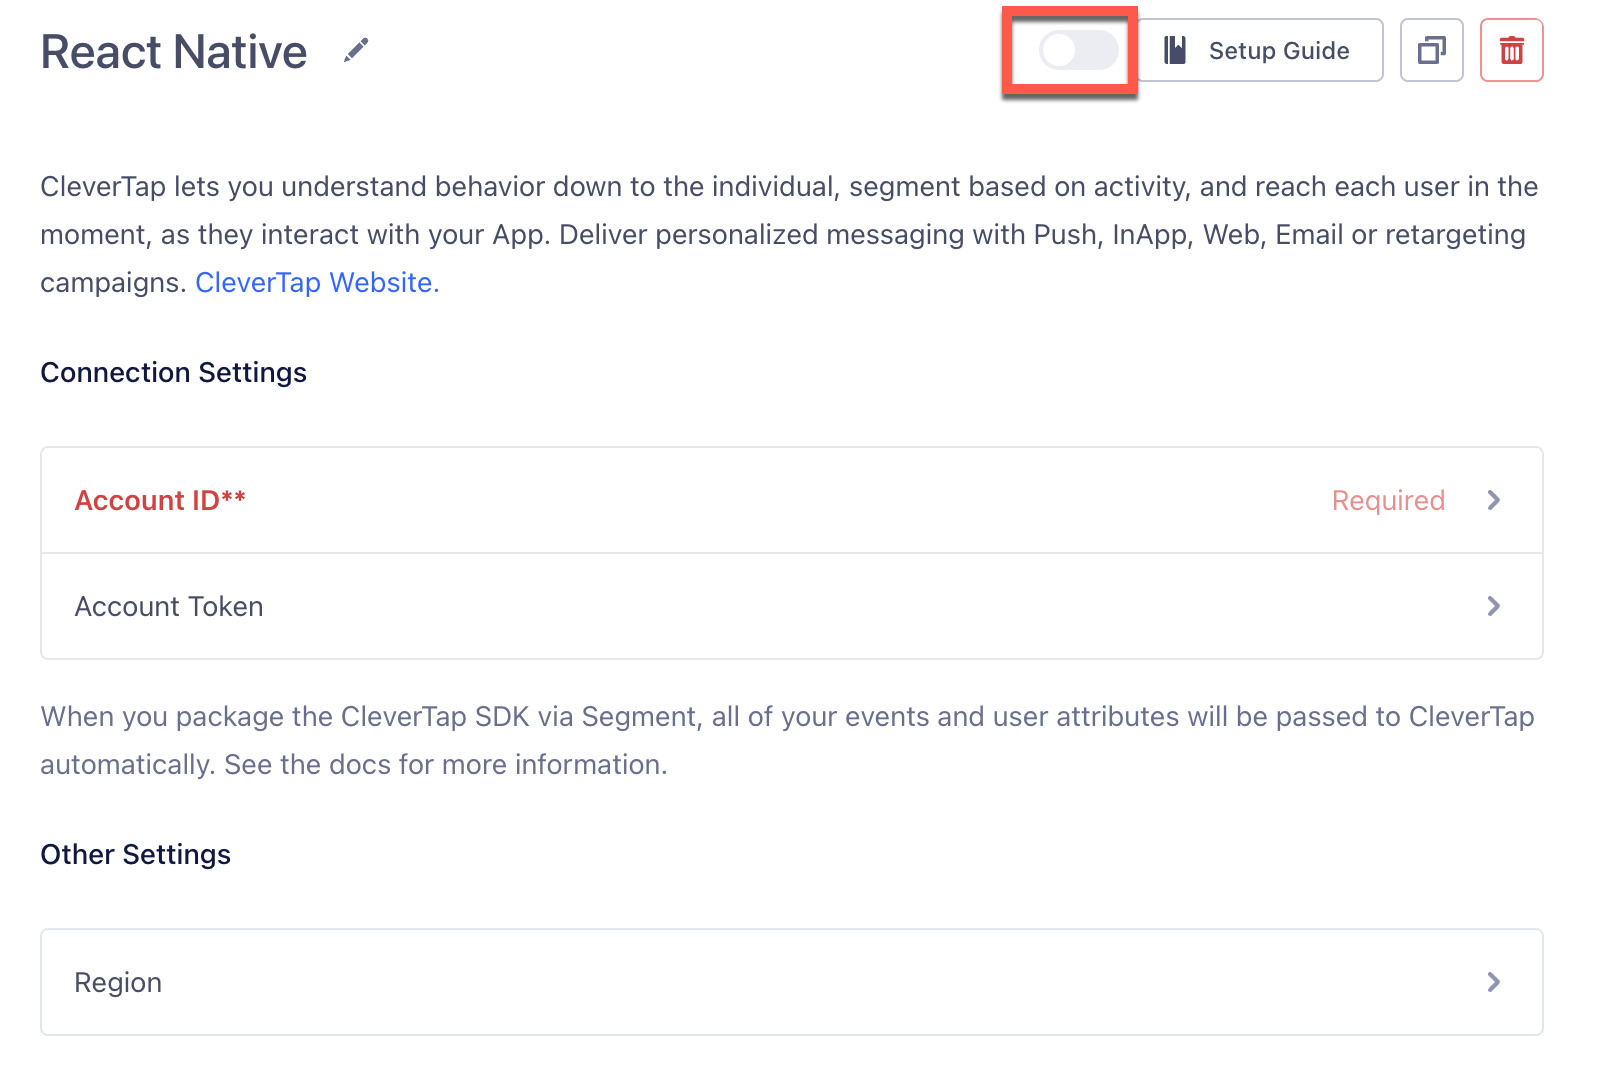
- Add CleverTap Account ID and Account Token, which you can find on the CleverTap Dashboard under Settings page.
- Select the appropriate region from the Region dropdown. To identify the region of your CleverTap account, refer to the following table:
- Turn on the toggle at the top of the Settings page to enable the destination.

Install SDK in React-Native Application
We recommend installing the React Native SDK through npm. To add the SDK as a dependency, perform the following steps:
- Go to the root of your Application and add
@segment/analytics-react-nativeto your Application using the following code:
npm install @segment/[email protected]- Add the Segment-CleverTap module to your application using the following code:
npm install @segment/[email protected]
React Native v18 ChangesThe latest versions of react native use higher versions of Android Build SDK. Segment version v1 does not support
Kotlinbeyond 1.4.0 version. Therefore you need to change theKotlinversion manually inbuild.gradlefiles of associated plugins:
in
node_modules/@segment/analytics-react-native/android/build.gradle, update manuallyext.defaultKotlinVersionvalue from '1.4.0' to '1.7.0'.in
node_modules/@segment/analytics-react-native-clevertap/android/build.gradle, update manuallyclasspath 'org.jetbrains.kotlin:kotlin-gradle-plugin:1.3.1'toclasspath 'org.jetbrains.kotlin:kotlin-gradle-plugin:1.7.0'.
- Navigate to your
Android/Appfolder and add the following dependency to yourapp/build.gradlefile:
implementation 'com.clevertap.android:clevertap-android-sdk:4.1.1'
    implementation 'com.google.android.gms:play-services-base:17.4.0'

    implementation 'com.google.android.exoplayer:exoplayer:2.11.5' //Optional for Audio/Video
    implementation 'com.google.android.exoplayer:exoplayer-hls:2.11.5' //Optional for Audio/Video
    implementation 'com.google.android.exoplayer:exoplayer-ui:2.11.5' //Optional for Audio/Video
    implementation 'com.github.bumptech.glide:glide:4.11.0' //Mandatory for App Inbox
    implementation 'androidx.recyclerview:recyclerview:1.1.0' //Mandatory for App Inbox
    implementation 'androidx.viewpager:viewpager:1.0.0' //Mandatory for App Inbox
    implementation 'com.google.android.material:material:1.2.1' //Mandatory for App Inbox
    implementation 'androidx.appcompat:appcompat:1.2.0' //Mandatory for App Inbox
    implementation 'androidx.core:core:1.3.0'
    implementation 'androidx.fragment:fragment:1.1.0' // InApp
    //Mandatory for React Native SDK v0.3.9 and above add the following -
implementation 'com.android.installreferrer:installreferrer:2.1'- In Terminal, go to the iOS folder and install all the pod file by running the following command:
pod installInitialize the Segment Client
To initialize the Segment client:
- Import the module you added above, as shown below:
import analytics from '@segment/analytics-react-native'
import CleverTap from '@segment/analytics-react-native-clevertap'- Initialize the CleverTap-Segment SDK as follows:
analytics.setup('YOUR_WRITE_KEY', {
  // Add any of your Device-mode destinations.
        using: [CleverTap],
        debug: true,
        recordScreenViews: false,
        trackAppLifecycleEvents: true,
        trackAttributionData: true
    })
    .then(() =>
        console.log('Analytics is ready'),
    )
    .catch(err =>
        console.error()
)| Parameter | Description |
|---|---|
YOUR_WRITE_KEY | In the Segment dashboard, navigate to Connections > Sources. Select the source and navigate to Settings > API Keys to get Write Key information. |
trackAppLifecycleEvents | This allows you to track Segment SDK to capture their Lifecycle events. |
debug | This allows you to go through the application log while developing the application. |
Push User Information
You can call the analytics.identify() method for pushing user profiles when a user logs in or registers to your application or when you want to update any user information.
After installing an application on a device, your user is assigned an "anonymous" profile. The first time when the application identifies the user on the device, the "anonymous" history on the device is associated with the newly identified user.
You can call this method as follows:
analytics.identify("userid", {
                                name: "Name Surname",
                                email: "[email protected]",
                                phone: "+919869357572",
                                gender: "M",
                                avatar: "link to image",
                                title: "Owner",
                                organization: "Company",
                                city: "Tokyo",
                                region: "ABC",
                                country: "JP",
                                zip: "100-0001",
                                Flagged: false,
                                Residence: "Shibuya",
                                "MSG-email": true
                              })
                          }
Replace userid with the unique identifier for your application. This identifier must match the identifier selected on the CleverTap dashboard.
Push Events
You can call the analytics.track() method to capture any user action in your application.
For example, when a user views any product, and you want to capture this event, then call this method and pass the following parameters:
- Event: Product Viewed
- Event Properties: Product viewed, Category, and Amount
Event Property Data Types
- The value of a property can be Integer, Long, Double, Float, Character, String, or Boolean.
- The Date value must always be passed as $D_EPOCH value only.
Calling a push event method may vary based on the type of event as follows:
- All events except the Order Completed event:
analytics.track("Checked Out", {
  Clicked_Rush_delivery_Button: true,
  total_value: 2000,
  revenue: 2000,
});- Order Completed (equivalent to the Charged event in CleverTap)
analytics.track("Order Completed", {
      checkout_id: "12345",
      order_id: "1234",
      affiliation: "Apple Store",
      'Payment mode': "Credit Card",
      total: 20,
      revenue: 15.0,
      shipping: 22,
      tax: 1,
      discount: 1.5,
      coupon: "Games",
      currency: "USD",
      products: [
        {
          product_id: "123",
          sku: "G-32",
          name: "Monopoly",
          price: 14,
          quantity: 1,
          category: "Games",
          url: "https://www.website.com/product/path",
          image_url: "https://www.website.com/product/path.jpg",
        },
        {
          product_id: "345",
          sku: "F-32",
          name: "UNO",
          price: 3.45,
          quantity: 2,
          category: "Games",
        },
        {
          product_id: "125",
          sku: "S-32",
          name: "Ludo",
          price: 14,
          quantity: 7,
          category: "Games",
          brand: "Ludo King"
        },
      ],
    });
Integrate Push Notification in Android
For more information about integrating Push Notification in Android, refer to Android Push Notification.
Integrate Push Notification in iOS
For more information about integrating Push Notification in Android, refer to iOS Push Notification.
Advanced Features
Debugging
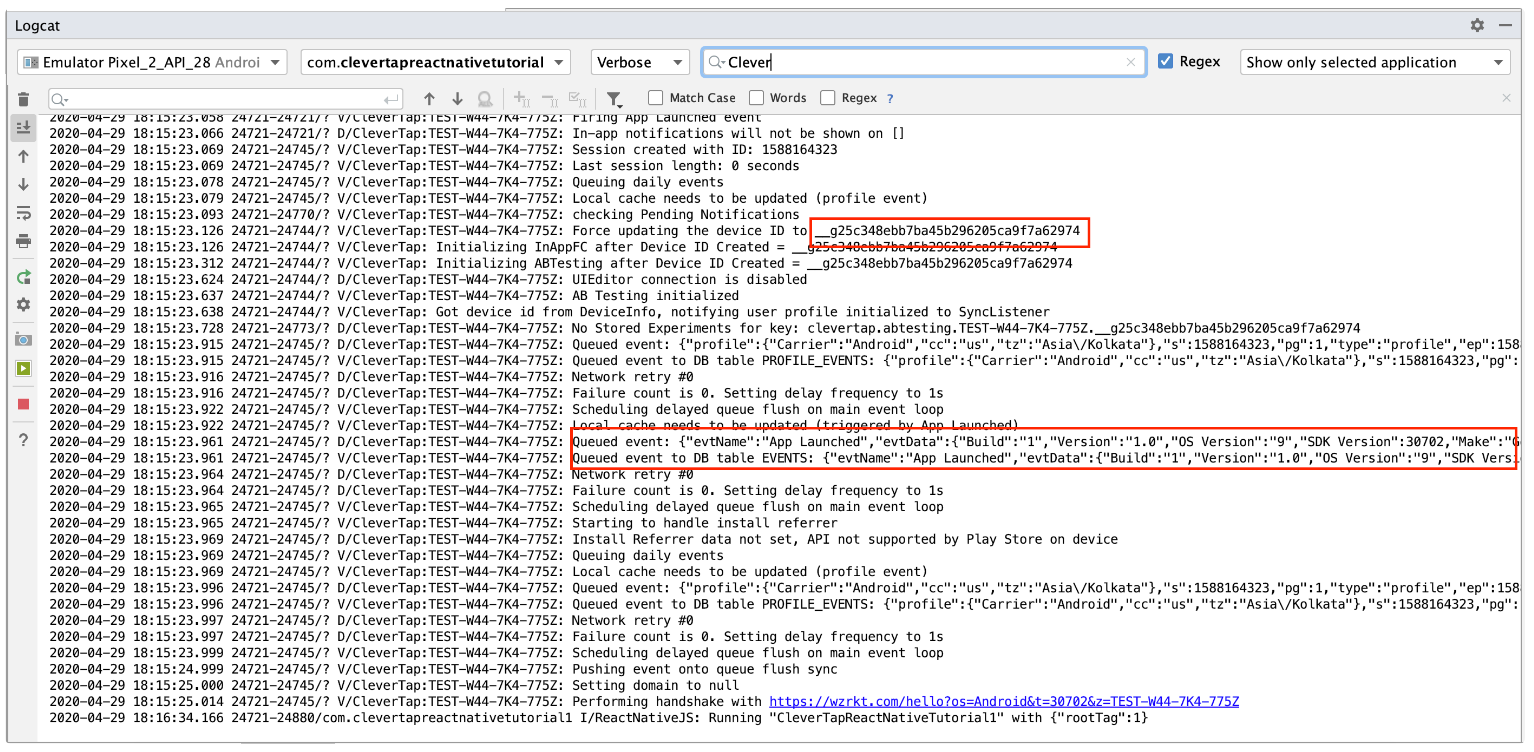
You can view the debugging logs in Android Studio. After you run the application, navigate to Android Studio > Logcat and search by CleverTap. The printed logs display all information associated with CleverTap. You can use this log to identify your CleverTap ID, check the events and user information that are getting pushed to CleverTap, etc.
The following is an example display of a Logcat in your Android Studio:

Troubleshooting
- Error Message: If you are getting the following error while compiling the Android project:
Note: Recompile with -Xlint:deprecation for details.
D8: Cannot fit requested classes in a single dex file (# methods: 79994 > 65536 ; # fields: 68161 > 65536)
com.android.builder.dexing.DexArchiveMergerException: Error while merging dex archives:Reason: Android can build only files up to 65K, if it exceeds, you will get this error.
Solution: Add the following code in your android/app/build.gradle file:
defaultConfig {
        multiDexEnabled true
}- Error Message: If you are getting the following error while compiling the iOS project:
CleverTap.h file not foundSolution:
-
Open
SEGCleverTapIntegration.mfile from pods directory under segment-clevertap pods. -
Change
#import <CleverTapSDK/CleverTap.h>to#import <CleverTap-iOS-SDK/CleverTap.h>and hit
Unlock button to edit and save the changes. -
Run the project again to compile successfully without error.
OR (Recommended Approach)
-
Add use_modular_headers! in your PodFile to enable stricter search paths and module map generation for all of your pods.
-
Run pod installs.
-
Navigate to the
SEGCleverTapIntegration.mclass and replace#import<CleverTapSDK/CleverTap.h>with@import CleverTapSDK; -
Import header as
@import CleverTapSDK;instead of<CleverTapSDK/CleverTap.h>in the App Delegate class as well.
Updated 2 months ago
