Flutter Push
Learn how to handle push notifications in Flutter.
Push Notifications
When integrated with a Flutter application, CleverTap enables seamless and targeted push notifications, allowing you to engage with your users at the right time and with relevant content.
Android
To use CleverTap's default Push Notifications service, add the following code to the AndroidManifest.xml file.
<application>
         ....
         ....
        <service android:name="com.clevertap.android.sdk.pushnotification.fcm.FcmMessageListenerService"
         android:exported="true">
            <intent-filter>
                <action android:name="com.google.firebase.MESSAGING_EVENT" />
            </intent-filter>
        </service>

 </application>
Notification Trampolines in Android 12 and Above.Android has changed the handling of push notifications for version 12 and above to improve performance. An app can no longer start an activity within a service or broadcast receiver. For more information, refer to Android 12 Push Changes.
Create a Notification Channel
To create a notification channel, add the following code snippet:
CleverTapPlugin.createNotificationChannel("fluttertest", "Flutter Test", "Flutter Test", 3, true);The notification channel importance can have any value from 1 to 5. A higher value means a more interruptive notification. For more information, refer to Notification Channel Importance Levels.
Delete Notification Channel
To delete a notification channel, add the following code snippet:
CleverTapPlugin.deleteNotificationChannel(“channelId”);Create a Group Notification Channel
To create a group notification channel, add the following code snippet:
CleverTapPlugin.createNotificationChannelGroup(“groupId”, “groupName”);Delete a Group Notification Channel
To delete a group notification channel, add the following code snippet:
CleverTapPlugin.deleteNotificationChannelGroup(“channelId”);Enable RenderMax with Android
Starting from CleverTap Flutter SDK version 1.8.0, the RenderMax Push SDK functionality is now supported directly within the CleverTap Android SDK. We strongly recommend updating CleverTap Flutter SDK to version 1.8.0 or onwards to take advantage of this integration and to ensure stability.
NoteEsnure you remove the integrated RenderMax SDK before you upgrade to CleverTap Flutter SDK v1.8.0 or onwards.
Custom Rendering with RenderMax Push SDKIf the app custom renders the push notification and does not pass the payload to CleverTap SDK, add the following code before you render the notification:
CleverTapAPI.processPushNotification(getApplicationContext(),extras);
Handle Notification Click
Register a setCleverTapPushClickedPayloadReceivedHandler handler to get a notification click callback along with the entire payload.
_clevertapPlugin.setCleverTapPushClickedPayloadReceivedHandler(pushClickedPayloadReceived);

void pushClickedPayloadReceived(Map<String, dynamic> notificationPayload) {
  print("pushClickedPayloadReceived called with notification payload: " + notificationPayload.toString());
  // You may perform UI operation like redirecting the user to a specific page based on custom key-value pairs
  // Passed in the notificationPayload. You may also perform non UI operation such as HTTP requests, IO with local storage etc.
  handleNotificationClick(notificationPayload);
}
NotePlease note that the
pushClickedPayloadReceivedhandler is triggered in Android platform only when the app is in the foreground or background states, and not when it has been terminated(killed). However, in the case of iOS platform, this handler is supported regardless of whether the app is in the foreground, background, or has been terminated (killed).
[Android Platform] Handle Notification Trampoline Restrictions to Support pushClickedPayloadReceived Handler in Android 12 and Above
Due to notification trampoline restrictions, Android 12 and above do not directly support the pushClickedPayloadReceived callback. Hence, apps need to add manual handling for Android 12 and above to inform the CleverTap SDK about the notification click and get the pushClickedPayloadReceived callback.
Add the following code in the onNewIntent() method of the Launcher FlutterActivity class in android:
class MainActivity : FlutterActivity() {

override fun onNewIntent(intent: Intent?) {
   super.onNewIntent(intent)

   // On Android 12 and above, inform the notification click to get the pushClickedPayloadReceived callback on dart side.
   if (Build.VERSION.SDK_INT >= Build.VERSION_CODES.S) {
       cleverTapDefaultInstance?.pushNotificationClickedEvent(intent!!.extras)
   }
 }
}
For detailed information, refer to Android 12 Push Changes.
[Android Platform] Handle Notification Clicks When the App Is Killed
The CleverTap Plugin provides two ways to handle user interactions with notifications, depending on whether the app needs to perform UI or non-UI operations.
- Perform UI Operation using
CleverTapPlugin.getAppLaunchNotification() - Perform Non-UI Operation using
onKilledStateNotificationClicked Handler
Perform UI Operation using CleverTapPlugin.getAppLaunchNotification()
The default behavior on Android is to launch the application if the application is terminated(killed). Use CleverTapPlugin.getAppLaunchNotification() for Android platform to get a Future containing a notification payload of Map type if the application is opened from a terminated(killed) state. Depending on the content of a notification payload, you may perform UI operations such as redirecting the user to a specific page.
class Application extends StatefulWidget {
  @override
  State<StatefulWidget> createState() => _Application();
}

class _Application extends State<Application> {
  void _handleKilledStateNotificationInteraction() async {
    // Retrieve the notification-payload in a 'CleverTapAppLaunchNotification' class object
    // which caused the application to open from a terminated state.
    CleverTapAppLaunchNotification appLaunchNotification = await CleverTapPlugin
        .getAppLaunchNotification();

    if (appLaunchNotification.didNotificationLaunchApp) {
      //App is launched from a notification click which was rendered by the CleverTap SDK.
      Map<String, dynamic> notificationPayload = appLaunchNotification.payload!;
      _handleDeeplink();
    }
  }

  void _handleDeeplink() {
    // It is assumed that all notifications contain a data field with the key 'type' but you may also have
    // a different key for deeplink handling.
    var type = notificationPayload["type"];

    if (type != null) {
      print(
          "_handleKilledStateNotificationInteraction => Type: $type");
      Navigator.push(
          context,
          MaterialPageRoute(
              builder: (context) =>
                  DeepLinkPage(type: type)));
    }
  }

  @override
  void initState() {
    super.initState();

    //Run CleverTapPlugin.getAppLaunchNotification for Android platform in an async function
    // as initState() must not be async
    if (Platform.isAndroid) {
      _handleKilledStateNotificationInteraction();
    }
  }

  @override
  Widget build(BuildContext context) {
    return Text("...");
  }
}
NoteThe notification needs to be generated by the CleverTap SDK to get the notification payload from the
CleverTapPlugin.getAppLaunchNotification()API.
Perform Non-UI Operation using onKilledStateNotificationClicked Handler
There are two steps to set up the onKilledStateNotificationClicked handler:
- Your
Applicationclass should extend theCleverTapApplicationclass instead of theFlutterApplicationclass. - Register the
onKilledStateNotificationClickedhandler to get a notification click callback along with the entire payload. When a notification is clicked, an isolate is spawned (Android only), allowing you to handle notification clicks even when your application is not running. There are a few things to keep in mind about youronKilledStateNotificationClickedhandler:
- It must not be an anonymous function.
- It must be a top-level function. For example, not a class method that requires initialization.
- When using Flutter version 3.3.0 or higher, the
onKilledStateNotificationClickedhandler must be annotated with@pragma('vm:entry-point')right above the function declaration (otherwise, it may be removed during tree shaking for release mode).
Add the following method to your main.dart file, right after the import statements, and outside any Widget class declaration, to process push notifications in the killed state via a Flutter background isolate:
@pragma('vm:entry-point')
void _onKilledStateNotificationClickedHandler(Map<String, dynamic> map) async {
  print("Notification Payload received: " + map.toString());
}

void main() {
  CleverTapPlugin.onKilledStateNotificationClicked(_onKilledStateNotificationClickedHandler);
  runApp(MyApp());
}
NoteSince the
_onKilledStateNotificationClickedHandlerhandler runs in its own isolate outside your applications context, it is not possible to update application state or execute any UI operation from the handler itself. You can, however, perform HTTP requests, IO operations with local storage etc.
Set a Custom Push Notification Icon
By default, our SDK uses the app's icon for both the notification and the notification bar icons. However, You can provide a custom app icon by adding the icon to your app's Android resources and registering it with CleverTap in the AndroidManifest.xml file. For more information, refer to Set the Small Notification Icon.
Handle Custom Push Notification
If you have your custom implementation for handling Android push notifications, you can inform CleverTap about the user’s Push Service Registration ID :
Custom FCM Implementation
To add custom FCM implementation, add the following code:
if (Platform.isAndroid) {
  CleverTapPlugin.setPushToken("fcm_token");
}
Custom Baidu Implementation
To add a custom Baidu implementation, add the following code:
CleverTapPlugin.setBaiduPushToken("<your_token_bps>", {
   'type': 'bps',
   'prefKey': 'bps_token',
   'className': 'com.clevertap.android.bps.BaiduPushProvider',
   'messagingSDKClassName': 'com.baidu.android.pushservice.PushMessageReceiver'
});
Custom Huawei Implementation
To add a custom Huawei implementation, add the following code:
CleverTapPlugin.setHuaweiPushToken("<your_token_hms>", {
   'type': 'hps',
   'prefKey': 'hps_token',
   'className': 'com.clevertap.android.hms.HmsPushProvider',
   'messagingSDKClassName': 'com.huawei.hms.push.HmsMessageService'
});
Push Notification Templates
CleverTap Push Templates SDK helps you engage with your users using fancy push notification templates built specifically to work with CleverTap.
It requires no Flutter-specific integration and can be enabled via Android code only. Find the complete integration steps for the CleverTap Push Templates SDK here and the associated documentation here
Push Notifications Permission
Starting from Android 13 and iOS 10.0, applications must request notification permission from the user before sending Push Notifications. All newly installed applications must seek user permission before they can send notifications.
Push Primer
A Push Primer explains the need for push notifications to your users and helps to improve your engagement rates. It is an InApp notification that you can show to your users before requesting notification permission.
Push Primer helps with the following:
Allows you to educate your users on why you are asking for this permission before invoking a system dialog to seek user permission.
Acts as a precursor to the hard system dialog and thus allows you to seek permission multiple times if previously denied without making your users search the device settings.
Starting with the v1.6.0 release, CleverTap Flutter SDK supports Push primer for push notification runtime permission through local in-app.
iOS and Android Versions for Push Primer
- The minimum supported version for the iOS platform is 10.0.
- The minimum supported version for the Android platform is Android 13.
The following are the two ways to handle the new push notification changes:
- Push Primer Using Half-Interstitial InApp Notification Template
- Push Primer Using In-App Alert Template
Push Primer Using Half-Interstitial InApp Template
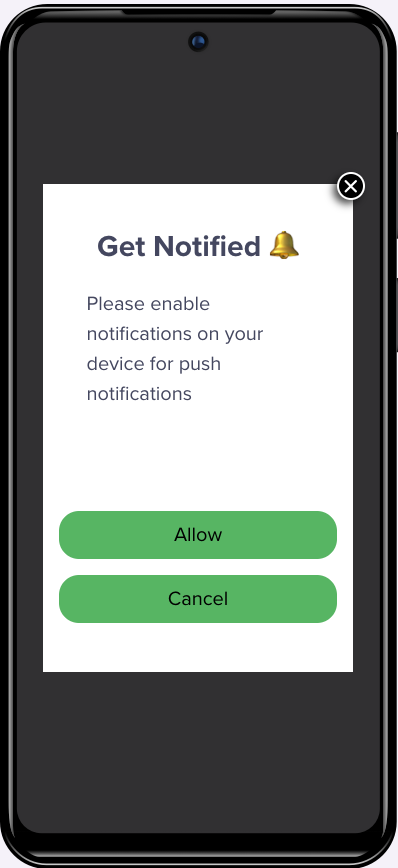
Using this template, you can send a customized push primer notification with an image, text, and button. You can also modify the notification's text, button, and background color.
Refer to the following images for Push Primer using Half-Interstitial InApp Template:
- In Android

Push Primer Using Half-Interstitial InApp-Android
- In iOS

Push Primer Using Half-Interstitial InApp-iOS
Add the following code to your code to create a Push Primer using the Half-Interstitial In-App template:
var pushPrimerJSON = {
  inAppType: 'half-interstitial',
  titleText: 'Get Notified',
  messageText: 'Please enable notifications on your device to use Push Notifications.',
  followDeviceOrientation: false,
  positiveBtnText: 'Allow',
  negativeBtnText: 'Cancel',
  fallbackToSettings: true,

  // Optional styling parameters
  backgroundColor: '#FFFFFF',
  btnBorderColor: '#000000',
  titleTextColor: '#000000',
  messageTextColor: '#000000',
  btnTextColor: '#000000',
  btnBackgroundColor: '#FFFFFF',
  btnBorderRadius: '4',

  // Optional image with accessibility text
  imageUrl: 'https://icons.iconarchive.com/icons/treetog/junior/64/camera-icon.png',
  altText: 'Alternate Image'
};

CleverTapPlugin.promptPushPrimer(pushPrimerJSON);
Push Primer using Alert InApp Template
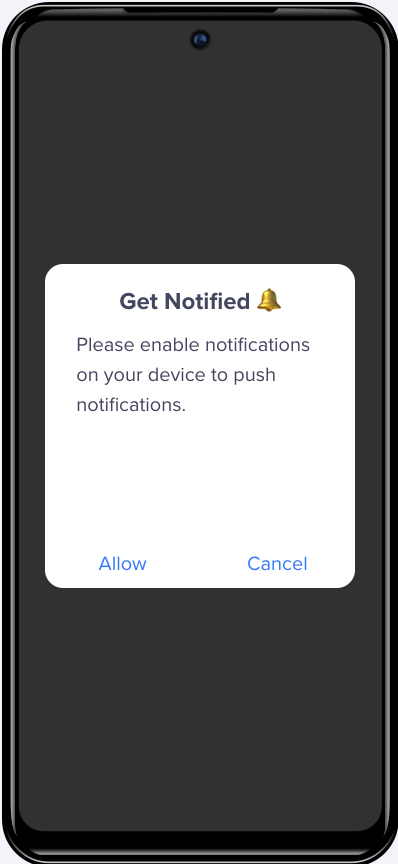
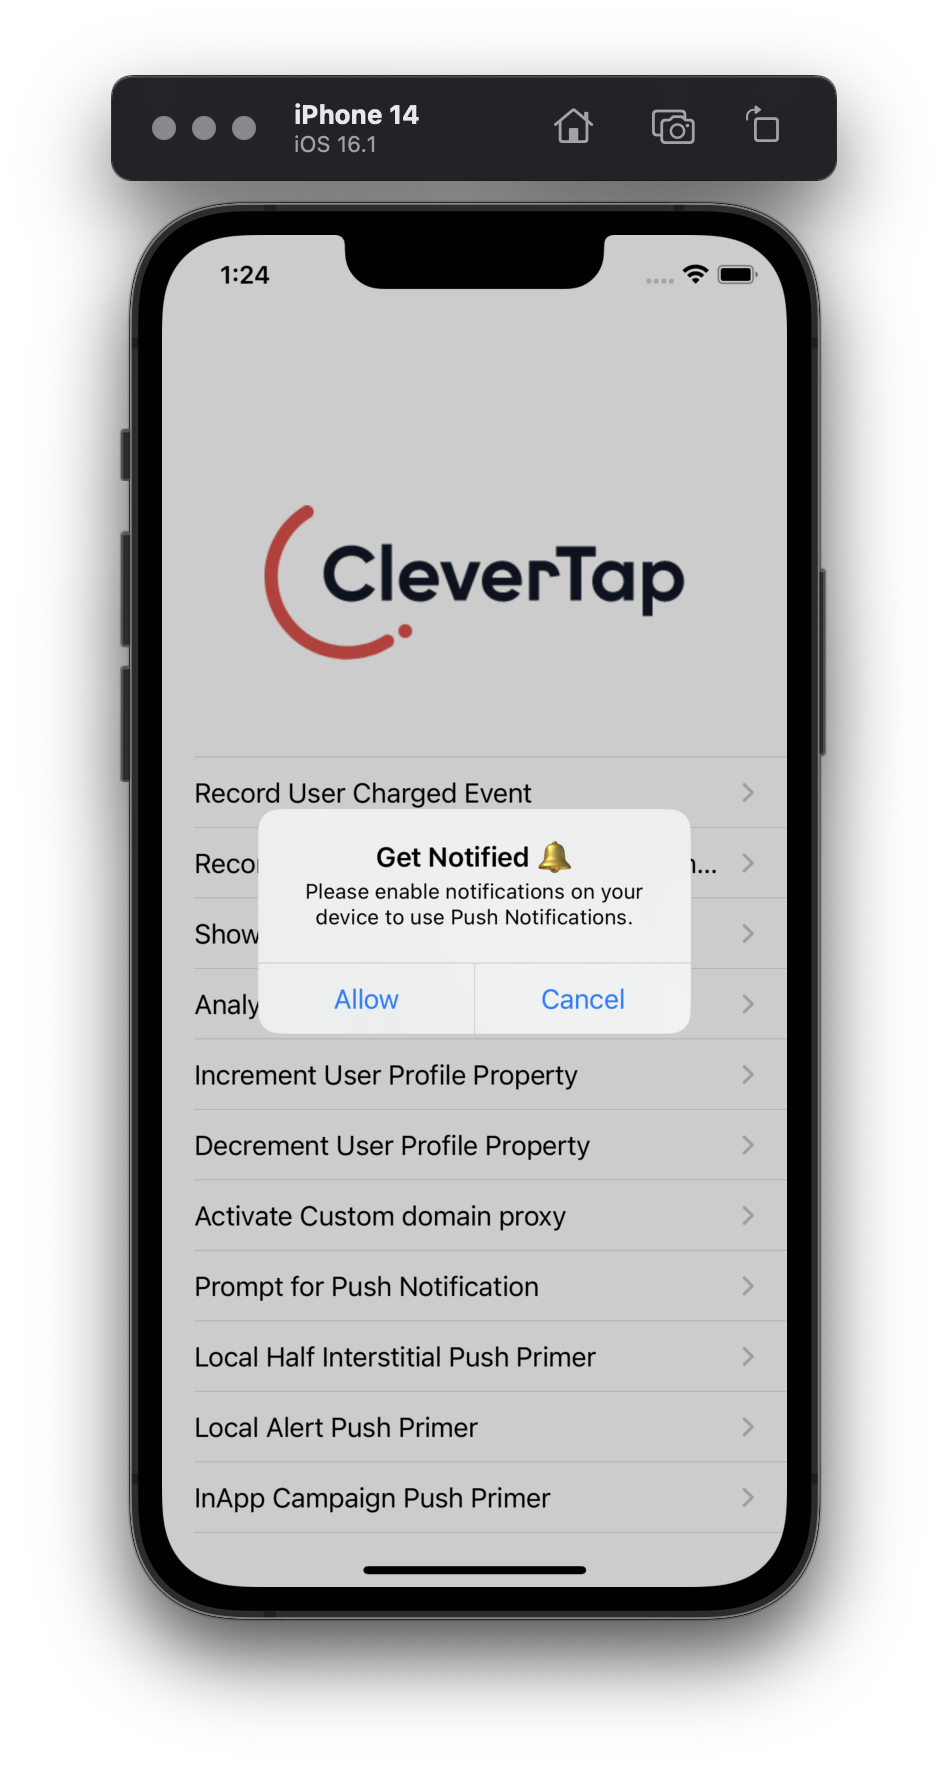
Using this template, you can create a basic push primer notification with a title, message, and two buttons.
Refer to the following images for Push Primer using the Alert InApp template:
- In Android

Push Primer using Alert InApp Template-Android
- In iOS

Push Primer using Alert InApp Template-iOS
Add the following code to your code to create a Push Primer using the Alert InApp template:
var pushPrimerJSON = {
  'inAppType': 'alert',
  'titleText': 'Get Notified',
  'messageText': 'Enable Notification permission',
  'followDeviceOrientation': true,
  'positiveBtnText': 'Allow',
  'negativeBtnText': 'Cancel',
  'fallbackToSettings': true
};
CleverTapPlugin.promptPushPrimer(pushPrimerJSON);
Method Description
The following table describes all the keys used to create In-App templates:
Key Name | Parameters | Description | Required |
|---|---|---|---|
| "half-interstitial" or "alert" |
| Required |
| String | Sets the title of the local in-app notification. | Required |
| String | Sets the subtitle of the local in-app notification. | Required |
| true or false |
| Required |
| String |
| Required |
| String |
| Required |
| true or false |
| Optional |
| Hex color as String | Sets the background color of the local in-app notification. | Optional |
| Hex color as String | Sets the border color of both positive and negative buttons. | Optional |
| Hex color as String | Sets the title text color of the local in-app notification. | Optional |
| Hex color as String | Sets the sub-title text color of the local in-app notification. | Optional |
| Hex color as String | Sets the color of text for both positive/negative buttons. | Optional |
| Hex color as String | Sets the background color for both positive/negative buttons. | Optional |
| String |
| Optional |
| true or false |
| Optional |
| String (URL) | Sets the image to be shown in the local in-app notification. Must be a valid URL pointing to an image resource. | Optional |
| String | Alternate text shown if the image cannot be loaded. Improves accessibility and provides fallback context. | Optional |
Invoke Notification Permission Dialog without Push Primer
You can call the push permission dialogue directly without a Push Primer using the promptForPushNotification(boolean) method. It takes a boolean value as a parameter.
- If the value is set to true and permission is denied, then the user is redirected to the app’s notification settings.
- If the value is set to false, the callback is sent stating that the permission is denied.
var fallbackToSettings = false;
CleverTapPlugin.promptForPushNotification(fallbackToSettings);
Check the Push Notification Permission Status
The isPushPermissionEnabled method can be used to check the status of the push notification permission for your application. The method returns the status of the push permission.
bool? isPushPermissionEnabled = await CleverTapPlugin.getPushNotificationPermissionStatus();
if (isPushPermissionEnabled == null) return;

if (!isPushPermissionEnabled) {
  // call Push Primer here.
} else {
  print("Push Permission is already enabled.");
}
Available Callback for Push Primer
Based on notification permission grant/deny, CleverTap Flutter SDK provides a callback with the permission accepted status.
_clevertapPlugin.setCleverTapPushPermissionResponseReceivedHandler(pushPermissionResponseReceived);

void pushPermissionResponseReceived(bool accepted) {
  print("Push Permission response called ---> accepted = " + (accepted ? "true" : "false"));
}
iOS
-
Refer to iOS Push Notifications setup and follow the same steps till step 4 in the document and in your runner application in Xcode. Ensure you configure the push notifications in your Flutter project.
-
Call the following from your Dart:
CleverTapPlugin.registerForPush();- For more information on how to create a push notification, refer to Campaign on the CleverTap dashboard. Otherwise, you can follow the remaining steps on the CleverTap iOS Push Notifications document.
iOS Foreground Notifications
To receive push notifications when your app is in the foreground, check your AppDelegate class conforms to the UNUserNotificationCenterDelegate and then add userNotificationCenter:willPresentNotification:withCompletionHandler: delegate method in your AppDelegate class as in sample app
- (void)userNotificationCenter:(UNUserNotificationCenter *)center willPresentNotification:(UNNotification *)notification withCompletionHandler:(void (^)(UNNotificationPresentationOptions options))completionHandler{
    completionHandler(UNAuthorizationOptionSound | UNAuthorizationOptionAlert | UNAuthorizationOptionBadge);
}
func userNotificationCenter(_ center: UNUserNotificationCenter,
willPresent notification: UNNotification,
withCompletionHandler completionHandler: @escaping (UNNotificationPresentationOptions) -> Void) {
completionHandler([.badge, .sound, .alert])
}iOS Push Notification Templates
CleverTap iOS Push Templates allow you to engage with users using rich push notification templates. For more details about rich push notification templates, refer to iOS Rich Push Notifications.
Flutter Push Notification Callback on iOS
The CleverTap iOS SDK sends the callback when a Push Notification is clicked along with the entire payload. For this, you must register the CleverTapPushNotificationClicked callback using the below code:
CleverTapPlugin.pushNotificationClickedEvent();You can raise a callback event if a notification is viewed on the Flutter application using the following code:
CleverTapPlugin.pushNotificationViewedEvent();Deeplink or External URL (iOS)
A deeplink helps you open a particular activity in your app after clicking the notification. If left empty, the notification opens the launcher activity of the app after clicking. Deep links allow you to land the users on a particular part of your app. Your app's OpenURL method is called with the deep link specified here. If you want to use external URLs, you will have to whitelist the IPs or provide http/https before the URL so that the SDK can appropriately handle them. For more information, refer to Deeplinking.
With CleverTap Flutter SDK, you can implement custom handling In-App notification CTAs, Push Notifications, and App Inbox message URLs.
Check that your class conforms to the CleverTapURLDelegate protocol by first calling setURLDelegate.
Use the following protocol method shouldHandleCleverTap(_ : forChannel:) to handle URLs received from channels such as in-app notification CTAs, push notifications, and app Inbox messages:
#import <CleverTapSDK/CleverTapURLDelegate.h>

// Set the URL Delegate
[[CleverTap sharedInstance]setUrlDelegate:self];

// CleverTapURLDelegate method
- (BOOL)shouldHandleCleverTapURL:(NSURL *)url forChannel:(CleverTapChannel)channel {
    NSLog(@"Handling URL: \(%@) for channel: \(%d)", url, channel);
    return YES;
}
// Set the URL Delegate
CleverTap.sharedInstance()?.setUrlDelegate(self)
// CleverTapURLDelegate method
public func shouldHandleCleverTap(_ url: URL?, for channel: CleverTapChannel) -> Bool {
print("Handling URL: \(url!) for channel: \(channel)")
return true
}Enable Support for Deeplink Tracking Manually
To manually enable support for deeplink tracking in the application itself, refer to iOS Deeplink Tracking.
Web
Enable Web Push in Flutter
Add CleverTap's service worker in the web folder. For more information, refer to the Web Push documentation.
var pushData = {
    'titleText': 'Would you like to receive Push Notifications?',
    'bodyText':
        'We promise to only send you relevant content and give you updates on your transactions',
    'okButtonText': 'Ok',
    'rejectButtonText': 'Cancel',
    'okButtonColor': '#F28046',
    'askAgainTimeInSeconds': 5,
    'serviceWorkerPath': '/firebase-messaging-sw.js'
  };
  CleverTapPlugin.enableWebPush(pushData);
Updated about 2 months ago
