Advanced Android Push Notification Options
Overview
Apart from the Title and Message, you can add the following options to your Android push notification. Note that each of these is optional.
- Image URL
- Large Icon URL
- Deeplink/External URL
- Action Buttons
- Sound Files
- Notification Tray Priority
- Notification Delivery Priority
Image URL
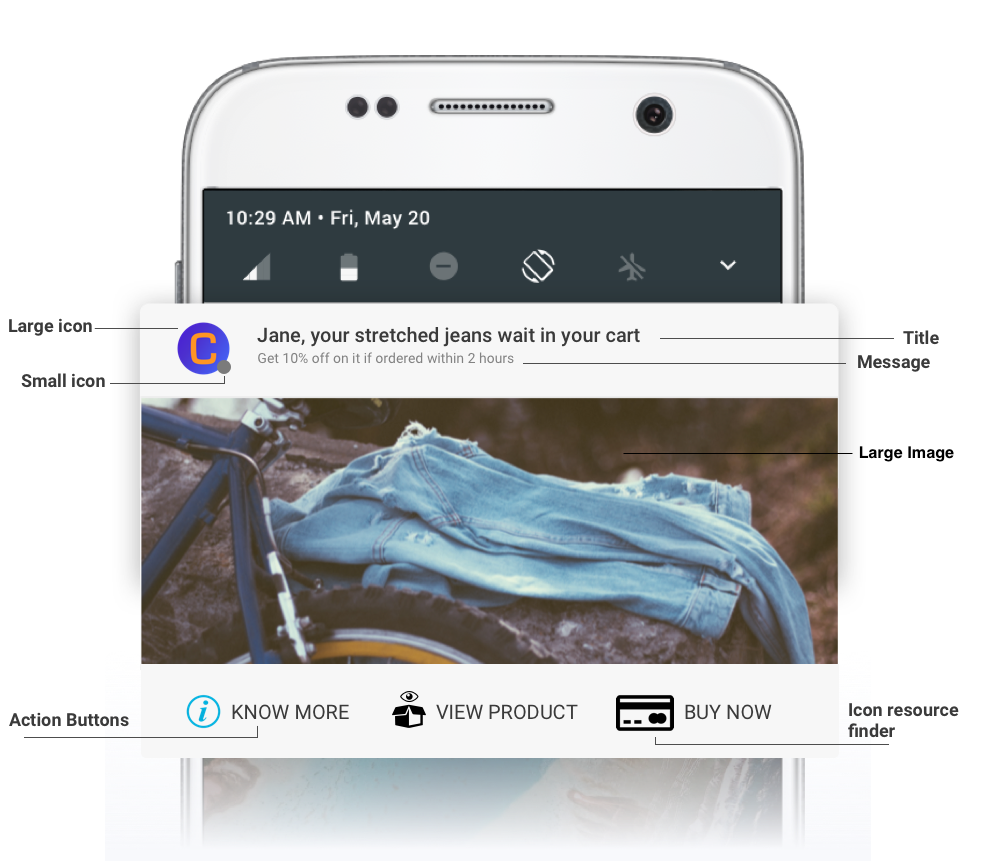
If an image link is specified, a large image is added to your push notification.
- Recommended resolution: 600×300
- Max size: 40 kb
- Supported file formats are .jpg and .png
Large Icon URL
If a large icon link is specified, the large icon will be appended to the push notification. The large icon will be displayed either far left or far right based on the device.
- Max resolution – 72×72
- Max size – 1 kb
Deeplink/External URL
A deeplink helps you open a particular activity in your app after a click on the notification. If left empty, the notification on click will open the launcher activity of the app.
To use external URLs, whitelist the IPs or prefix the URL with http or https. For more information, refer to Deeplinking.
Action Buttons
You can add up to three call-to-action buttons for every push notification. For every action button, you have the following options:
- Title: contains the call-to-action text (mandatory)
- Deeplink: the deeplink that should open on click of that button
- Action ID: a user-defined string (applicable to apps custom handling their android push notifications: This string will be available as an extra on the notification click intent for you to identify the action button clicked). This is a mandatory field.
- Icon Resource Identifier: A drawable icon in your app’s resources folder to display the icon along with the notification for Android devices below OS version Nougat. Android Nougat does not display icons by default to allow more buttons.
If the user clicks on the main body of the notification, the app will open, and the notification will disappear. If the user clicks on one of the action buttons, then by default, Android will not remove the notification from the tray. We provide two user options for this.
The first option is to handle closing the notification yourself (applies to apps that are custom handling the push notification). The click intent has the notification Id in its extras to accomplish this. So to close, add the following code in the activity that would get called.
Bundle extras = intent.getExtras();
if (extras != null) {
    String actionId = extras.getString("actionId");
    if (actionId != null) {
        Log.d("ACTION_ID", actionId);
        boolean autoCancel = extras.getBoolean("autoCancel", true);
        int notificationId = extras.getInt("notificationId", -1);
        if (autoCancel && notificationId > -1) {
            NotificationManager notifyMgr =
                    (NotificationManager) getApplicationContext().getSystemService(Context.NOTIFICATION_SERVICE);
            notifyMgr.cancel(notificationId);  // the bit that cancels the notification
        }
        Toast.makeText(getBaseContext(),"Action ID is: "+actionId,
                Toast.LENGTH_SHORT).show();
    }
}
intent.extras?.apply {
getString("actionId")?.let {
Log.d("ACTION_ID", it)
val autoCancel = getBoolean("autoCancel", true)
val notificationId = getInt("notificationId", -1)
if (autoCancel && notificationId > -1) {
val notifyMgr: NotificationManager =
applicationContext.getSystemService(Context.NOTIFICATION_SERVICE) as NotificationManager
notifyMgr.cancel(notificationId) // the bit that cancels the notification
}
Toast.makeText(baseContext, "Action ID is: $it", Toast.LENGTH_SHORT).show()
}
}The second option is that CleverTap handles closing the notification. You will have to add CleverTap IntentService to your Manifest.xml, and the SDK will do it for you automatically.
<service
    android:name="com.clevertap.android.sdk.pushnotification.CTNotificationIntentService"
    android:exported="false">
    <intent-filter>
        <action android:name="com.clevertap.PUSH_EVENT" />
    </intent-filter>
</service>
Notification Action Buttons
Sound Files
You can choose to have no notification sound, use the default OS sound, or use a custom sound. The sound file must be present in your app's resources folder. Refer to the Android sound guide to learn how to add a sound file to your Android app. Android only supports .mp3, .ogg, and .wav files.
Add a Sound File to Android App
Learn how you can add a sound file to your Android app, thereby allowing you to use custom sounds for your Android push notifications.
Android supports .mp3, .ogg, and .wav files for playing custom sounds.
Add Sound Files to Android Project
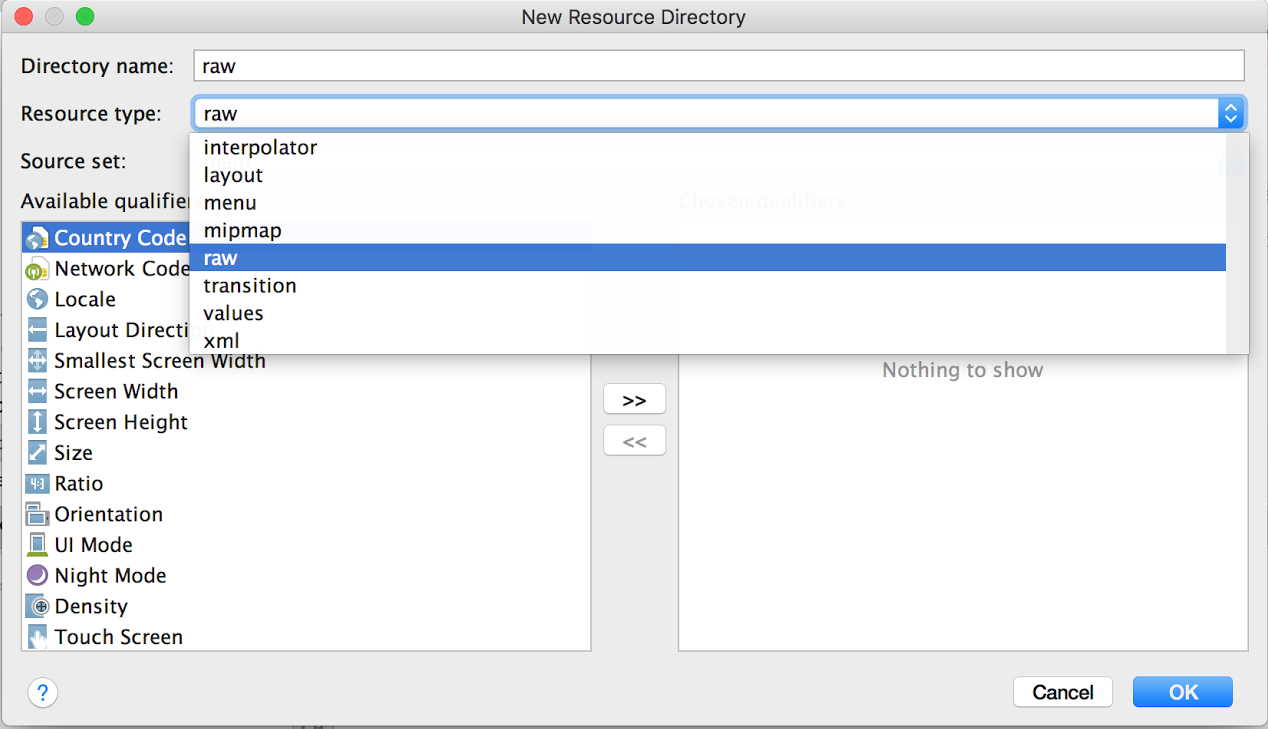
Right-click the resources (res) folder and select New > Android resource directory.

Add Source Files to Android Project
Select Resource Type as raw.

Select Resource Type-Raw
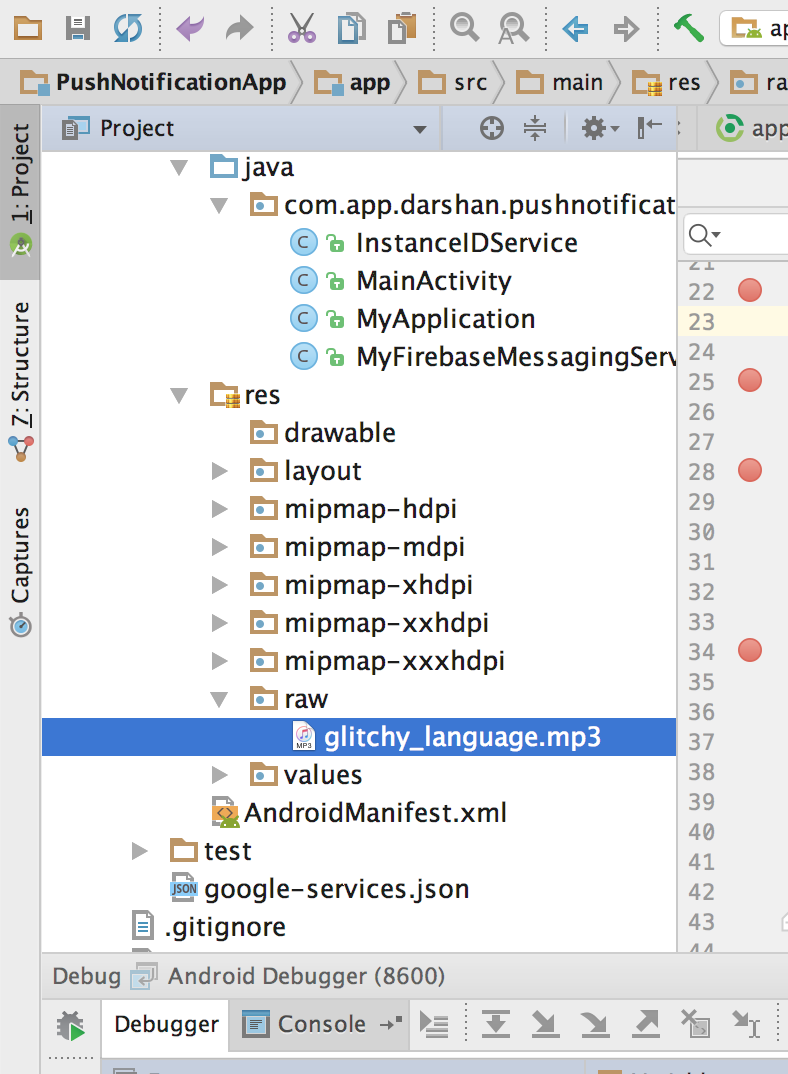
Put your MP3 file in the raw folder.

Add MP3 File in raw Folder
Registering Notification Channel For the Custom Sound File
// Creating a Notification Channel With Sound Support
CleverTapAPI.createNotificationChannel(getApplicationContext(),"got","Game of Thrones","Game Of Thrones",NotificationManager.IMPORTANCE_MAX,true,"gameofthrones.mp3");
CleverTapAPI.createNotificationChannel(getApplicationContext(),"got","Game of Thrones","Game Of Thrones",NotificationManager.IMPORTANCE_MAX,true,"gameofthrones.mp3")Creating Push Notifications with Custom Sounds
In the CleverTap dashboard, select Advanced > Custom Sound file and enter the name of your file with the extension in the text box.
NoteIf the notification channel has a custom sound, then this sound will always override the default OS sound.

Add Custom Sound File
Notification Tray Priority
It is the relative priority for this notification in the device tray. Priority indicates how much of the user’s valuable attention must be consumed by this notification.
- MAXIMUM: Use for critical and urgent notifications that alert the user to a time-critical condition or need to be resolved before continuing with a particular task. A notification with priority set to the maximum will be a heads-up notification. It will always be at the top of the notification tray.
- HIGH: Use primarily for important communication, such as message or chat events with exciting content for the user. High-priority notifications trigger the heads-up notification display. A notification with priority set to high will be a heads-up notification.
- DEFAULT: Use for all notifications that do not fall into any of the other priorities. A notification with default priority will show up in the notification tray, and its order in the notification tray is subject to the presence of other notifications.
NoteNotification tray priority is only applicable for Android 7.1 and below. For Android 8 and above, the notification tray priority is based on the notification channel.
Notification Delivery Priority
On Android, you have two options for assigning delivery priority to downstream messages:
- Normal priority - This is the default priority for messages on Android. Normal priority messages are delivered immediately when the app is in the foreground. When the device is in Doze, the delivery may be delayed to conserve battery. Choose a normal delivery priority for less time-sensitive messages, such as notifications of new emails, keeping your UI in sync, or syncing app data in the background.
- High priority - FCM attempts to deliver high priority messages immediately, allowing the FCM service to wake a sleeping device when necessary and to run some limited processing (including very limited network access). High priority messages generally should result in user interaction with your app or its notifications. If FCM detects a pattern in which the notifications do not result in interactions with your app, such messages may be de-prioritized.
Updated 2 months ago
