CleverTap Xiaomi Push Integration (Deprecated)
Learn how to integrate and send push notifications from Xiaomi.
Discontinuation of Xiaomi Push ServiceXiaomi Corporation made a significant announcement recently, notifying users about discontinuing the Mi Push service beyond Mainland China starting from April 2, 2024, citing operational concerns. For more information, refer to Discontinuation of Xiaomi Push Service.
Chinese OEMs command a considerable market share in the smartphone market. Many of these Chinese OEMs terminate processes running in the background and limit an app's ability to send push notifications to improve battery life. Due to this limitation, users are unable to receive important push notifications.
CleverTap can send push notifications powered by Xiaomi Cloud Push, an Android push notification delivery service for Chinese devices. We send a push notification through Xiaomi Cloud Push and Firebase Cloud Messaging (FCM) push services for a greater chance of delivery success. If a message is delivered through one of these push services, the notification from the other cloud service is suppressed. There is no priority defined, and there are no changes to the current flow of FCM. This ensures that the user will only receive the push notification once.
Register as a Xiaomi Developer
The first step to access the Xiaomi cloud push is to register as a Xiaomi developer on the Xiaomi Website.
Enter console and create an application
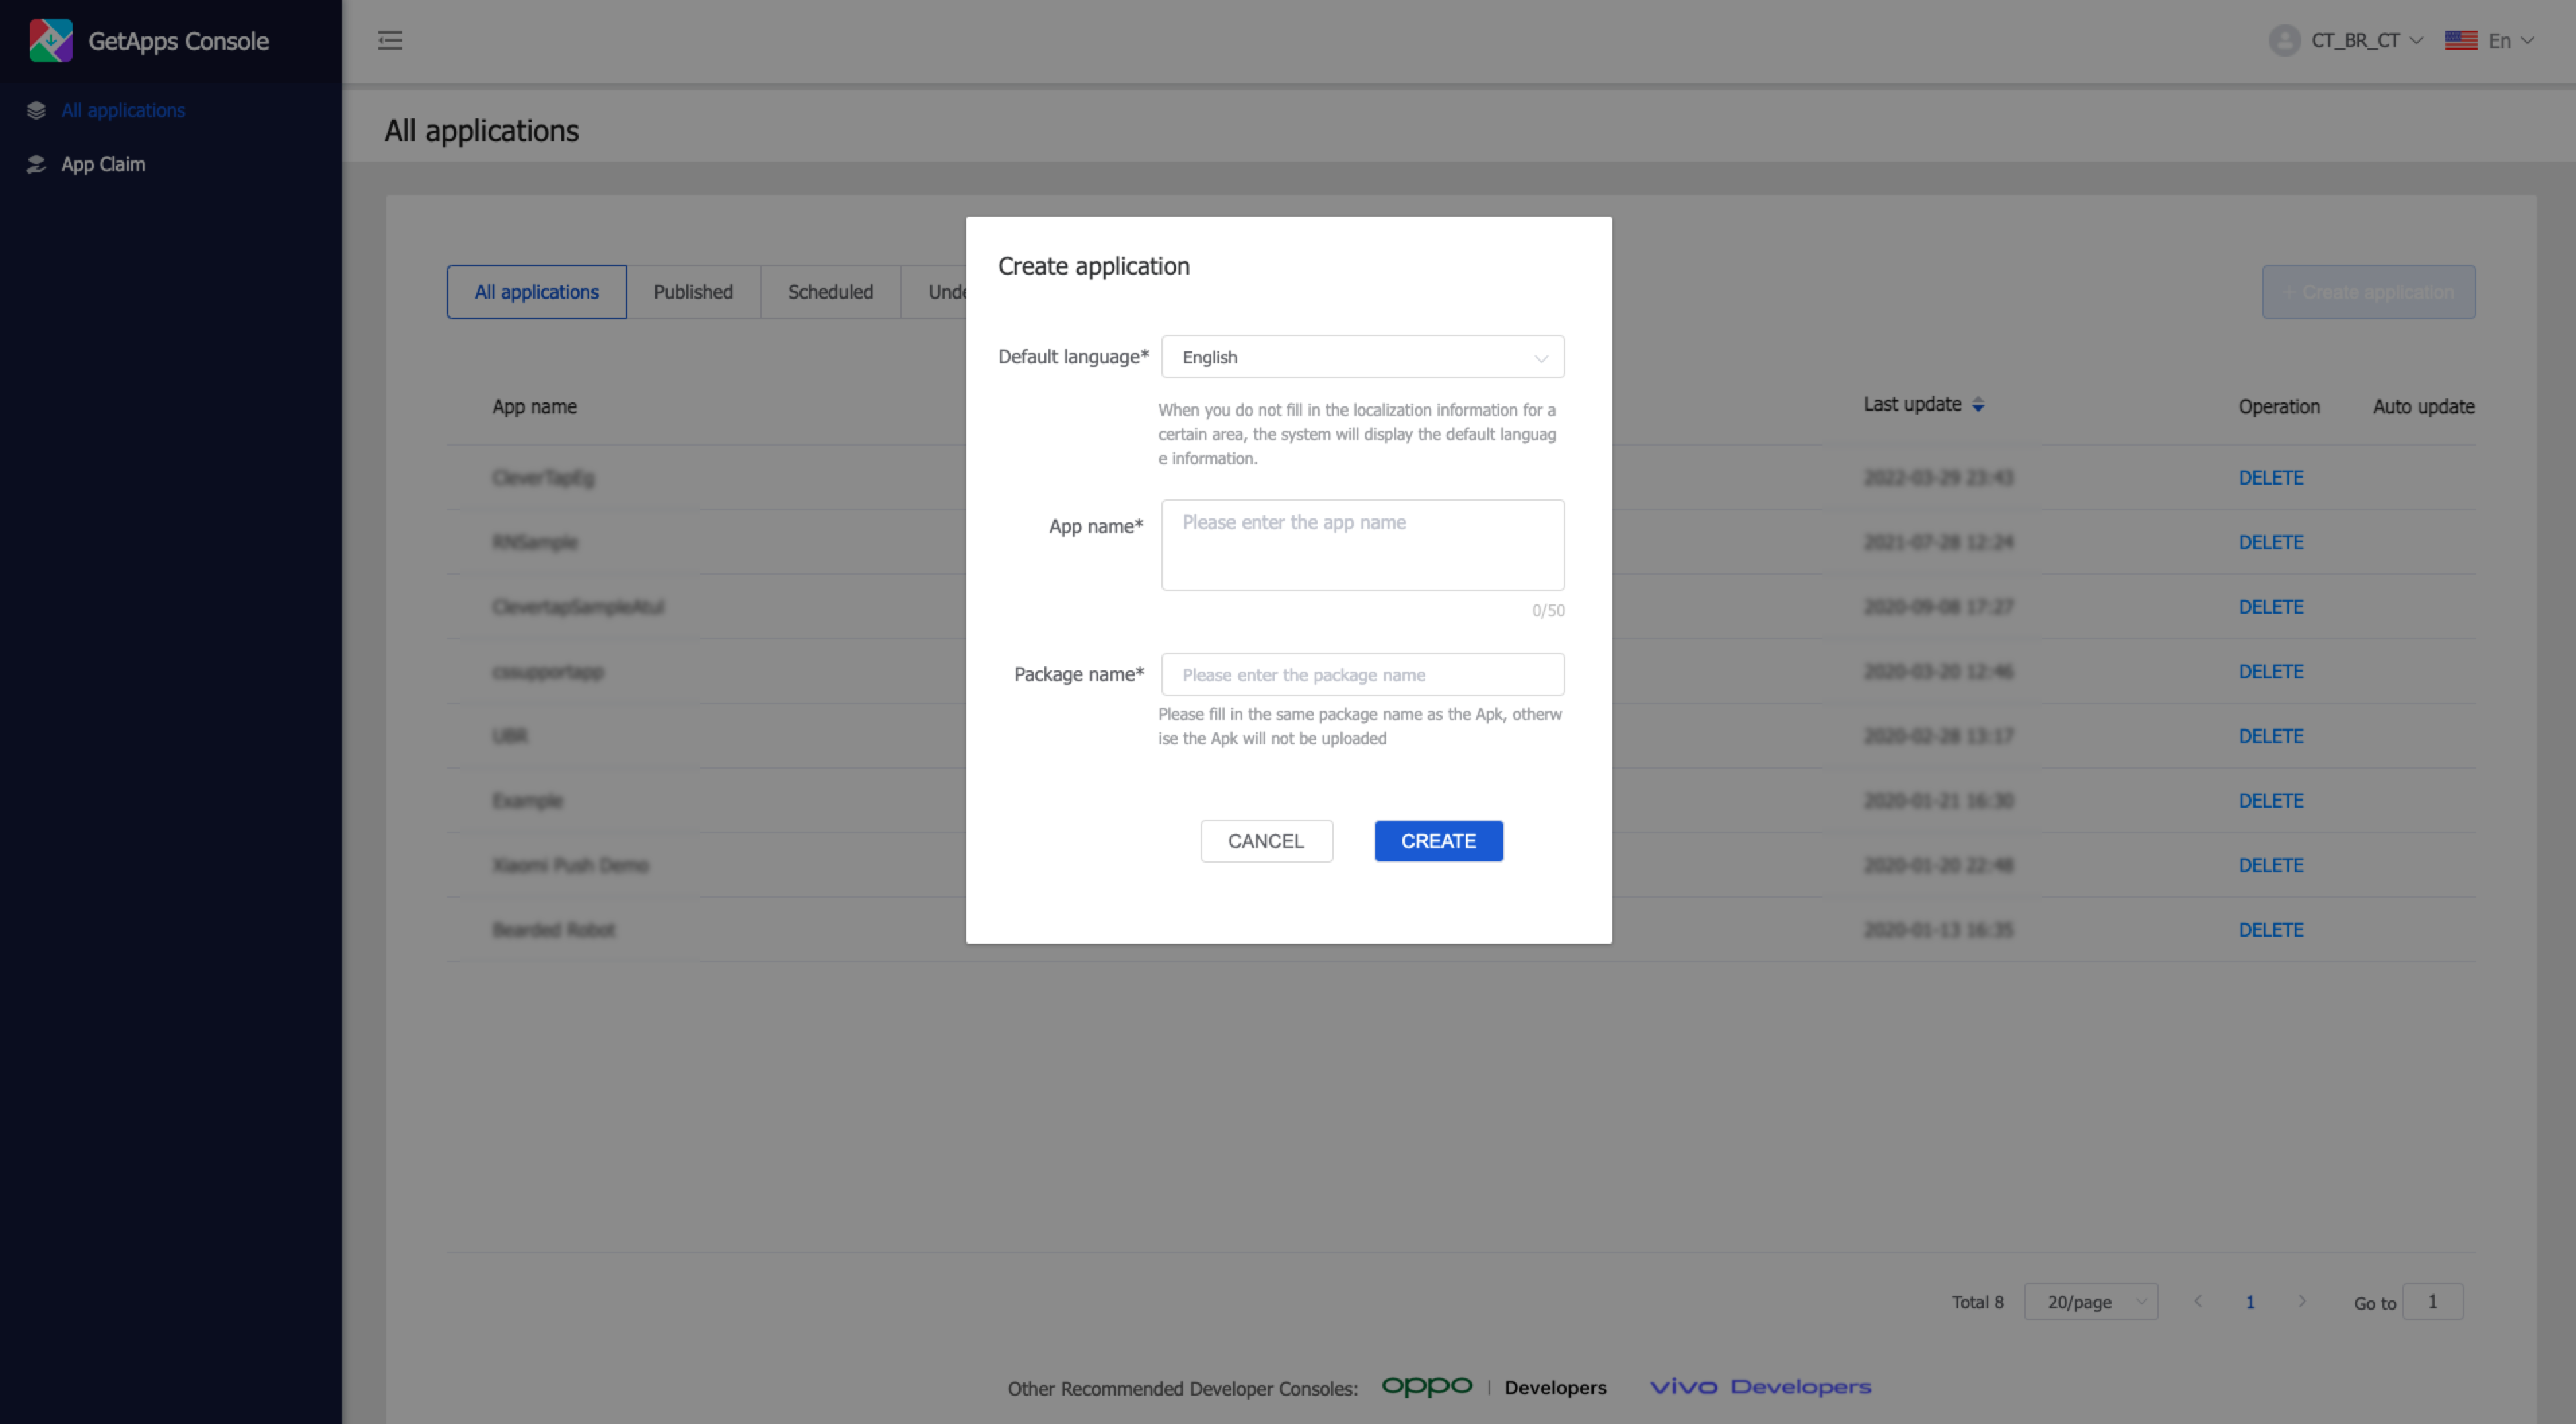
Once you log in to the console, click on Create App and enter the required details.

Create Application
Get the app's Package name/App ID / AppKey / App Secret
Once the App is created on your console, click on the App name to get your Package Name/App ID/ App Key/ App Secret. Among these, the AppID and AppKey are the client’s identity, used when the client SDK initializes; the AppSecret is authenticated for sending a message at the server-side.

Obtain the App Credentials
Click on Mi Push Console and click on Enable Push to enable push services for your app.

Enable Push Services for your App
IP WhitelistingIP Whitelisting is not supported with Mi Push integration.
Integrate Xiaomi Push SDK
Follow the steps to integrate the default Xiaomi push service provided by CleverTap.
Configure with CleverTap Xiaomi plugin
Configure AndroidManifest.xml file
It is easier to configure the Xiaomi push with our CleverTap plugin.
Mandatory Library Inclusion in Gradle DependenciesXiaomi Push SDK (XPS) v1.5.0 release makes it mandatory to include the Xiaomi Push library as a part of your Gradle dependencies.
To configure your app with CleverTap Xiaomi plugin:
-
Download the Xiaomi Push Library and add it to your app's lib folder (app/libs).
-
Add the CleverTap Xiaomi dependency and Xiaomi Push dependency in your app’s
build.gradlefile.
implementation "com.clevertap.android:clevertap-xiaomi-sdk:1.5.3"
implementation fileTree(include: ["*.jar", "*.aar"], dir: "libs")// or implementation files("libs/MiPush_SDK_Client_5_1_5-G_3rd.aar") for including only MiPush_SDK_Client_5_0_6 aar file
If you are using obfuscation for your builds, you might need to add the following lines in proguard rules, as required by Xiaomi SDK:
#Change xxx.DemoMessageRreceiver to the full class name defined in your app
-keep class xxx.DemoMessageReceiver {*;}

#SDK has been obfuscated and compressed to avoid class not found error due to re-obfuscation.
-keep class com.xiaomi.**

#If the compiling Android version you are using is 23, you can prevent getting a false warning which makes it impossible to compile.
-dontwarn com.xiaomi.push.**

-keep class com.xiaomi.mipush.sdk.MiPushMessage {*;}
-keep class com.xiaomi.mipush.sdk.MiPushCommandMessage {*;}
-keep class com.xiaomi.mipush.sdk.PushMessageReceiver {*;}
-keep class com.xiaomi.mipush.sdk.MessageHandleService {*;}
-keep class com.xiaomi.push.service.XMJobService {*;}
-keep class com.xiaomi.push.service.XMPushService {*;}
-keep class com.xiaomi.mipush.sdk.PushMessageHandler {*;}
-keep class com.xiaomi.push.service.receivers.NetworkStatusReceiver {*;}
-keep class com.xiaomi.push.service.receivers.PingReceiver {*;}
-keep class com.xiaomi.mipush.sdk.NotificationClickedActivity {*;}
minSDK Version Mandatory UpdateCleverTap Xiaomi Push SDK v1.5.0 release makes it mandatory to support minSdkVersion 19.
- Configure the
AndroidManifest.xmlfile.
<meta-data
    android:name="CLEVERTAP_XIAOMI_APP_KEY"
    android:value="@string/xiaomi_app_key" />

<meta-data
    android:name="CLEVERTAP_XIAOMI_APP_ID"
android:value="@string/xiaomi_app_id" />- Declare the Xiaomi App Key and your Xiaomi App ID in the res/strings.xml file.
<string name="xiaomi_app_key">Your Xiaomi App Key</string>
<string name="xiaomi_app_id">Your Xiaomi App ID</string>
From CleverTap Android SDK v4.5.0 and CleverTap Xiaomi Push SDK v1.4.0 onwards
-
Method to change credentials for the CleverTap Xiaomi Push SDK
CleverTapAPI.changeXiaomiCredentials(String xiaomiAppID, String xiaomiAppKey). This needs to be added beforeCleverTapAPIinstance creation. -
Method to run Xiaomi Push SDK on all devices, Xiaomi only devices or turn off push on all devices.
-
This needs to be added before
CleverTapAPIinstance creation.
// possible values are PushConstants.ALL_DEVICES, PushConstants.XIAOMI_MIUI_DEVICES,PushConstants.NO_DEVICES
// default is PushConstants.ALL_DEVICES
CleverTapAPI.enableXiaomiPushOn(PushConstants.XIAOMI_MIUI_DEVICES);
// possible values are PushConstants.ALL_DEVICES, PushConstants.XIAOMI_MIUI_DEVICES,PushConstants.NO_DEVICES
// default is PushConstants.ALL_DEVICES
CleverTapAPI.enableXiaomiPushOn(PushConstants.XIAOMI_MIUI_DEVICES)Configure Manually
Download the SDK from the Xiaomi Website. The Android SDK is provided in a JAR library, so the third party app only needs to add a small number of codes to adapt to the Mi Push service.
Use the following steps if you do not wish to use the CleverTap plugin to configure the Xiaomi push.
<uses-permission android:name="android.permission.INTERNET" />
<uses-permission android:name="android.permission.ACCESS_NETWORK_STATE" />
<uses-permission android:name="android.permission.ACCESS_WIFI_STATE" />
<uses-permission android:name="android.permission.READ_PHONE_STATE" />
<uses-permission android:name="android.permission.VIBRATE"/>

<!-- the following 2 yourpackage should be changed to your package name -->
    <permission
        android:name="yourpackage.permission.MIPUSH_RECEIVE"
        android:protectionLevel="signature" />
    <uses-permission android:name="yourpackage.permission.MIPUSH_RECEIVE" />
    <uses-permission android:name="android.permission.VIBRATE" />
<service
  android:enabled="true"
  android:process=":pushservice"
  android:name="com.xiaomi.push.service.XMPushService"/>
<service
  android:name="com.xiaomi.push.service.XMJobService"
  android:enabled="true"
  android:exported="false"
  android:permission="android.permission.BIND_JOB_SERVICE"
  android:process=":pushservice" />
<!--Note:This service must be added to the version 3.0.1 or later(including version 3.0.1)-->
<service
  android:enabled="true"
  android:exported="true"
  android:name="com.xiaomi.mipush.sdk.PushMessageHandler" />
<service android:enabled="true"
  android:name="com.xiaomi.mipush.sdk.MessageHandleService" />
<!--Note:this service must be added to version 2.2.5 or later (includes version 2.2.5)-->
<receiver
  android:exported="true"
  android:name="com.xiaomi.push.service.receivers.NetworkStatusReceiver" >
  <intent-filter>
    <action android:name="android.net.conn.CONNECTIVITY_CHANGE" />
 <category android:name="android.intent.category.DEFAULT" />
</intent-filter>
</receiver>
<receiver
  android:exported="false"
  android:process=":pushservice"
  android:name="com.xiaomi.push.service.receivers.PingReceiver" >
  <intent-filter>
<action android:name="com.xiaomi.push.PING_TIMER" />
  </intent-filter>
</receiver>
Implement a BroadcastReceiver class
In order to receive messages, you must implement a BroadcastReceiver inherited from PushMessageReceiver and realize all required methods in it: onReceivePassThroughMessage, onNotificationMessageClicked, onNotificationMessageArrived, onCommandResult, and onReceiveRegisterResult, and then register your receiver in the AndroidManifest.xml file. Method onReceivePassThroughMessage is used to receive transparent messages sent by the server.
Pass token and region to CleverTap
In your MainActivity’s onCreate method, pass the token and region to CleverTap using the following code:
MiPushClient.registerPush(this, APP_ID, APP_KEY);
String xiaomiToken = MiPushClient.getRegId(this);
String xiaomiRegion = MiPushClient.getAppRegion(context);

if(cleverTapAPI != null){
    cleverTapAPI.pushXiaomiRegistrationId(xiaomiToken, xiaomiRegion, true);
}else{
    Log.e(TAG,"CleverTap is NULL");
}
MiPushClient.registerPush(this, APP_ID, APP_KEY)
val xiaomiToken = MiPushClient.getRegId(this)
val xiaomiRegion = MiPushClient.getAppRegion(context)
if (cleverTapAPI != null)
{
cleverTapAPI.pushXiaomiRegistrationId(xiaomiToken, xiaomiRegion, true)
}
else
{
Log.e(TAG, "CleverTap is NULL")
}
NoteEnsure to call the
setRegion()method to provide the device region to Xiaomi. For more information, refer to the Xiaomi documentation.
Receive Push Notifications from CleverTap
In the onReceivePassThroughMessage method, write the following code for CleverTap to render push notification and raise the Notification Viewed event.
@Override
    public void onReceivePassThroughMessage(Context context, MiPushMessage message) {
    try {
            String ctData = message.getContent();
            Bundle extras = Utils.stringToBundle(ctData);
            CleverTapAPI.createNotification(context,extras);

        } catch (JSONException e) {
            e.printStackTrace();
        }
    }
fun onReceivePassThroughMessage(context:Context, message:MiPushMessage) {
try
{
val ctData = message.getContent()
val extras = Utils.stringToBundle(ctData)
CleverTapAPI.createNotification(context, extras)
}
catch (e:JSONException) {
e.printStackTrace()
}
}From CleverTap Xiaomi SDK v1.2.0 onwards, you can replace the above code with the following:
@Override
    public void onReceivePassThroughMessage(Context context, MiPushMessage message) {

 CTXiaomiMessageHandler().createNotification(getApplicationContext(),message);
    }
fun onReceivePassThroughMessage(context:Context, message:MiPushMessage) {
CTXiaomiMessageHandler().createNotification(applicationContext,message)
}
NoteFrom CleverTap Android SDK v5.1.0 onwards, the following API now runs on the caller's thread. Ensure to call it in
onReceivePassThroughMessage()of messaging service:
CTXiaomiMessageHandler().createNotification(getApplicationContext(), message)CleverTapAPI.createNotification(getApplicationContext(),extras);
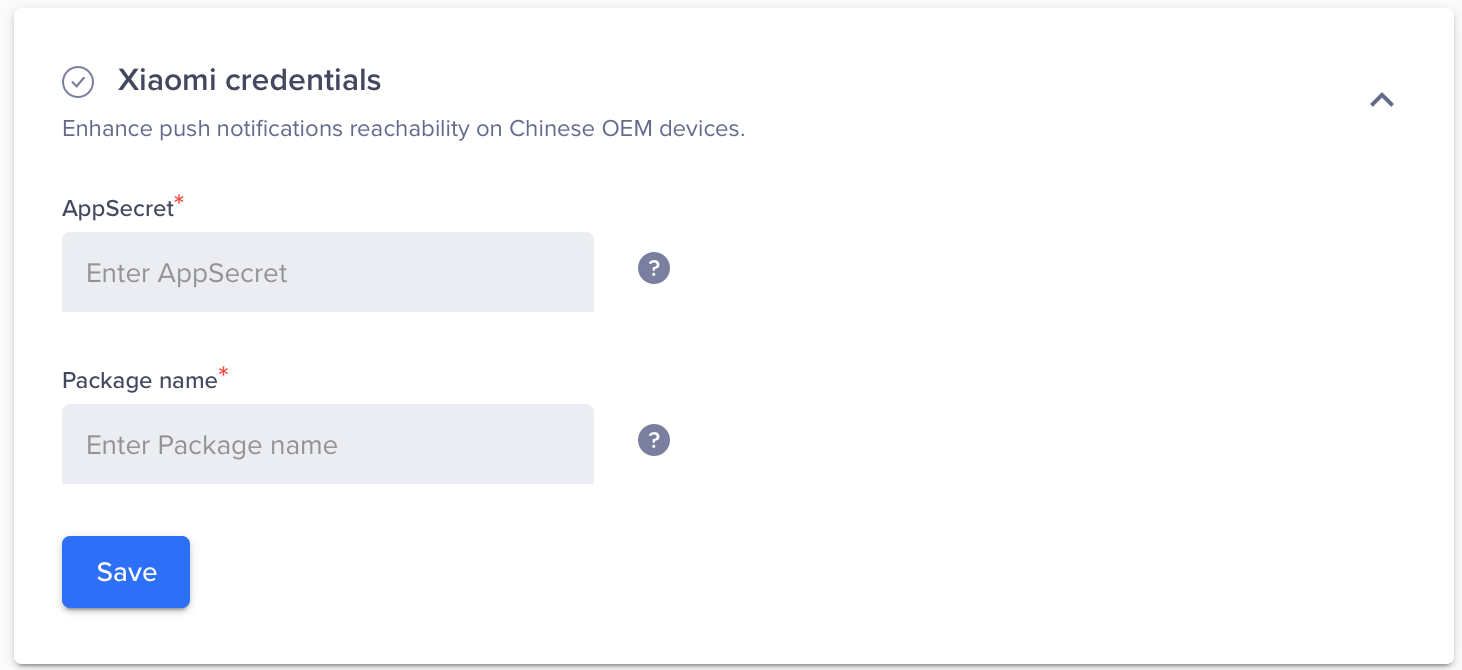
Update AppSecret / Package Name in Settings Dashboard

Update Xiaomi Credentials on Dashboard
Updated about 2 months ago
