Web Push
Learn about the basic configurations for Web Push channel
Overview
Web push notifications are browser-based messages that allow you to reach users directly on their devices, even when they are not actively browsing your website. Using CleverTap’s advanced segmentation capabilities and powerful infrastructure, you can send time-sensitive, relevant, and personalized push messages at scale.
The latest Voluntary Application Server Identification (VAPID) protocol for Web Push enables secure communication between your server and CleverTap, by proving the server’s identity with VAPID keys.
Supported Browsers and Devices
Web push notifications are supported on the following browsers:
| Browser | Windows | Android | iOS (iPhone, iPad) | macOS |
|---|---|---|---|---|
| Google Chrome | Yes | Yes | Yes | Yes |
| Mozilla Firefox | Yes | Yes | Yes | Yes |
| Safari | N/A | N/A | Yes | Yes |
Following are the supported browser versions:
| Browser | Version number |
|---|---|
| Google Chrome | v42 and above (desktop and android) |
| Mozilla Firefox | v44 and above (desktop), v48 (android) |
| Safari | v16 and above (macOS), v16.4 (iOS) |
Note
HTTPS Requirement: Web push notifications function only on sites served over HTTPS.
Incognito/Private Browsing: Web push does not operate in Incognito or Private Browsing mode.
In-App Browsers: Browsers embedded within apps (such as Facebook, Instagram, etc.) do not support web push notifications.
Android WebViews: Web push is not supported within Android WebViews.
Features Availability across Browsers
Note the following features available across Chrome, Firefox, and Safari browsers:
| Feature | Chrome | Firefox | Safari |
|---|---|---|---|
| CTA | v53 and above (desktop, android) | No | No |
| Icon | v33 and above (desktop), v42 and above (android) | v26 and above (desktop, android) | No |
| Image | v56 and above (desktop, android) | No | No |
| Requires Interaction | v47 and above (desktop, android) | v117 and above (desktop, android) | No |
For more information on the additional features, refer to Notifications API.
Web Push Configuration
Following are the four major steps involved in the Web Push configuration process:
- Generating VAPID keys
- Uploading VAPID Keys in CleverTap
- Adding the Service Worker file
- Requesting User Permissions
NoteIf you are still using Chrome FCM or Safari APNS, refer to Web Push (Legacy) for detailed steps. We recommend migrating to the latest protocols for enhanced functionality and support.
Generating VAPID keys
Generating VAPID keys is a one-time setup process. You can follow Legacy or VAPID protocol for generating VAPID keys.
Version requirements for VAPID-based Web Push notificationsThis feature is supported only in CleverTap Web SDK versions 1.1.0 and above. To check your Web SDK version, use the
clevertap.getSDKVersionmethod.
Using npm package web-push
The VAPID keys can be generated using the npm package named web-push (recommended).
For example, to add VAPID keys using the npm package, refer to web-push generate-vapid-keys:
Public Key:
BCCW5bb7HgyST570k0LwvSLoUH6GkNMLYmGek5eXA-DZMn8J5Rt9EfdszmMqg60tpcYuP9jmXq3xDPAdAebb538
Private Key:
dZq613Sfk_®_JCzqIFWhDtW6mabuR11VtEoBRXiSYA
Using Firebase Console
The public and private key pair can be generated from Firebase with the following steps:
- In the Firebase console, navigate to your Project > Project Settings > Cloud Messaging > Web Configuration.
- Click Generate key pair.

Generating VAPID Keys
Uploading VAPID Keys in CleverTap
For all the browsers, user needs to enable the radio button to actually enable web push for that browser. To add the VAPID keys in the CleverTap dashboard, follow the steps below:
Chrome
- In the CleverTap dashboard, navigate to Settings > Engage > Channels > Web Push.
- Under the Chrome Web Push section, add your generated public and private key pairs.
- Click Save.
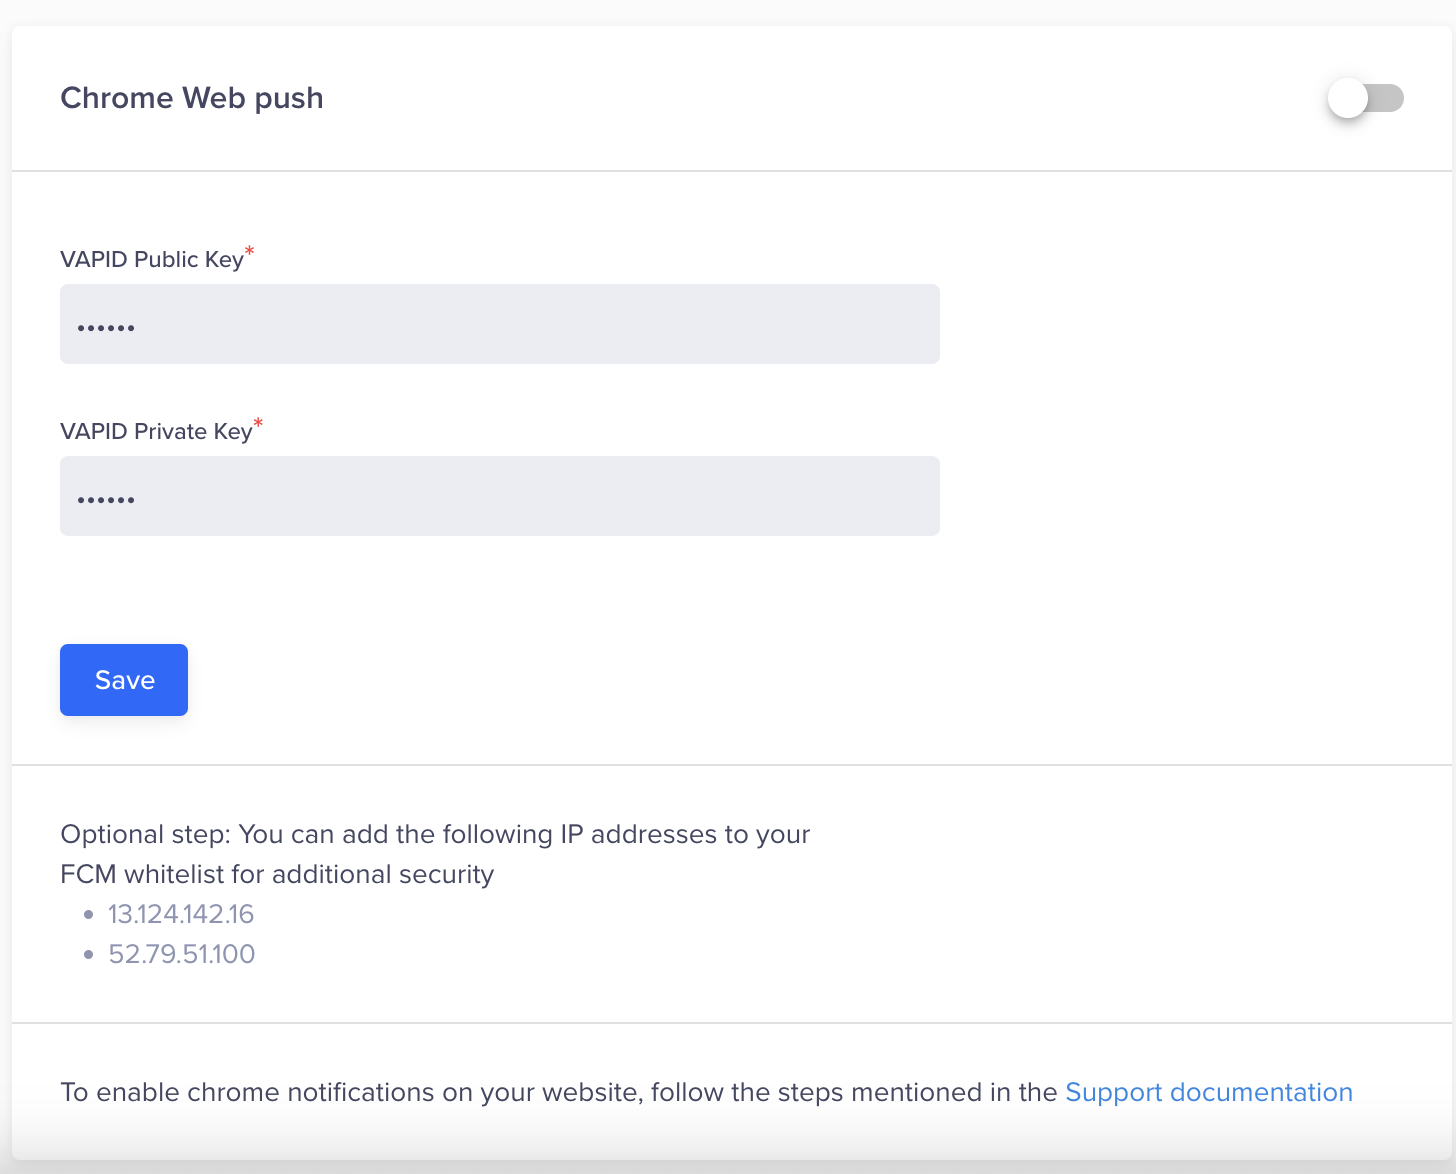
Add Public and Private Key Pairs for Chrome
Firefox
- In the CleverTap dashboard, navigate to Settings > Engage > Channels > Web Push.
- Under the Firefox Web Push section, add your generated VAPID public and private key pairs.
- Click Save.

Add Public and Private Key Pairs for Firefox
Safari
- In the CleverTap dashboard, navigate to Settings > Engage > Channels > Web Push.
- Under the Safari Web Push section, add your generated public and private key pairs.
- Click Save.
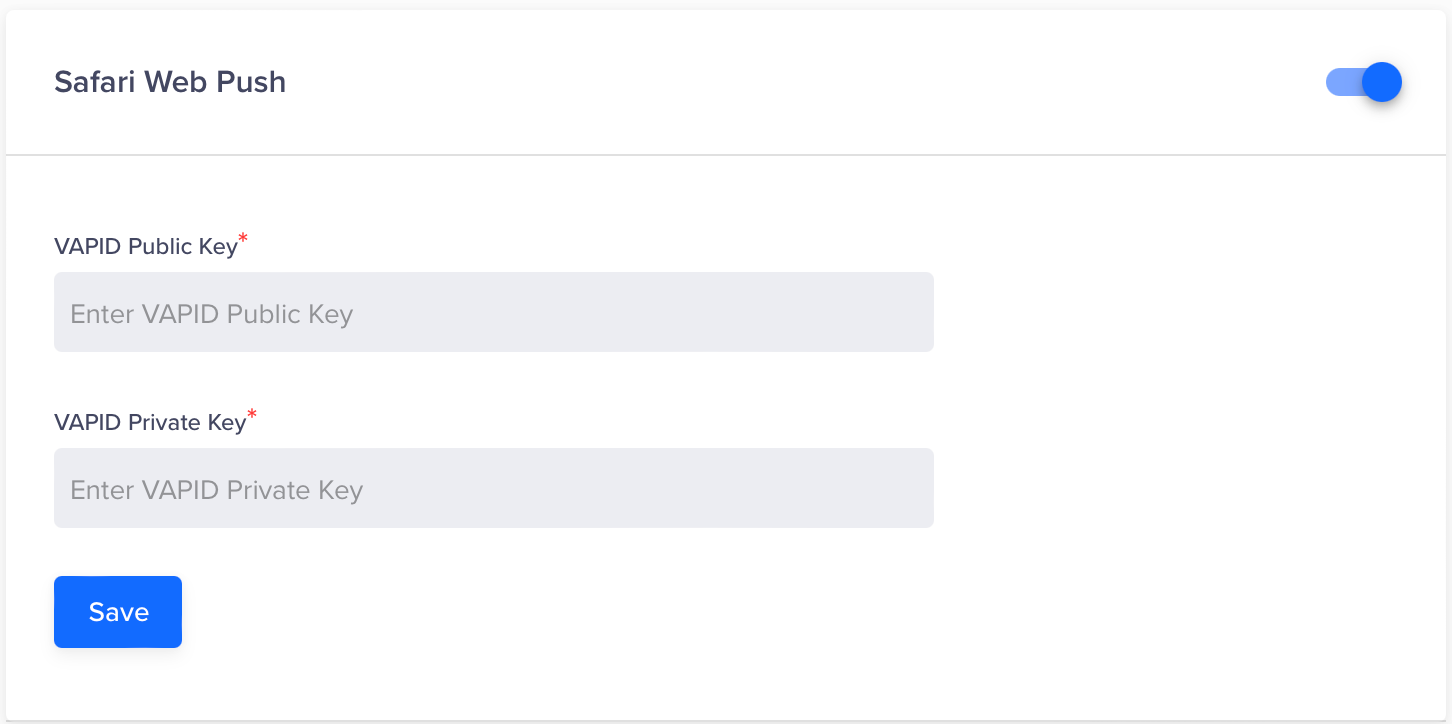
Add Public and Private Keys for Safari
Adding the Service Worker file
This section applies to Chrome, Firefox, and Safari browsers. Browser push notifications uses 'Service Worker', a special script that listens for web pushes. Since the browser manages the execution of these scripts in the background, users can receive push notifications from your website even when they are not on your site.
To get started, follow the steps below:
- Download the service worker file provided here - clevertap_sw.js .
- You must host this file in your document root. Keep the file name - clevertap_sw.js to ensure all the functionalities work as expected.
- Copy it to your website's document root to make it publicly accessible.
Integration with Existing Service Worker File
Import CleverTap's service worker at the start of your existing service worker. Add the following code snippet:
importScripts('https://s3-eu-west-1.amazonaws.com/static.wizrocket.com/js/sw_webpush.js');// remove CleverTap server worker from your root folder
Migrating Tokens with CleverTapThis script will also handle the migration of the tokens from your previous service provider. For more information about migration, refer to Migrating from other services.
Requesting User Permissions
This section applies to all browsers, such as Chrome, Firefox, and Safari. Now that you have a service worker and manifest set up, it is time to start asking users if they want to subscribe to web pushes. For flexibility, CleverTap provides you with the ability to ask for notifications based on context and user actions.
As a general rule, we highly recommend asking for permission from users only after they have spent some time on your website and completed action of significance. Do not ask new users to subscribe to notifications as soon as they land on your site.
For example, after a user has completed a transaction, you may call the function below:
clevertap.notifications.push({
   	"titleText": "Would you like to receive Push Notifications?",
   	"bodyText": "We promise to only send you relevant content and give you updates on your transactions",
   	"okButtonText": "Sign me up!",
   	"rejectButtonText": "No thanks",
   	"okButtonColor":"#F28046",
   	"askAgainTimeInSeconds":5,
  	"serviceWorkerPath": "/foo/my_sw.js" // path to your custom service worker file
  });
If a user blocks the native Chrome, Firefox, and Safari permissions pop-up, the user is lost forever unless the user clears their browser settings; however, if you are using the CleverTap pop-up, you get the advantage of asking the same user again for permission after a defined period.
Permission Frequency
To ensure that users are not asked for permission too frequently, our API ensures that calling clevertap.notifications.push does nothing if the user has rejected the dialog less than one week ago. Once a week has passed by, calling the function will display the dialog as expected. This eliminates the need for you to implement a separate check before calling the function.
Soft Prompt Setup
Before calling the Soft Prompt for Web Push, you must first enable it in the CleverTap dashboard. To enable, follow the steps below:
- From the CleverTap dashboard, go to Settings > Channels > Web push. Click Soft Prompt.
- Toggle the Card Popup radio button to enable the prompt.
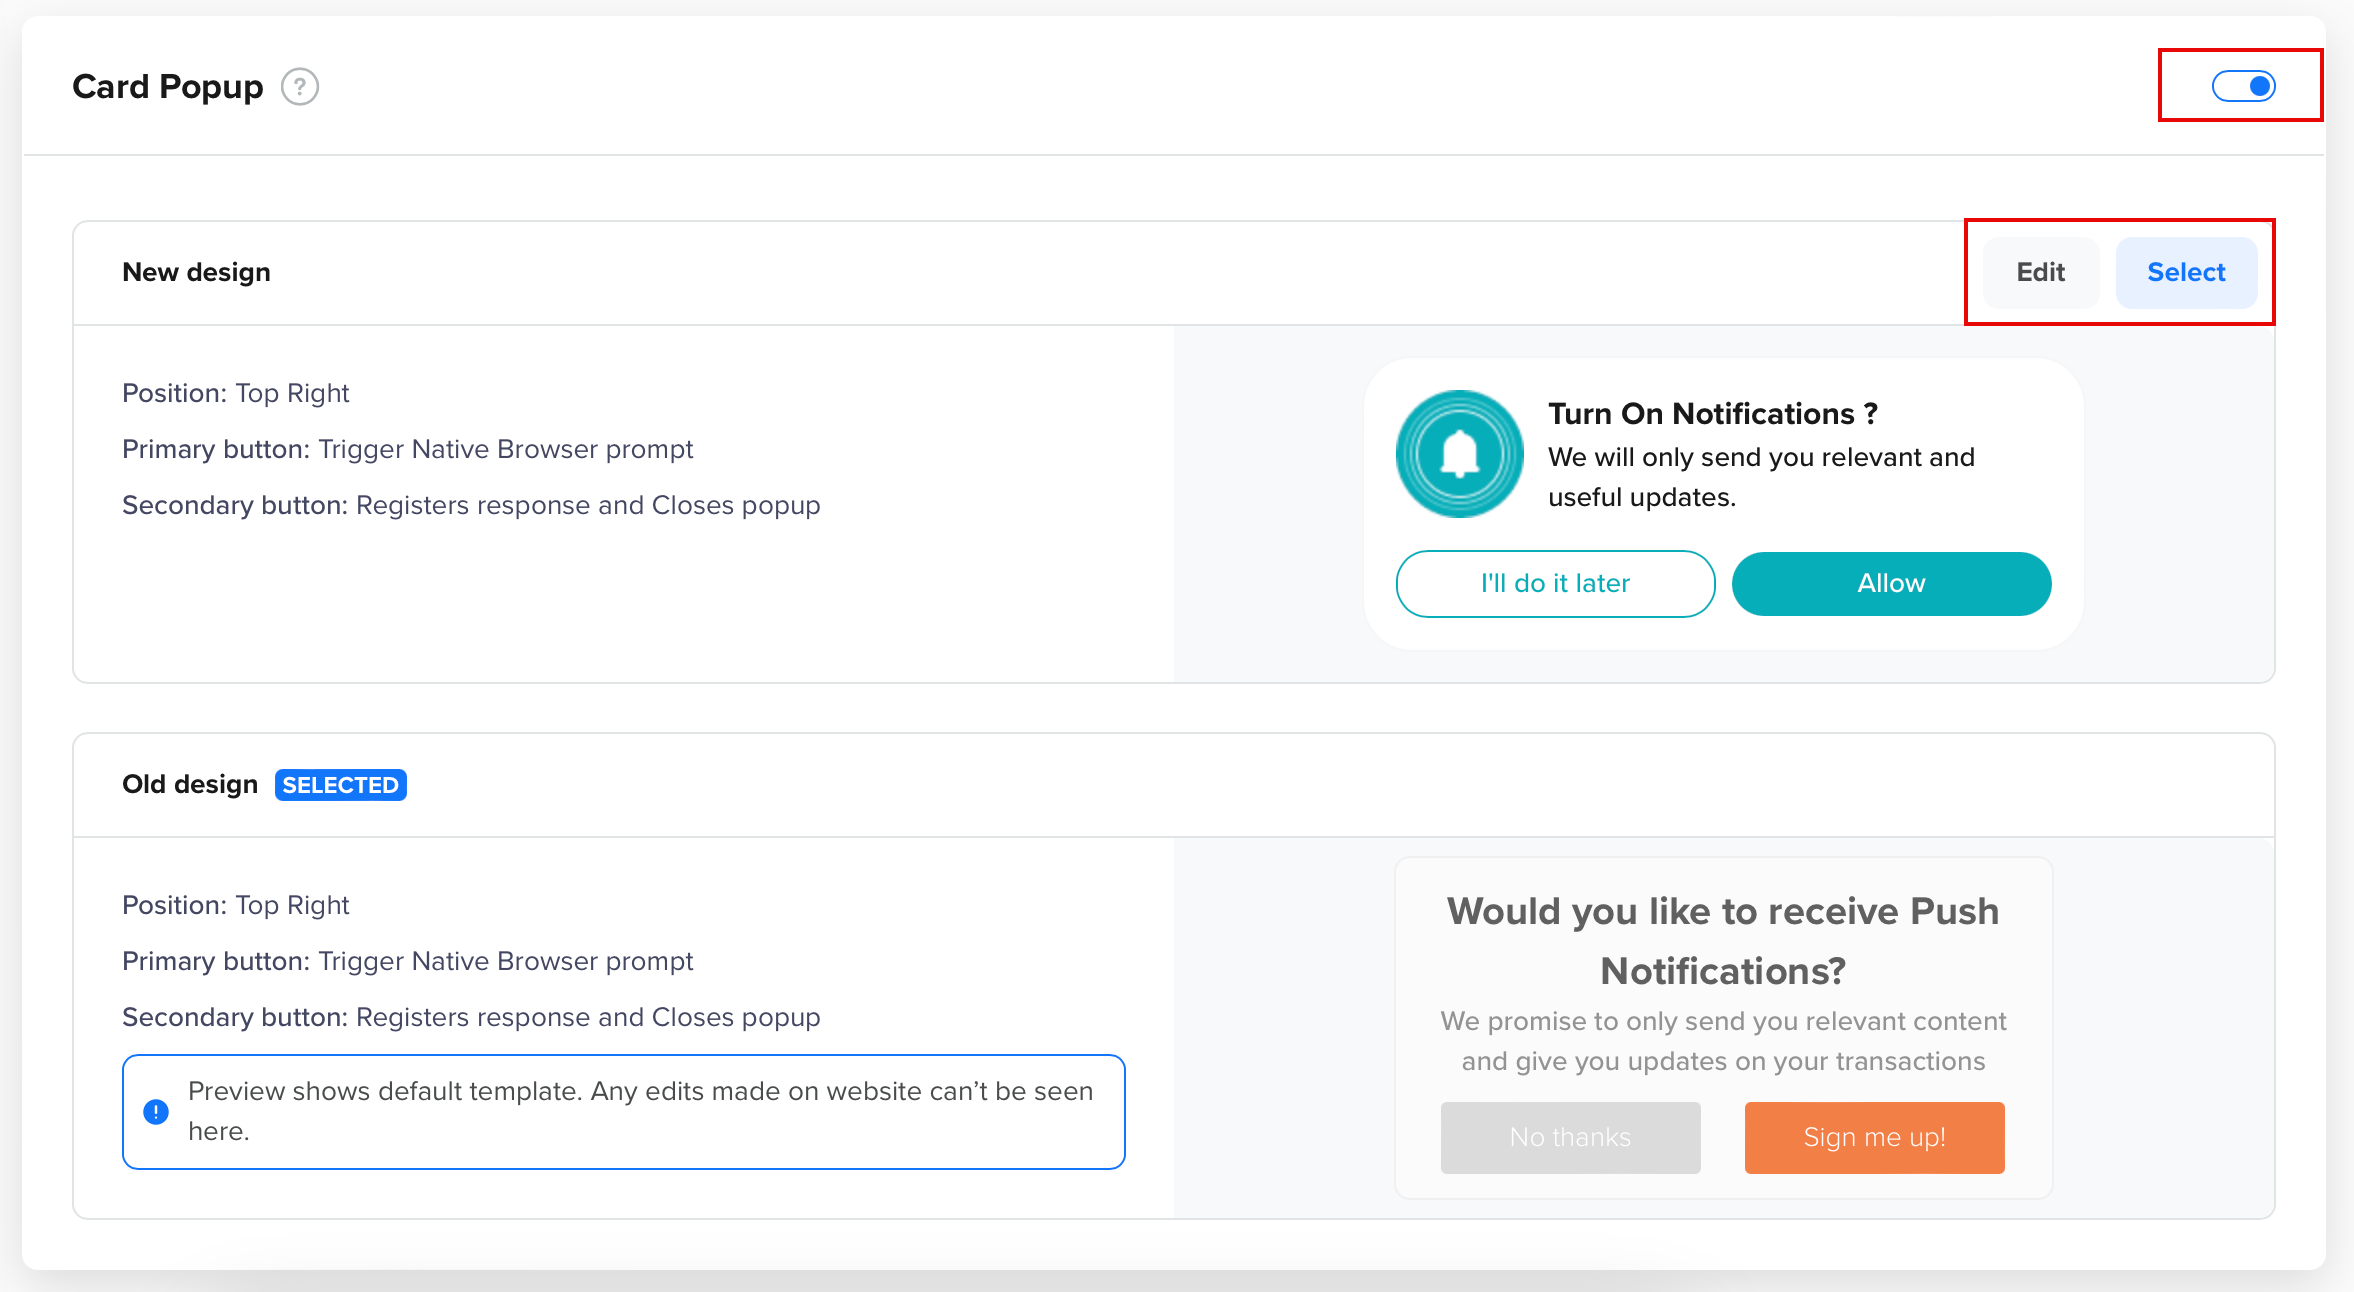
Soft Prompt
- Configure the prompt options as needed (title, body text, appearance, and so on).
- Save your changes.
Once enabled, you can use the SDK to call the Soft Prompt in your app. For more information, refer to Soft Prompt.
NoteThe setup step is required. If the Soft Prompt is not enabled in the dashboard, calling the prompt through the SDK will not display it.
iOS/iPadOS Web Push Configurations
Once you have completed the above steps, proceed with the following configurations to enable web push notifications on Safari for iOS and iPadOS devices.
NoteFor Shopify Plugin customers, this feature is currently not supported out of the box. Please follow the steps below to enable web push for iOS and iPadOS.
Following are the five major steps involved in the iOS/iPadOS Web Push configuration process:
- Creating a Manifest File
- Linking the Manifest File
- Adding a Service Worker
- Adding to Home Screen
- Displaying the Native Push Prompt
Creating a Manifest File
A web app manifest file is a JSON-formatted text file that provides metadata about your web app, including how it should appear once installed. It is essential for enabling web push notifications on iOS. Create a manifest.json file in your website’s root directory:
{
  "name": "CleverTap PWA App",
  "short_name": "CTPWA",
  "display": "standalone",
  "theme_color": "#your_theme_color",
  "background_color": "#your_background_color",
  "icons": [{
    "src": "/icon-512x512.png",
    "sizes": "512x512",
    "type": "image/png"
  }]
}
Linking the Manifest File
Add the following <link> tag to the <head> element of your website to reference the manifest file:
<link rel="manifest" href="/manifest.json" />Adding a Service Worker
This process is the same as the standard web push notifications integration. For detailed steps, refer to Service Worker Integration.
Adding to Home Screen
Unlike significant browsers such as Chrome and Firefox, Safari on iOS/iPadOS requires users to add your web app to their Home Screen before they can request push notification permissions.
The "Add to Home Screen" feature allows users to bookmark your website and display your app’s icon on their home screen.
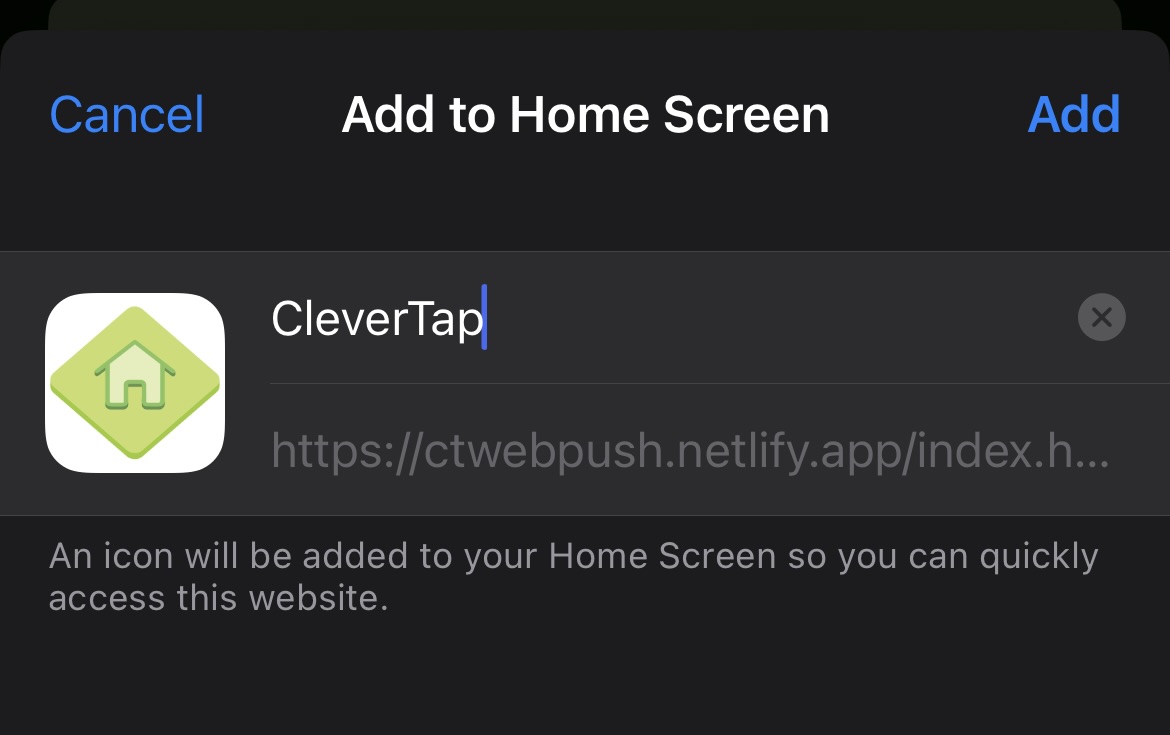
Add to Home Screen
Displaying the Native Push Prompt
Web apps added to the Home Screen require direct user interaction to request push notification permissions.
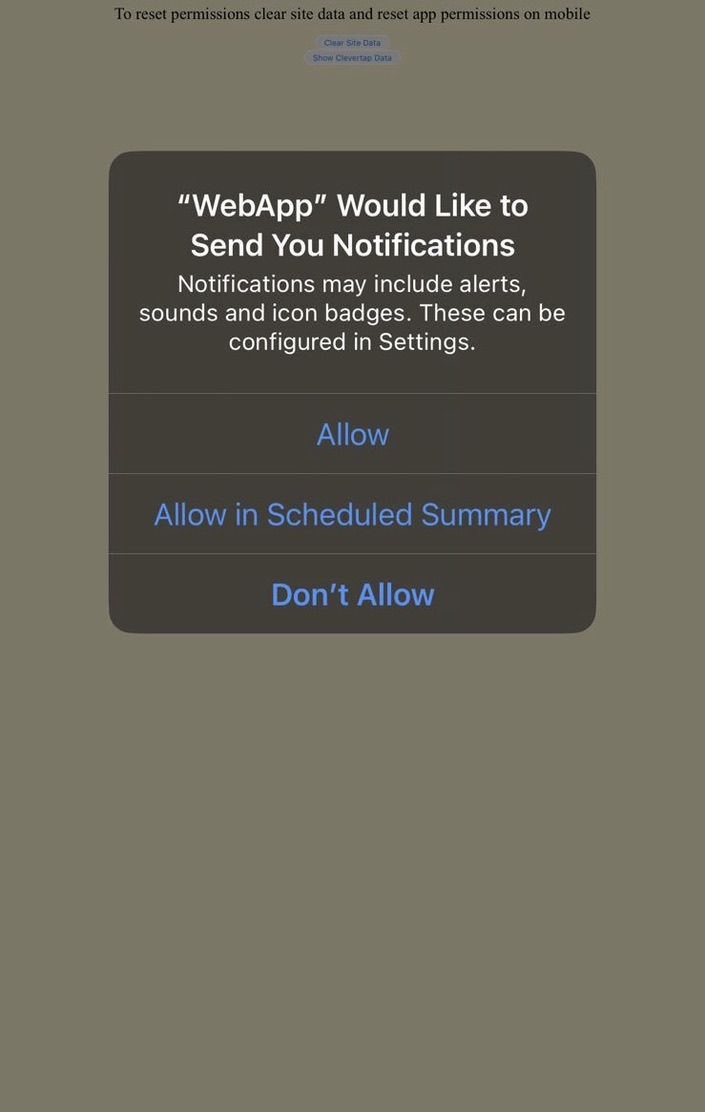
Native Prompt

Push Notification Opt-In
Shopify Web Push Configurations for iOS/iPadOS
To configure Web Push for your Shopify website, follow these steps:
Creating a Manifest File
You require a manifest.json file to enable Shopify web push configurations. Refer to the manifest file for iOS/iPadOS Web Push Configurations, and add it to your Shopify theme’s assets folder.

Shopify Theme Folders
Linking the Manifest File
Open the theme.liquid file in your Shopify folders. Add the following <link> tag to the <head> element to reference the manifest file:
<link rel="manifest" href="{{ 'manifest.json' | asset_url }}">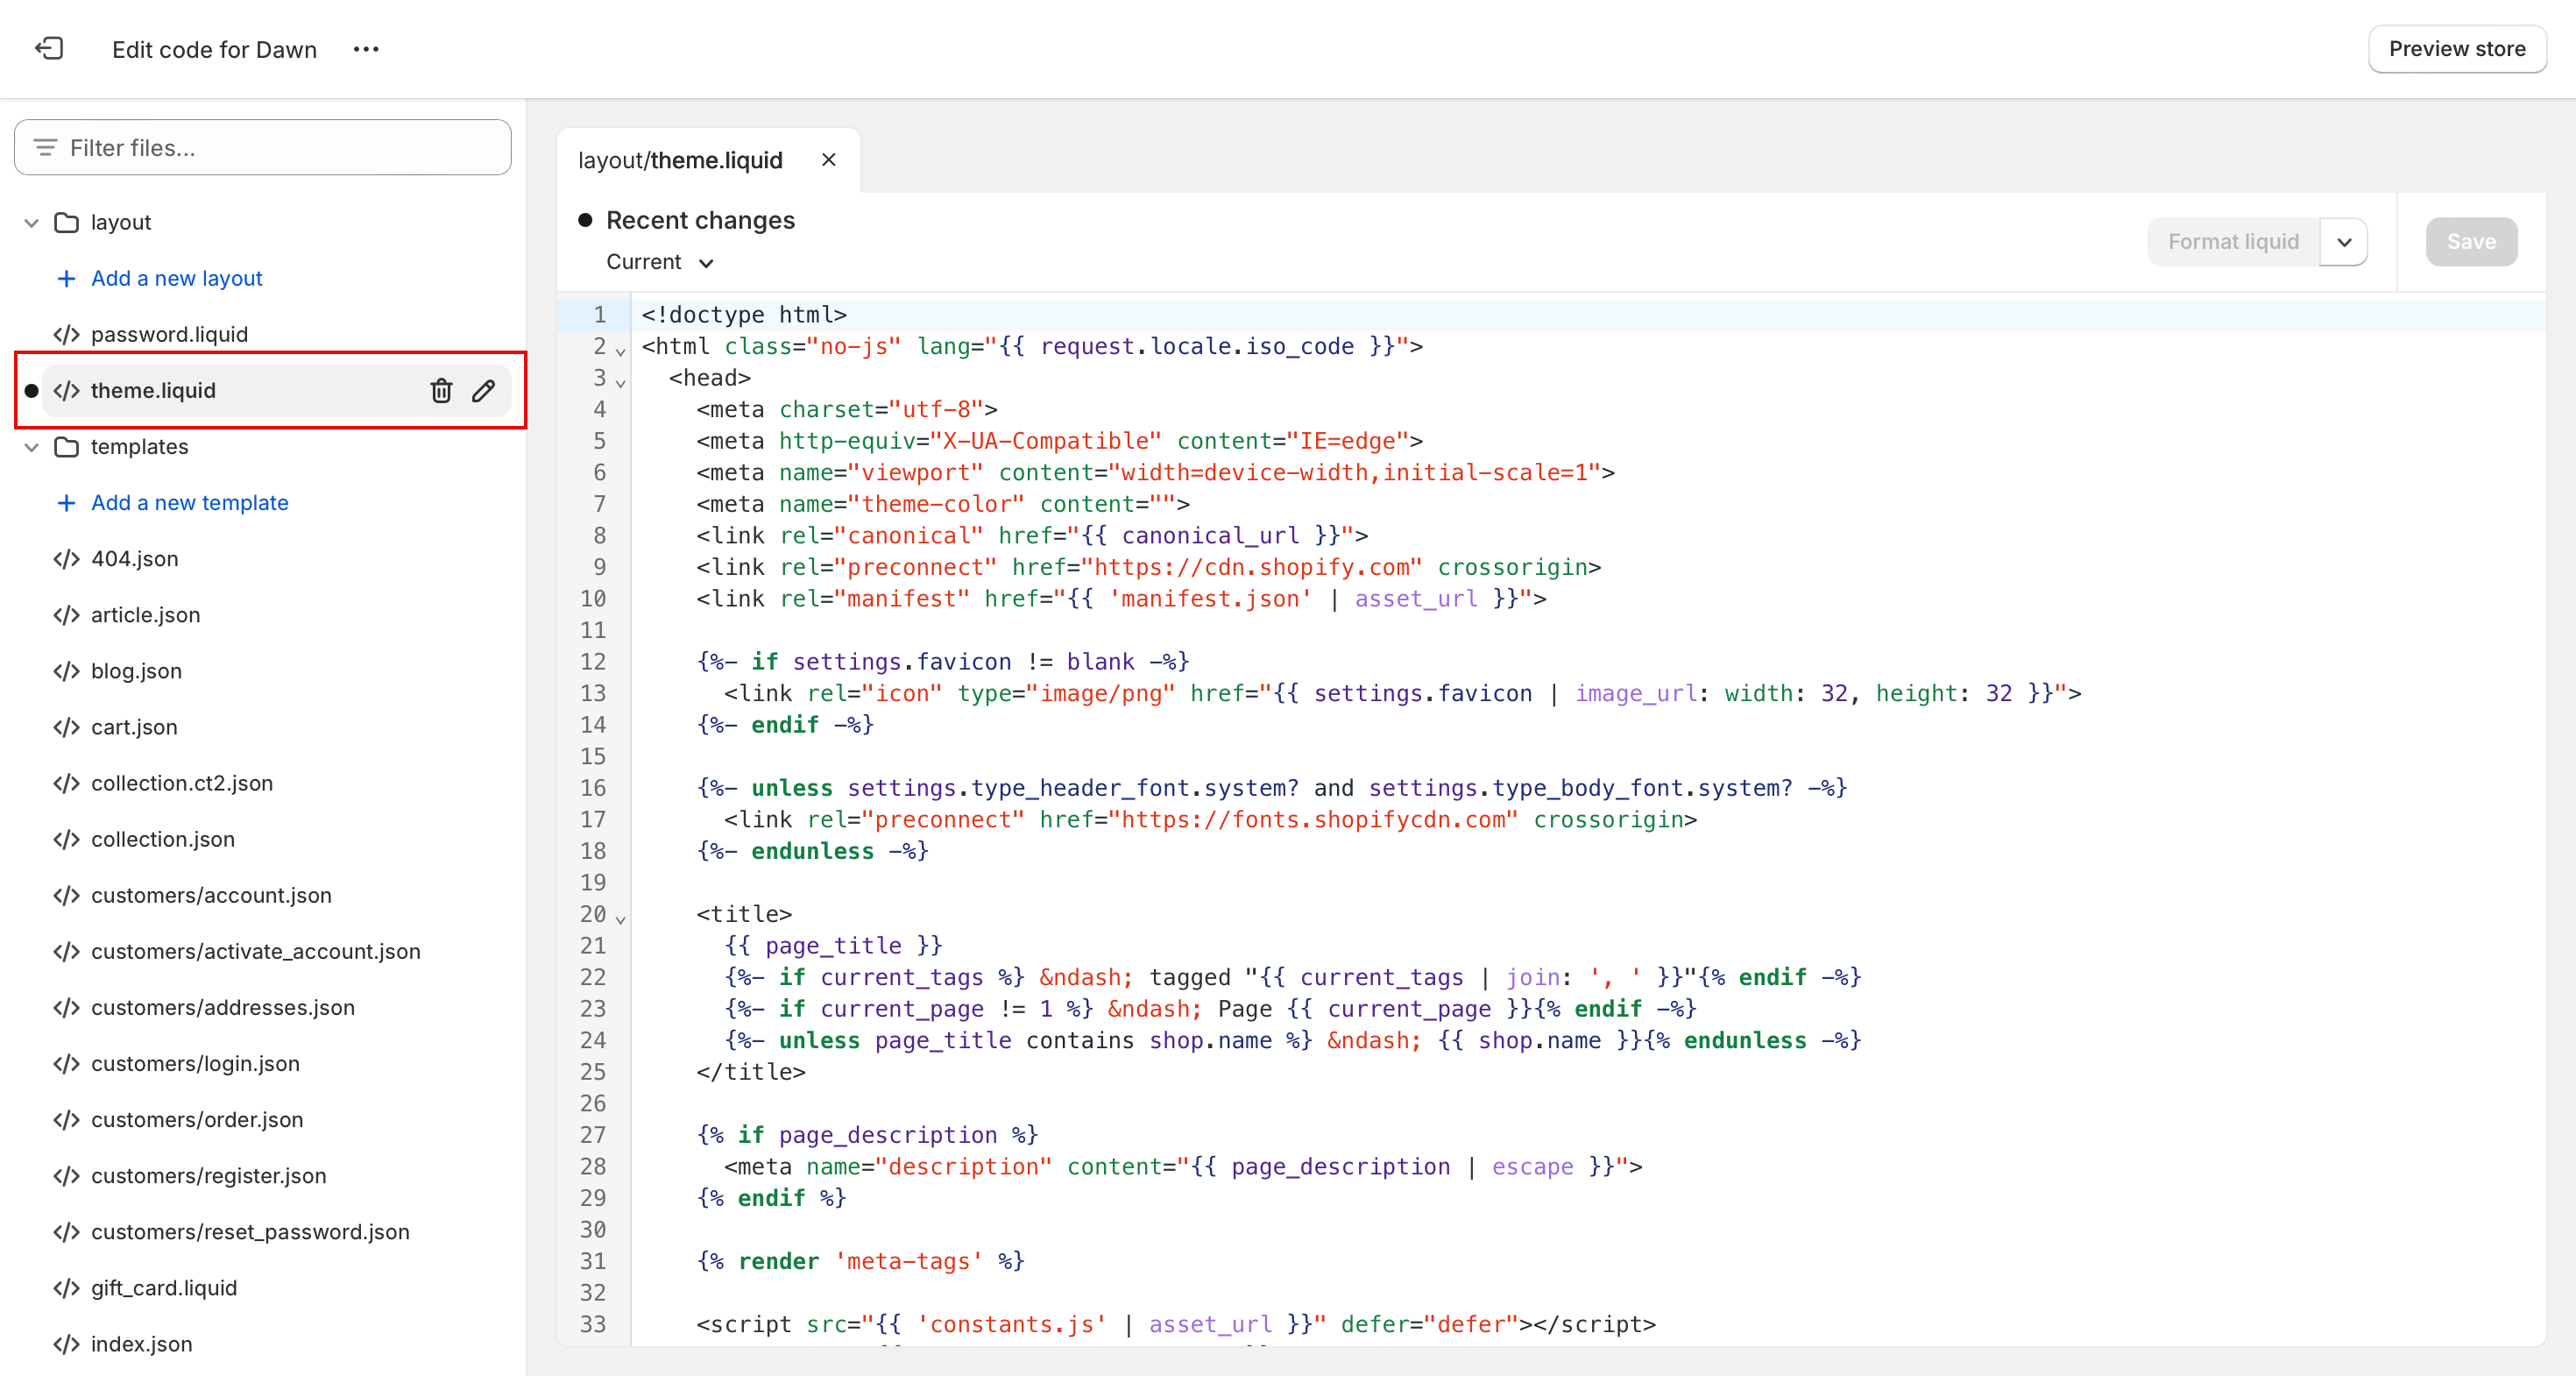
Theme.Liquid File
NoteBeyond these two steps, no additional setup is required. Web Push prompts and permissions are handled during user interaction.
For more information about Shopify dashbaord, refer to Shopify: Themes.
Migrating from Other Services
This section applies to Chrome, Firefox, and Safari browsers. If you are migrating from a different web push notifications provider, you may be concerned about asking subscribed users to enable notifications a second time.
Migrating Subscribed Users
The parent service worker will automatically migrate tokens from previous service providers and handle Web Push notifications.
Case 1: Existing Users - Registered with the previous service provider
If a user has already accepted receiving Web Push notifications on your domain through previous service provider, calling clevertap.notifications.push will not display the soft-prompt to that particular user and the user token is migrated automatically to CleverTap.
Case 2: Existing Users - Not registered with the previous service provider
The user token is not generated if a user has declined to receive Web Push notifications on your domain through a previous service provider. Therefore, calling clevertap.notifications.push will not display the soft-prompt to that particular user.
Case 3: New Users
Calling clevertap.notifications.push will display the soft-prompt for that particular user. If the user accepts receiving Web Push notifications, the user token is generated, and this user is registered with Clevertap.
Updated 7 months ago