Web Native Display
Learn about the configurations required to set up web native display on your website.
Overview
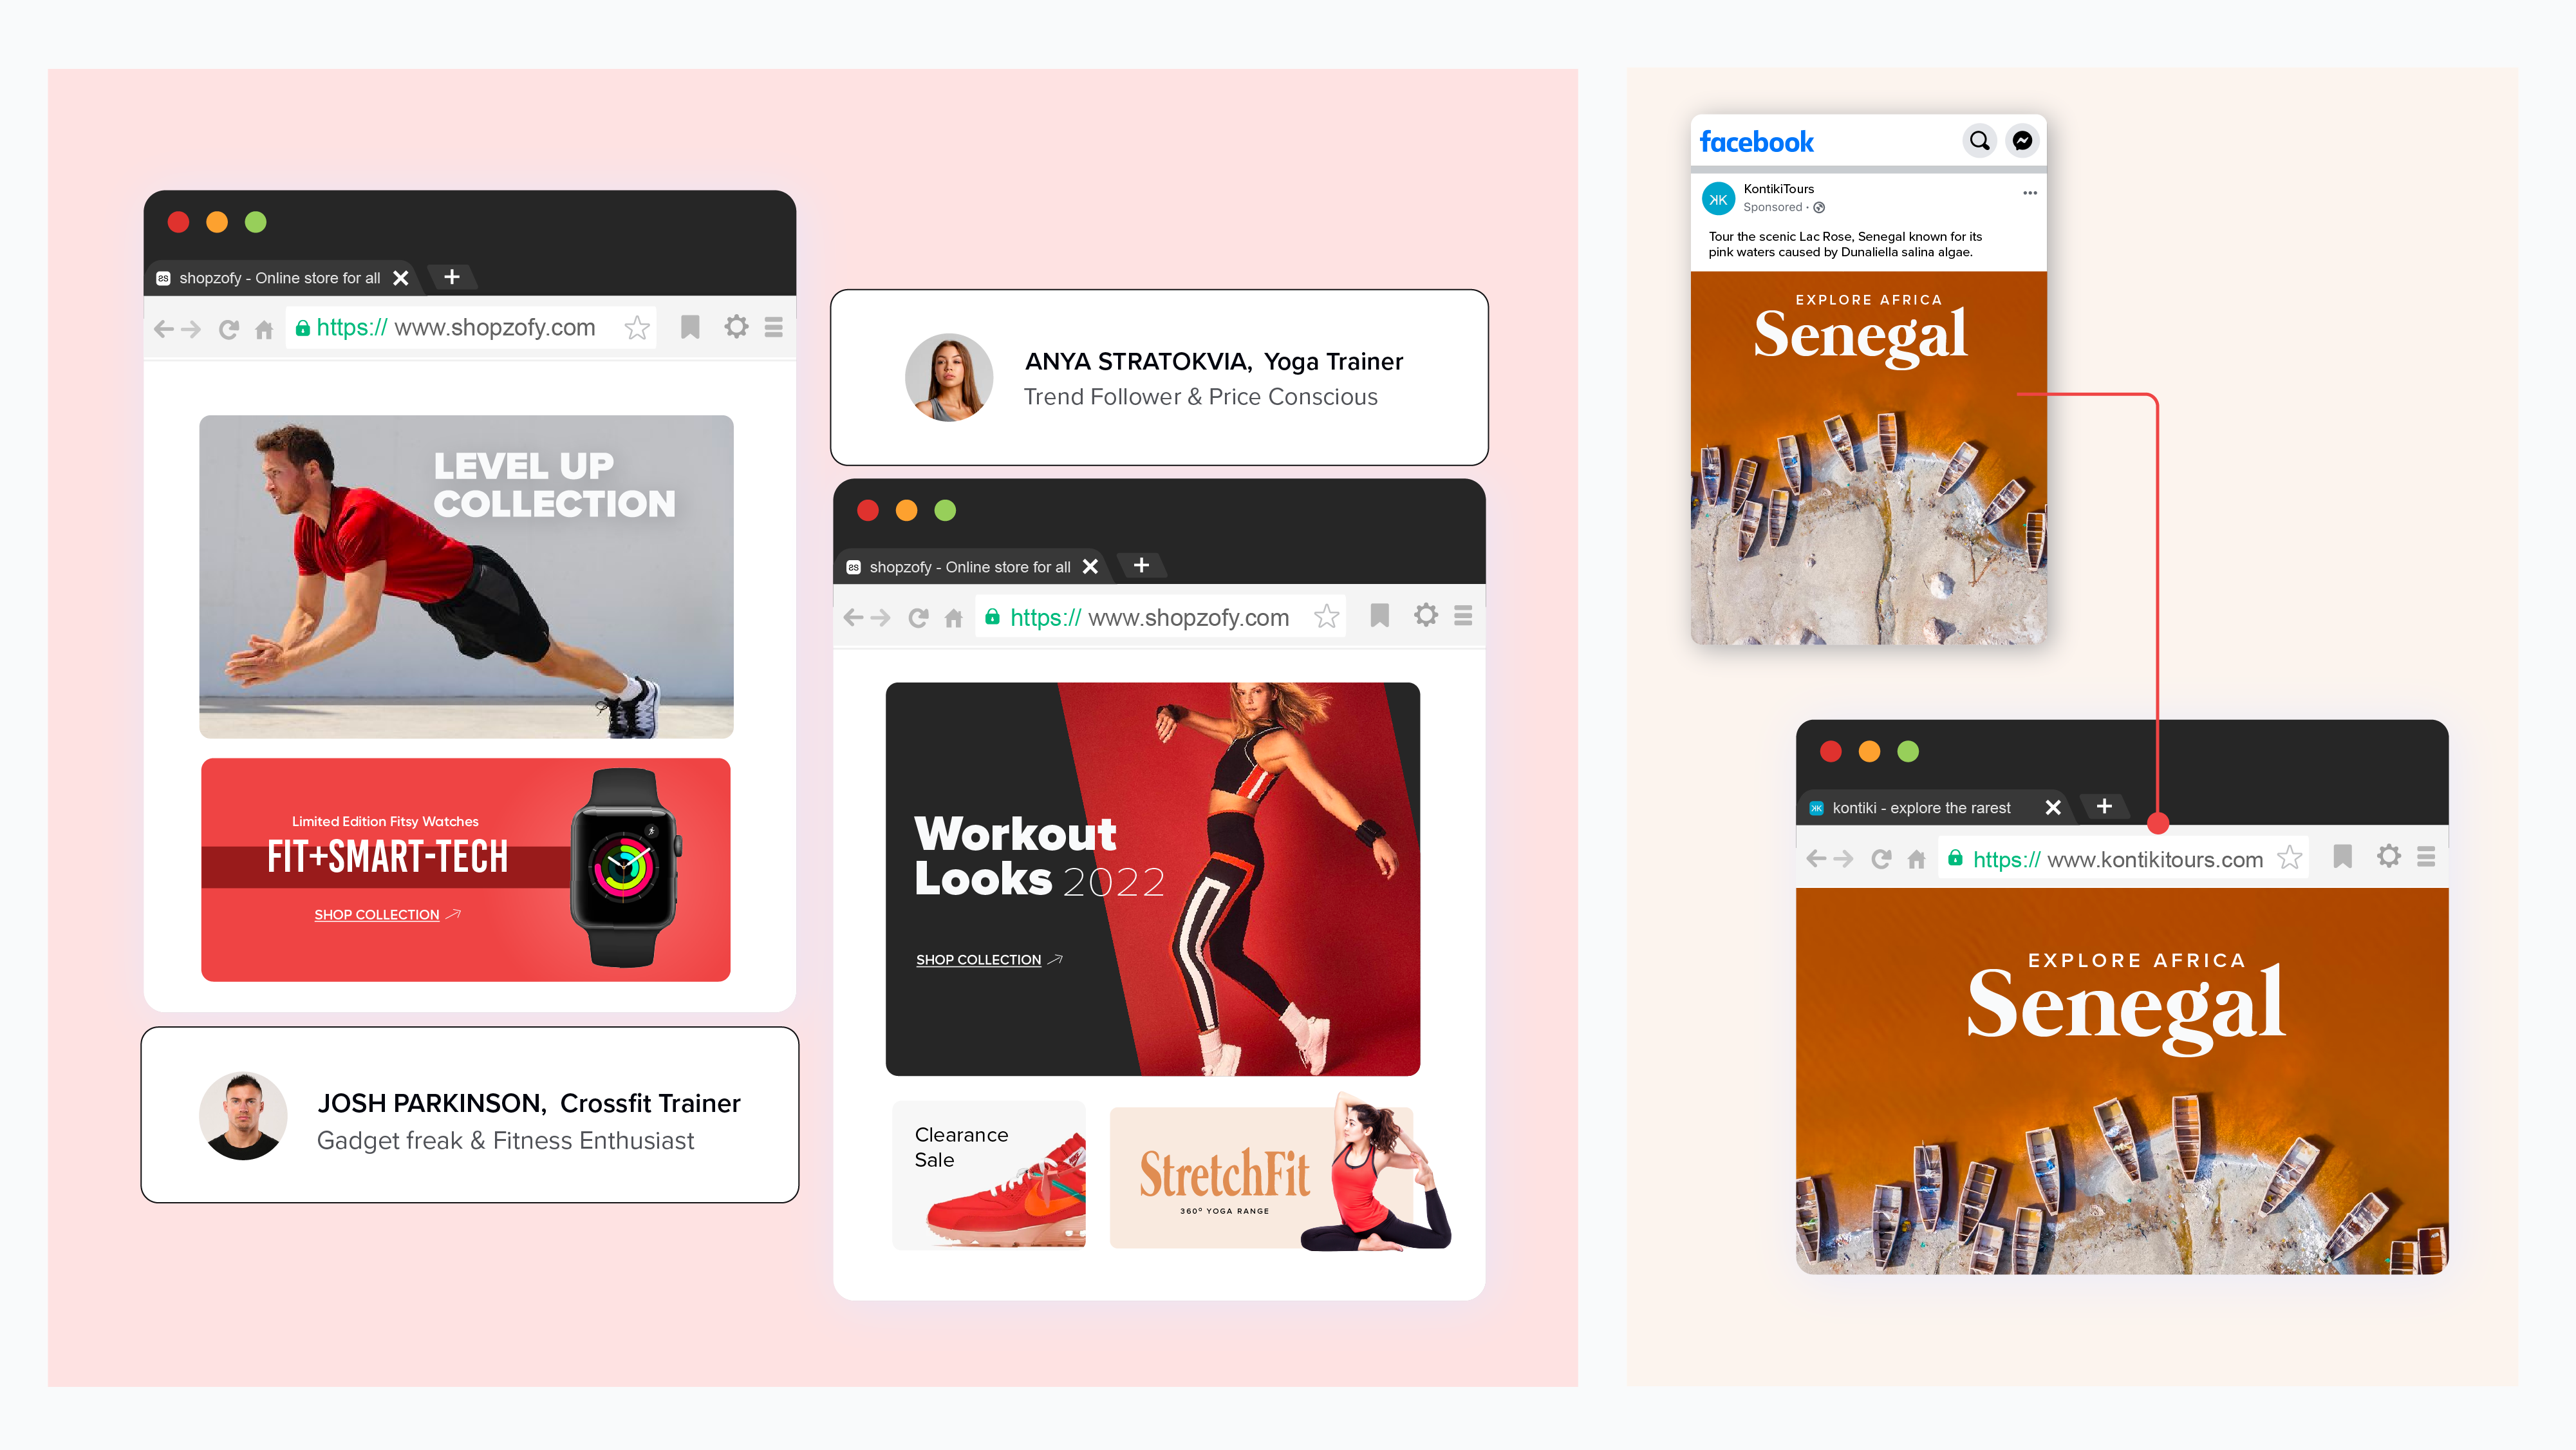
Web Native Display enables organizations to tailor the content of a website for delivering contextual and personalized user experiences for their customers. Basically, web native display is the real-time individualization of a website to cater to each individual’s varying needs.

Web Personalization
Prerequisites
- Ensure that you have integrated CleverTap's new Web SDK.
- Ensure that the default/fallback content is configured on your website to render in case of delayed response from CleverTap servers
Custom Key-value Pair Template
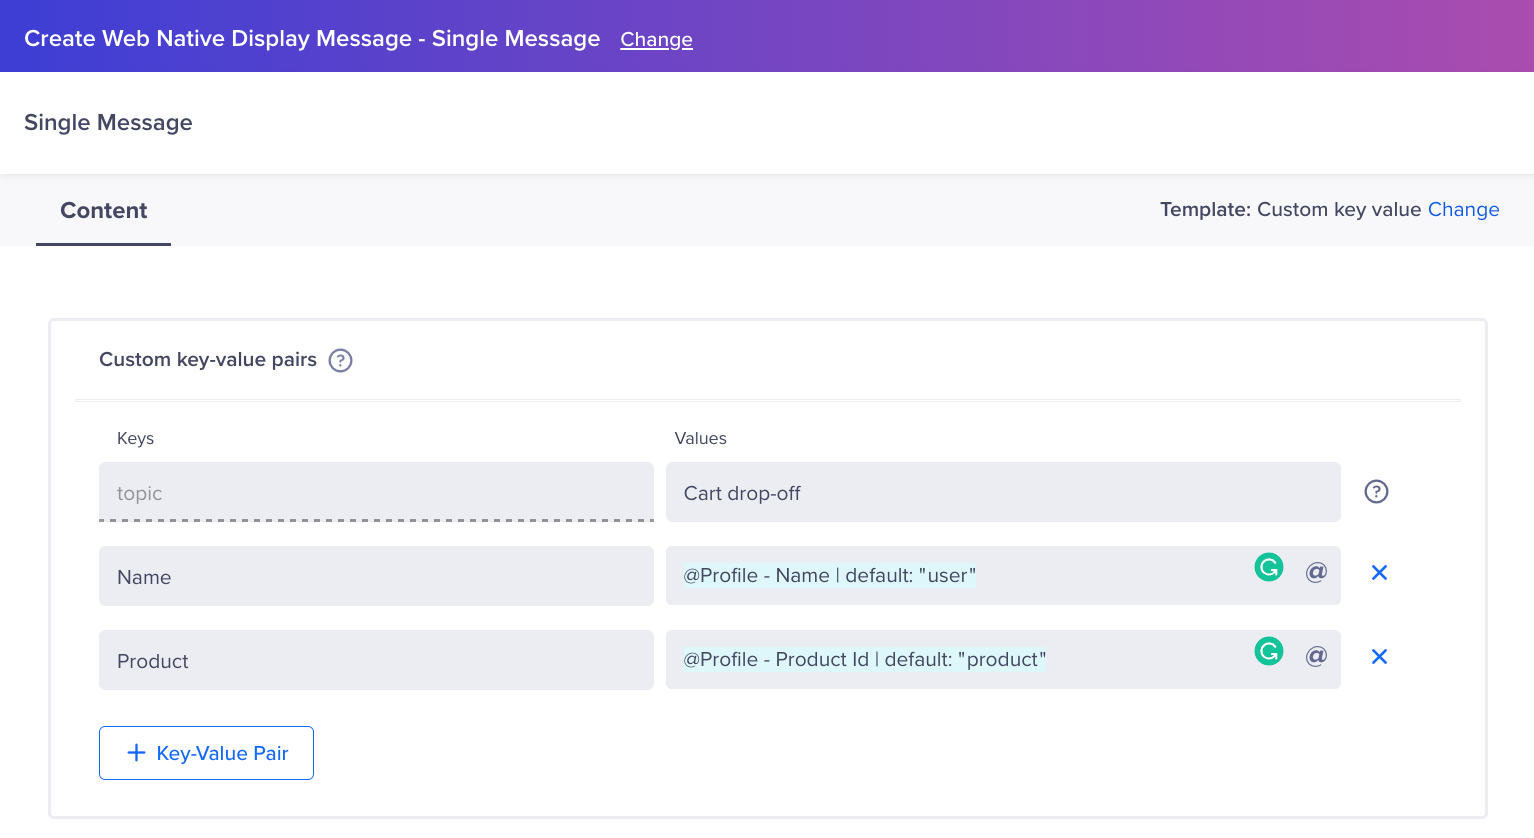
In the Custom Key-Value pair template, CleverTap sends the desired custom data configured by clients in JSON format to the client website. The developer uses this custom key-value data to personalize the web elements of the website.
Sample Key-Value Web Native Display Campaign

Key-Value Pairs in Web Native Display Campaign
Once you create a Key-value pair campaign on CleverTap dashboard for your website, you need to:
- Define rendering functions For Key-Value Pairs
- Listen to the key-value pairs sent by CleverTap
- Determine the topic value and render a personalized element
- Raise Notification Viewed and Notification Clicked Events
Define Rendering Functions For Key-Value Pairs
Developers need to define functions that accept the key-value pair that you have configured as a part of your campaign. They can define their custom rendering logic based on the custom event use case. For example, if you want to render a personalized banner for a cart drop-off event, you need to define the specific rendering logic.
Below is a sample function to render a custom personalized banner on your website.
Let us assume you have the following HTML element on your page:
<div id="container">
<div class="close">×</div>
<img src="https://img.freepik.com/free-photo/young-gowoman-yellow-leather-jacket-copy-space_23-2148674153.jpg?w=2000"/>
<div class="message">
Hello <span id="user-name">user</span>,
<p>Still thinking about the <span id="product-name">item</span> in your cart?</p>
<p>We get it - it's fabulous.</p>
<p>Use SALE20 and avail 20% off</p>
<p>What are you waiting for??</p>
</div>
</div>For personalizing the above HTML element with the key-value pair defined while creating the campaign, you can define a custom rendering function as shown below:
function renderCartDropOffPersonalisationCampaign(data) {
	const name = data.kv.Name;
  const product = data.kv.Cart;
  const containerEl = document.getElementById('container')
  const userNameEl = containerEl.getElementById('user-name')
  usernameEl.innerText = name
  const productNameEl = containerEl.getElementById('product-name')
  productNameEl.innerText = product
}
Listen to the key-value pairs sent by CleverTap
The developer needs to add a listener for the event - CT_web_native_display and define a callback function that will be executed whenever the event happens.
document.addEventListener("CT_web_native_display", function(event) {
    console.log(event);
});
A sample event object would look as follows:
{
  "detail": {
    "kv": {
          "topic": "Cart drop-off",
		  "Name": "Alice",
		  "Cart": "Roadster Jacket",
	  	},
    msgId: "1649748667_20220412",
    wzrk_pivot: "wzrk_default"
  }
}
NoteThe first key of your object will always be topic. The marketer can provide the relevant value of this key while configuring the campaign. The developer must use this value to access the right payload for that campaign.
Determine the Topic Value and Render Personalized Element.
Basis the topic value, you need to call the appropriate custom rendering logic defined in step 1.
Given below is a sample rendering logic.
document.addEventListener("CT_web_native_display", function(event) {
  const data = event.detail;
	const topic = data.kv.topic;
	switch (topic) {
		case "Cart drop-off": {
			renderCartDropOffPersonalisationCampaign(data)
			break;
   	}
  }
});
Raise Notification Viewed and Notification Clicked Event
To raise the NotificationViewed and NotificationClicked event, you can call the clevertap.renderNotificationViewed(data); and clevertap.renderNotificationClicked(data); API within the custom rendering function defined in Step 1.
Here data is the argument that your custom rendering function receives.
function renderCartDropOffPersonalisationCampaign(data) {
	const name = data.kv.Name;
  const product = data.kv.Cart;
  const containerEl = document.getElementById('container')
  const userNameEl = containerEl.getElementById('user-name')
  usernameEl.innerText = name
  const productNameEl = containerEl.getElementById('product-name')
  productNameEl.innerText = product
  clevertap.renderNotificationViewed(data);
  containerEl.addEventListener('click', () => {
  	clevertap.renderNotificationClicked(data)
  });
}
Banner and Carousel Templates
At the time of creating a campaign, users will have to specify the Div ID of the container within which they want to render the banner. In case there is some content within the container, it will be replaced with the banner from the campaign that you have created.
Default BannerEnsure that the default/fallback banner is configured on your website to render in case of delayed response from CleverTap servers
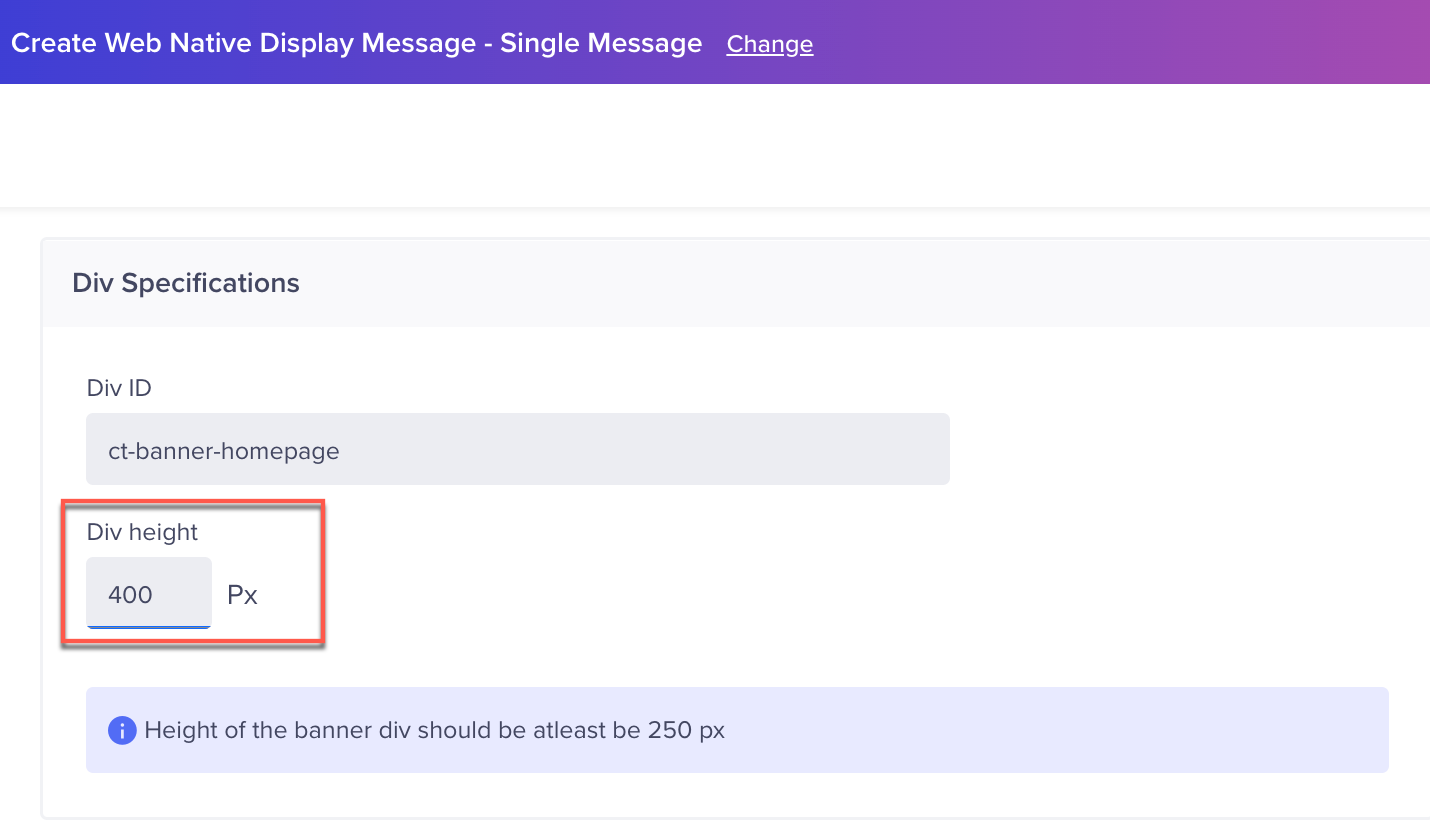
In case you have not set the CSS height property explicitly for your container, the banner will take 100% width of the container and its height will be auto-adjusted to maintain the aspect ratio.
In case you have set the CSS height property explicitly for your container, you'll have to specify the same under the Div height input field at the time of creating a campaign on the CleverTap dashboard.
When the banner is rendered, it will appear with the specified height defined at the time of campaign creation and its width will be auto-adjusted to maintain the aspect ratio.

Update Div Height
Campaign Priority Handling
Web Native Display campaigns allow users to create multiple campaigns targeting the same webpage elements or events. When multiple campaigns target the same elements, conflicts may arise. To resolve these conflicts, CleverTap uses Priority to determine how different campaigns are rendered.
Web Native Display campaigns are classified based on how rendering is handled:
- Rendering Handled by CleverTap
- Rendering Handled by Customer
Rendering handled by CleverTap
These campaigns involve templates where CleverTap handles end-to-end rendering of elements on the customer's website using predefined payloads.
The following templates fall under this category:
- Carousels
- Banners
- Custom HTML
- Visual Editor
- Element Based Changes
Visual Editor Campaign BehaviorVisual Editor campaigns can result in two types of changes based on the campaign configuration:
- HTML-Based Changes: If the campaign simply updates static content such as text or images, CleverTap renders these changes directly via HTML.
- JSON-Based Changes: If the campaign includes personalization, dynamic logic, or conditional targeting, CleverTap pushes
CustomEventand the rendering is handled by the client.
Priority kicks in when an element selector (a CSS-based identifier such as a div ID or class) is matched on the page. If multiple campaigns target the same selector, only the campaign with the highest priority executes. Lower-priority campaigns that target the same selector will not be executed.
Visual Editor Examples
Visual Editor campaigns introduce complexity as they can affect multiple selectors at once. Refer to the below examples of how priorities are resolved:
Example 1: Overlapping Visual Editor Campaigns
- Setup:
- VE Campaign 1 (Priority: 1): Updates the homepage headline text “Welcome to Our Store".
- VE Campaign 2 (Priority: 2): Updates both the headline text and the description.
- Outcome:
- VE Campaign 2 executes entirely due to its higher priority. The headline text "Welcome to Our Store" and description are updated.
- Conclusion:
- A campaign is executed entirely or not at all.
Example 2: Mixed Campaign Priorities
- Setup:
- VE Campaign 1 (Priority: 1): Updates the headline text "Welcome to Our Store".
- VE Campaign 2 (Priority: 3): Updates both the headline text and the description.
- Banner Campaign 3 (Priority: 2): Replaces the headline text with a promotional banner.
- Outcome:
- VE Campaign 2, having the highest priority, is executed entirely. The headline text "Welcome to Our Store" and description are updated.
- Conclusion:
- If campaigns target common nodes, they are grouped and selected based on priority.
Rendering Handled by Customer
These campaigns do not perform DOM updates directly. Instead, CleverTap pushes CustomEvents to the webpage, which customers can listen for and act upon as needed. Thus, CleverTap only provides data for rendering.
The following campaign types use customEvent to trigger client-side actions:
- Key-Value Pair (KV Pair)
- Visual Editor
- JSON-Based Campaigns
- JSON
Campaign execution is determined based on the event name associated with each campaign.
We use custom events named CT_web_native_display_builder, CT_web_native_display, and CT_web_native_display_json to listen for campaign activity. Events with the same name are grouped and prioritized accordingly.
When multiple campaigns trigger events with the same name, only the event from the highest-priority campaign is executed. This prevents conflicts and ensures consistent, predictable behavior.
Note
- Visual Editor and JSON-based campaigns do not support topics.
- If multiple campaigns of these types exist, only one event is created (the one with the highest priority).
Examples
Refer to the below examples of how priorities are resolved for such campaigns:
Example 1: Conflicting KV Pair Topics
- Setup:
- Two KV Pair campaigns share the same topic.
- Outcome:
- Only the campaign with the highest priority is executed. The other campaign is ignored.
- Conclusion
- Only one campaign can propagate an event per topic.
Example 2: Unique KV Pair Topics
- Setup:
- Multiple KV Pair campaigns use different topics.
- Outcome:
- All campaigns are executed simultaneously without conflict.
- Conclusion
- Topics act as unique identifiers and each topic is treated independently.
Example 3: Conflicting Visual Editor and JSON-Based Campaigns
- Setup:
- One Visual Editor campaign and one JSON-based campaign trigger similar
CustomEvents.
- One Visual Editor campaign and one JSON-based campaign trigger similar
- Outcome:
- Both campaigns are executed, as they are under different events (
CT_web_native_displayandCT_web_native_display_json).
- Both campaigns are executed, as they are under different events (
- Conclusion:
- JSON and Visual Editor campaigns do not compete with each other.
- If a JSON and Visual Editor campaign run simultaneously, both will be executed since they are under different events. Only when multiple JSON-based or Visual Editor-based campaigns run does priority determine which one is executed.
Updated 2 months ago
