Android Custom Proxy Domain
Custom Proxy Domain
A custom proxy domain allows you to proxy all events raised from the CleverTap SDK through your required domain. If you want to use your application server, use a proxy domain to handle and/or relay CleverTap events. We provide custom domain support for Push Impression event handling.
Why is it useful?
Using a custom proxy domain has the following benefits:
- Use your own domain to collect data.
- Have fine control over filtering, auditing, and/or cleaning data before sending it to CleverTap.
- Turn event collection on or off across all platforms quickly.
- If you want to use your own application server, you can use a proxy domain to handle and/or relay CleverTap events.
You must have a domain and access to DNS site settings to set up the proxy domain. To create an AWS Certificate and CloudFront distribution for the proxy domain, perform the steps listed in the following sections, and then integrate CleverTap SDK with your proxy domain configuration.
AWS Certificate Manager
To create a certificate using ACM in the required region:
- Go to Certificate Manager in AWS.
- Click Request Certificate and select Request a public certificate.

Request a Public Certificate
- Add the proxy domain name that you want to use. This proxy domain name relays events to CleverTap's origin domain. For example, subdomain.domain.com.
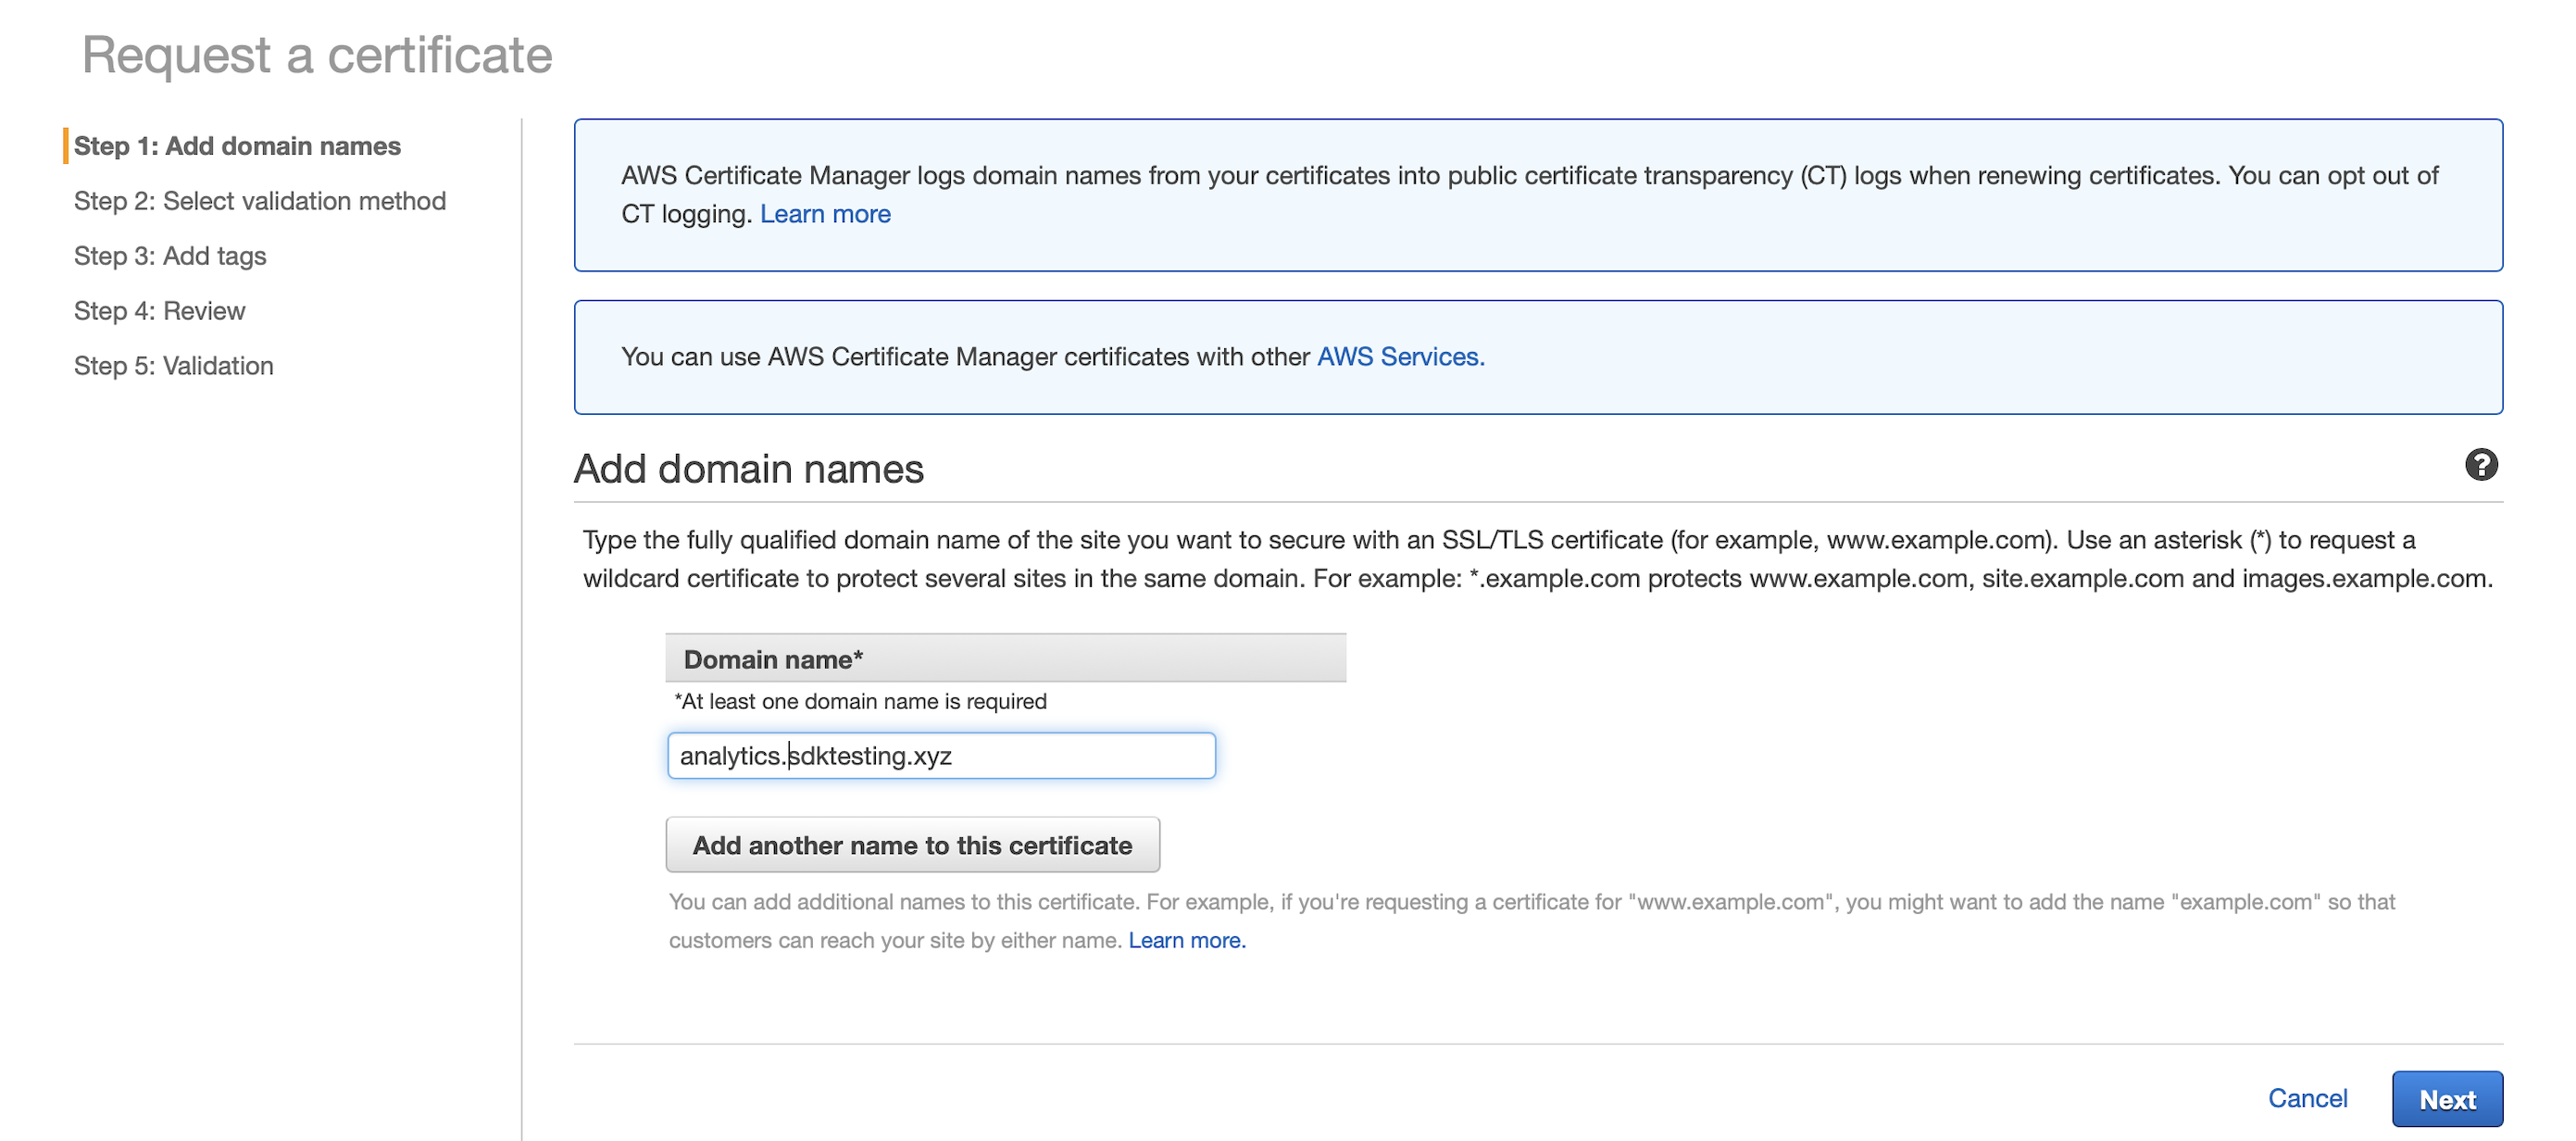
Add the Proxy Domain Name
- Select a validation method based on your domain account permission.
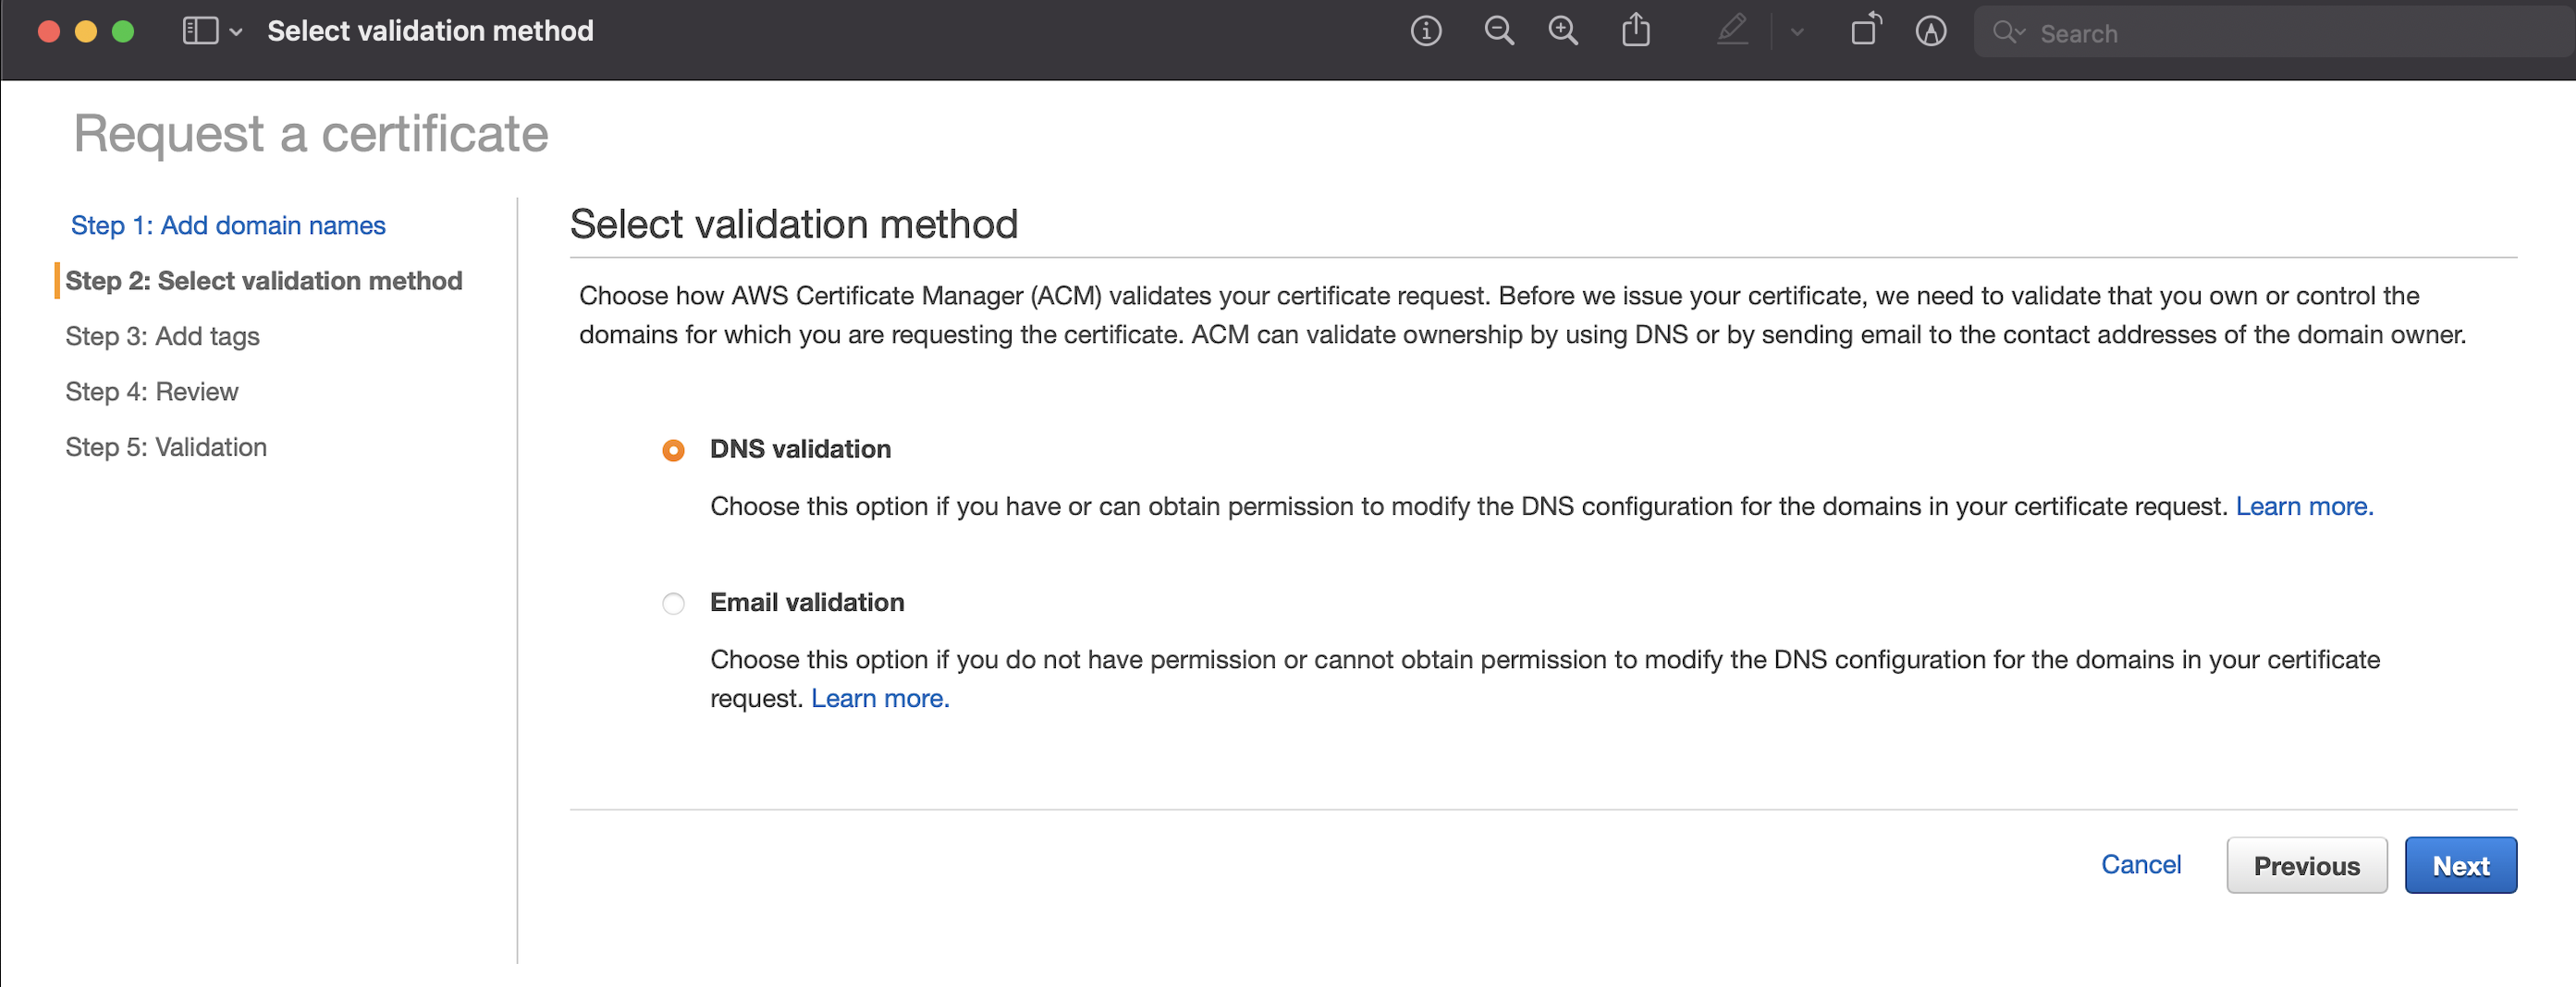
Select Validation Method
- After review, confirm and request the certificate.
- Copy the CNAME record from AWS Certificate Manager (ACM) details to add it to your domain registrar settings.
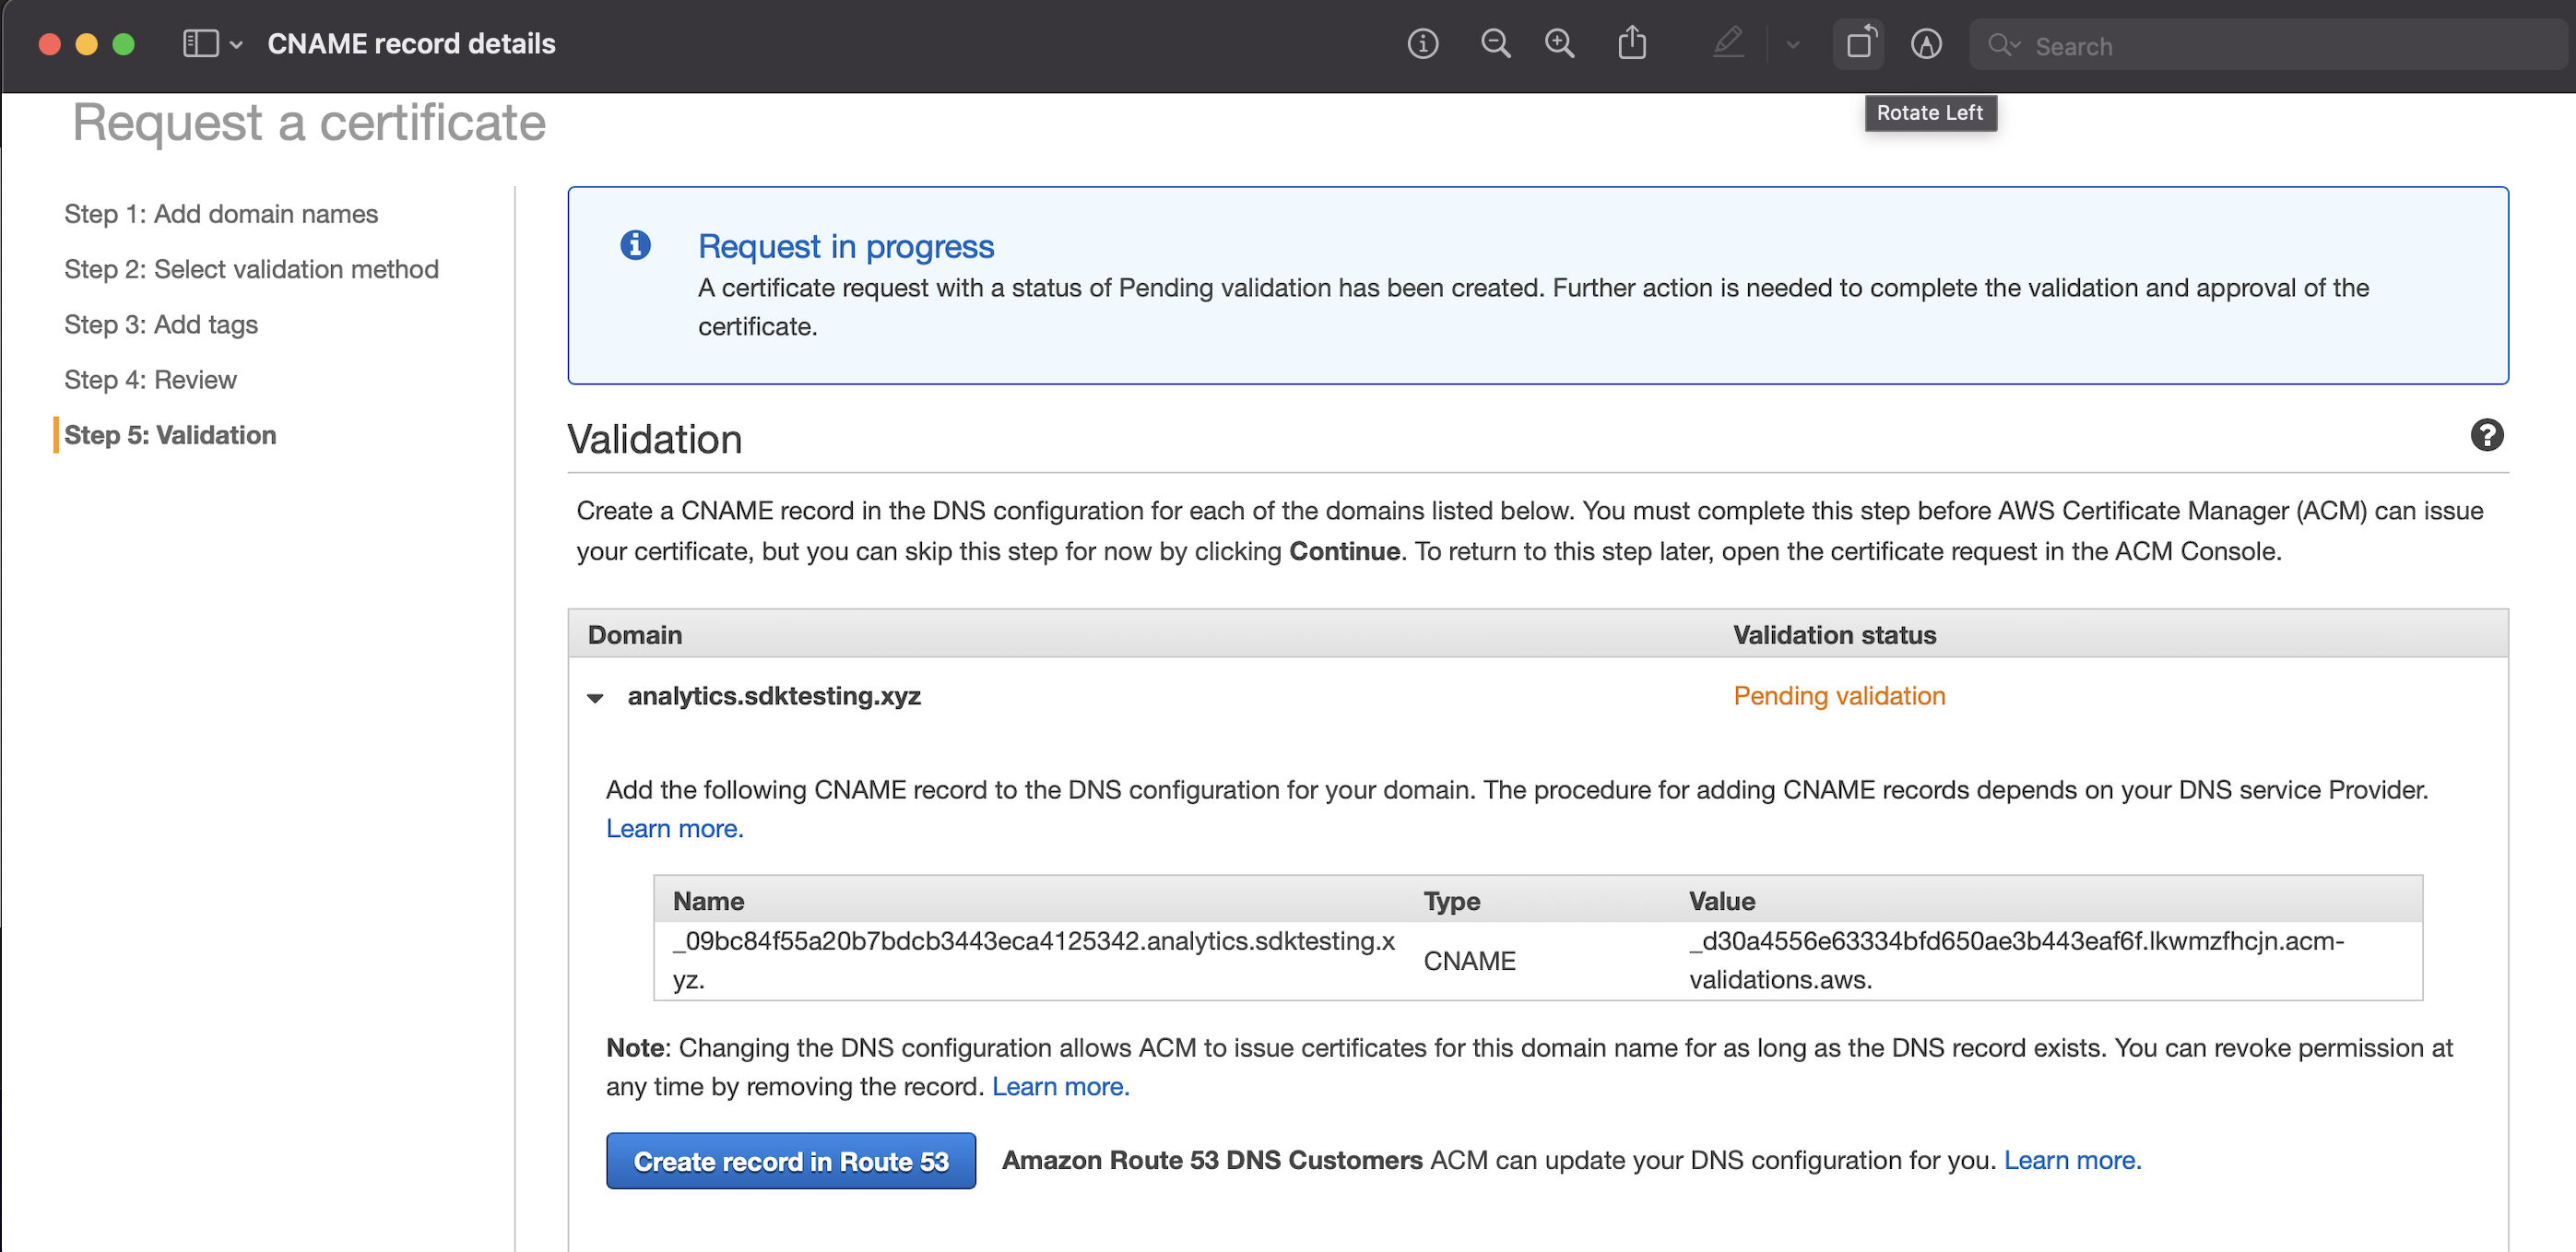
CNAME Record in AWS Certificate Manager (ACM)
- Add the CNAME record in DNS Settings as shown below:

Add CNAME in DNS
The ACM Validation status should update from Pending to Success in some time. This certificate is used for creating CloudFront distribution.
AWS CloudFront Distribution
Origin
- Enter Origin Domain: eu1.clevertap-prod.com.
- Select Protocol: HTTPS.
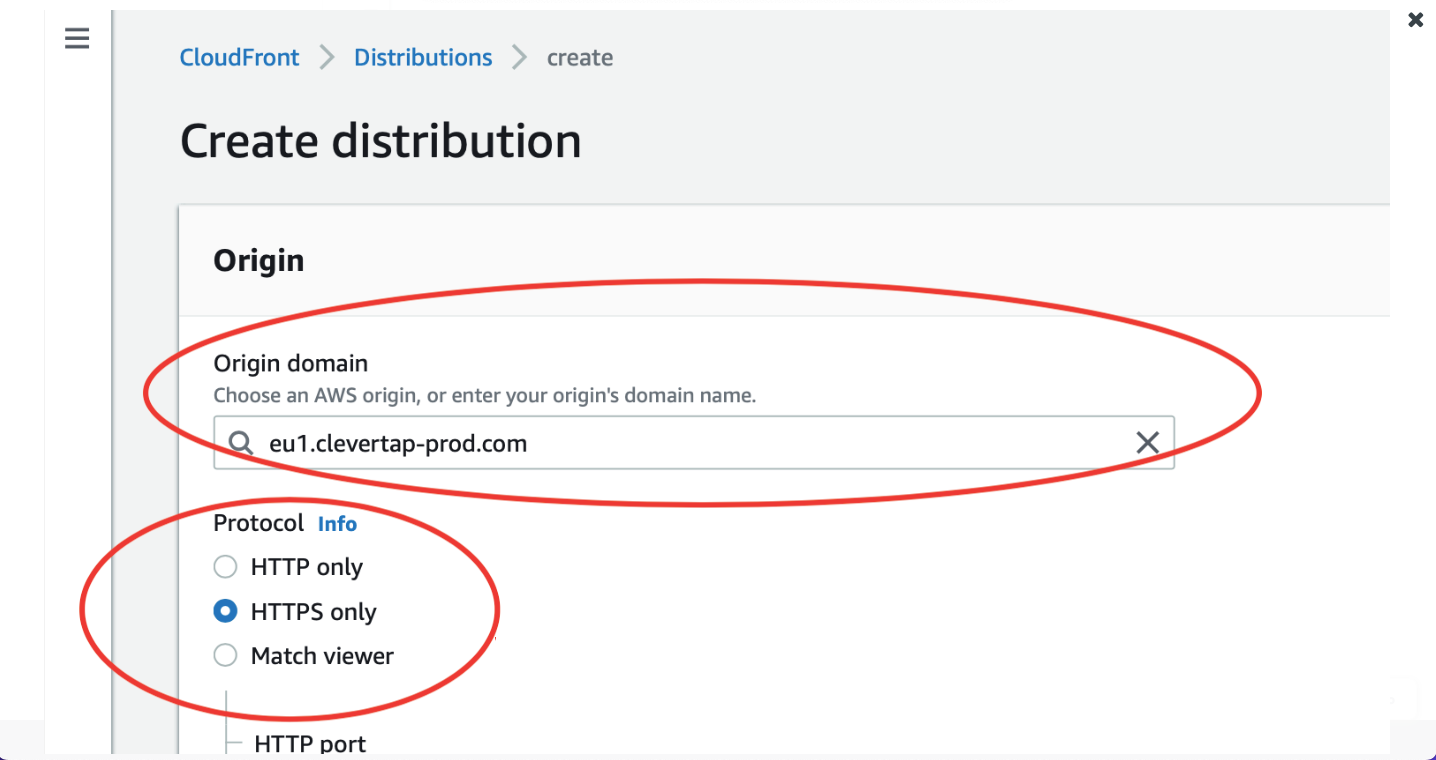
Configure Origin Domain and Protocol
Default Cache Behaviour:
- Select Redirect HTTP to HTTPS as the Viewer protocol policy.
- Select GET, HEAD, OPTIONS, PUT, POST, PATCH, DELETE as the Allowed HTTP methods.
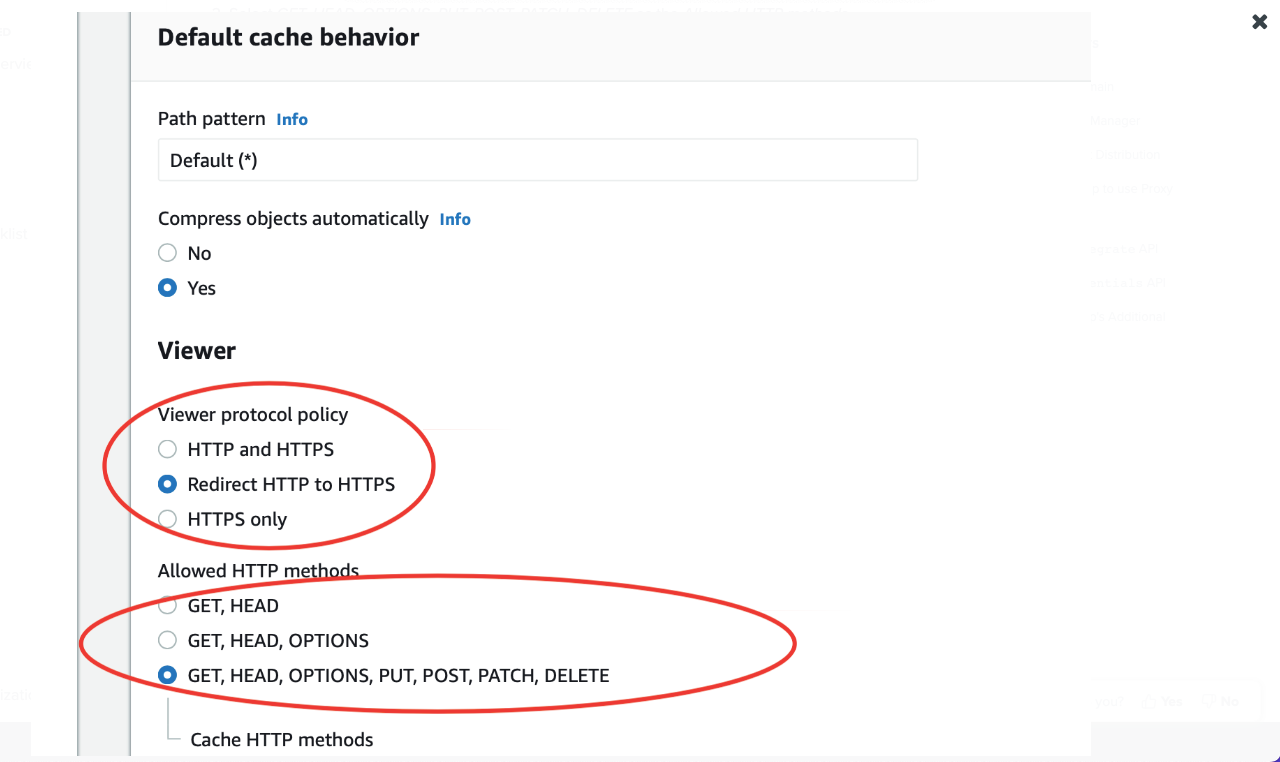
Configure Viewer Section
- Under Cache key and origin requests, select Cache policy and origin request policy (recommended) option and select CachingOptimized from the list.
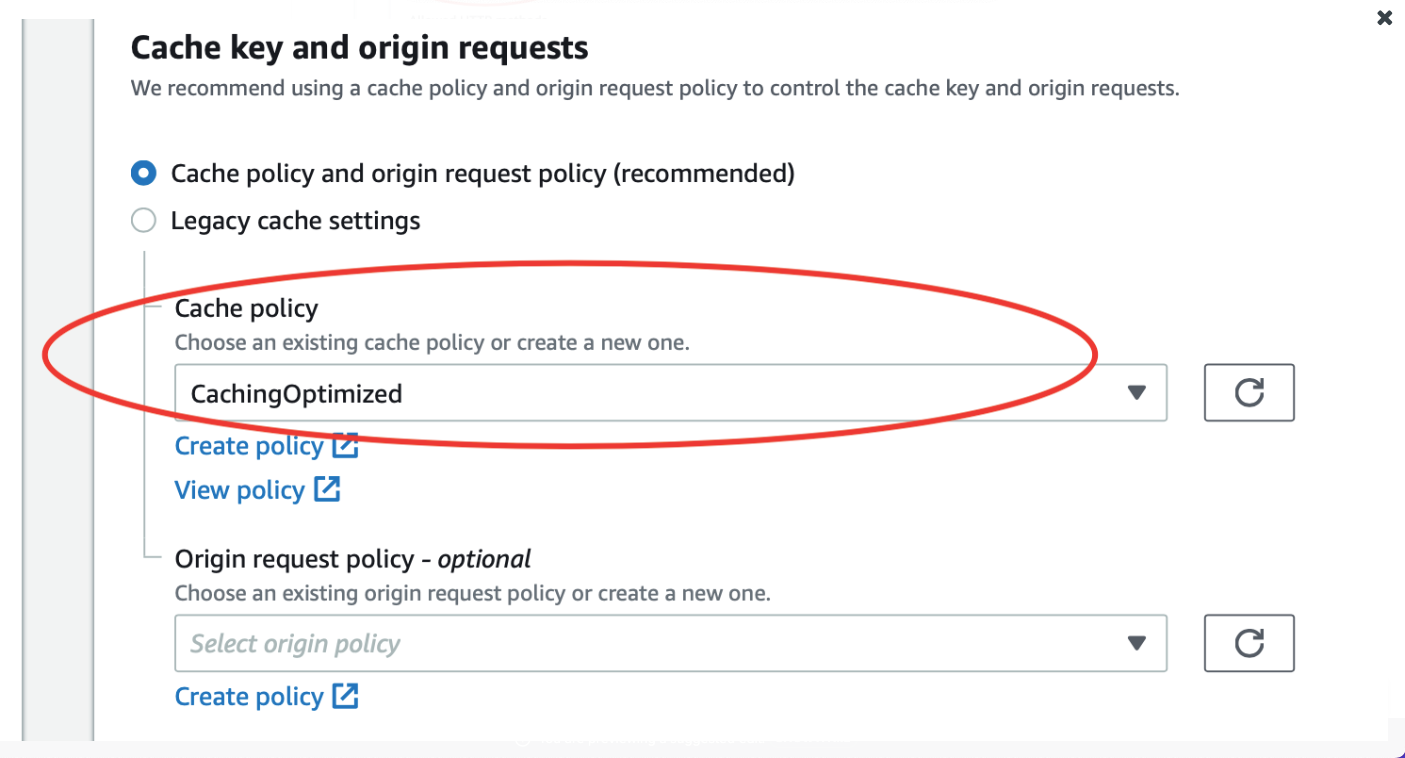
Configure Cache Key and Origin Requests
Settings
-
Add proxy name in Alternate domain name (CNAME) - optional: analytics.sdktesting.xyz. This is the same proxy used earlier to create the AWS certificate.
-
Select the certificate created earlier in Custom SSL certificate - optional.
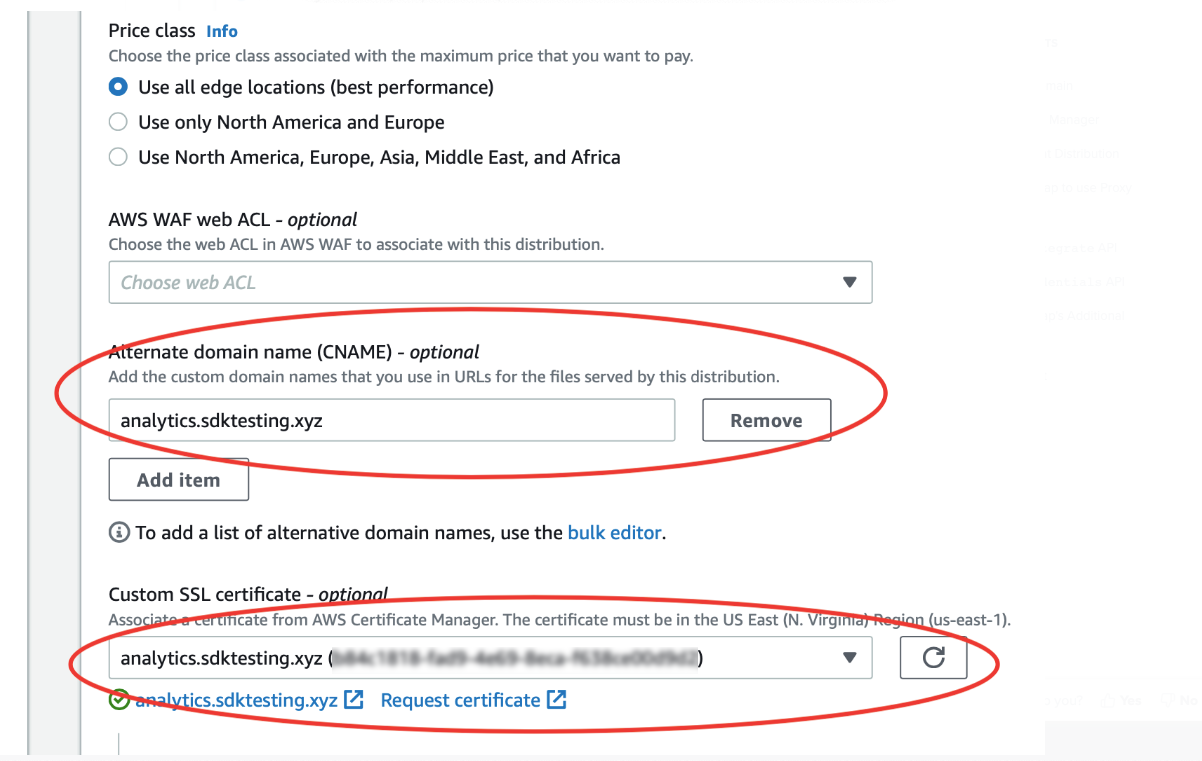
Configure Alternate Domain Name (CNAME) and Custom SSL Certificate
- Select the recommended option under Security policy.
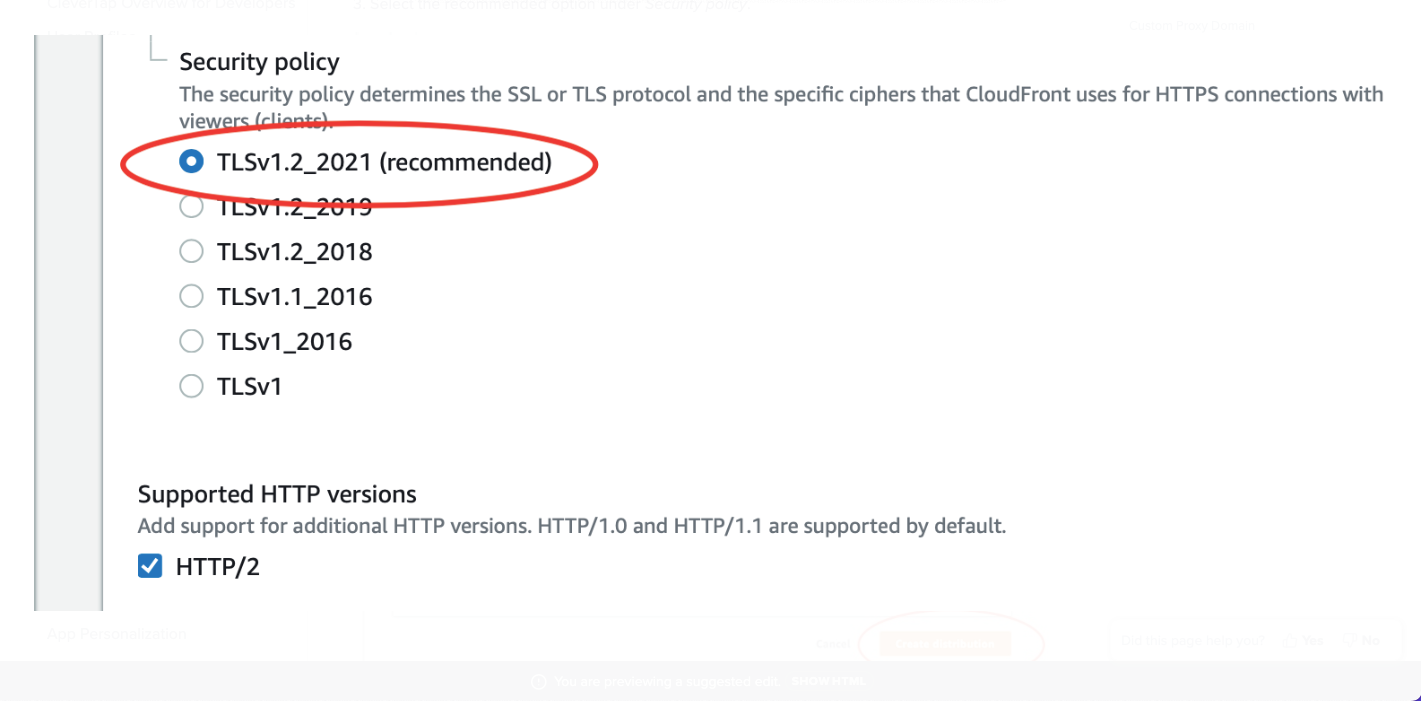
Configure Security Policy
- Keep the other settings at default selection and click Create Distribution.
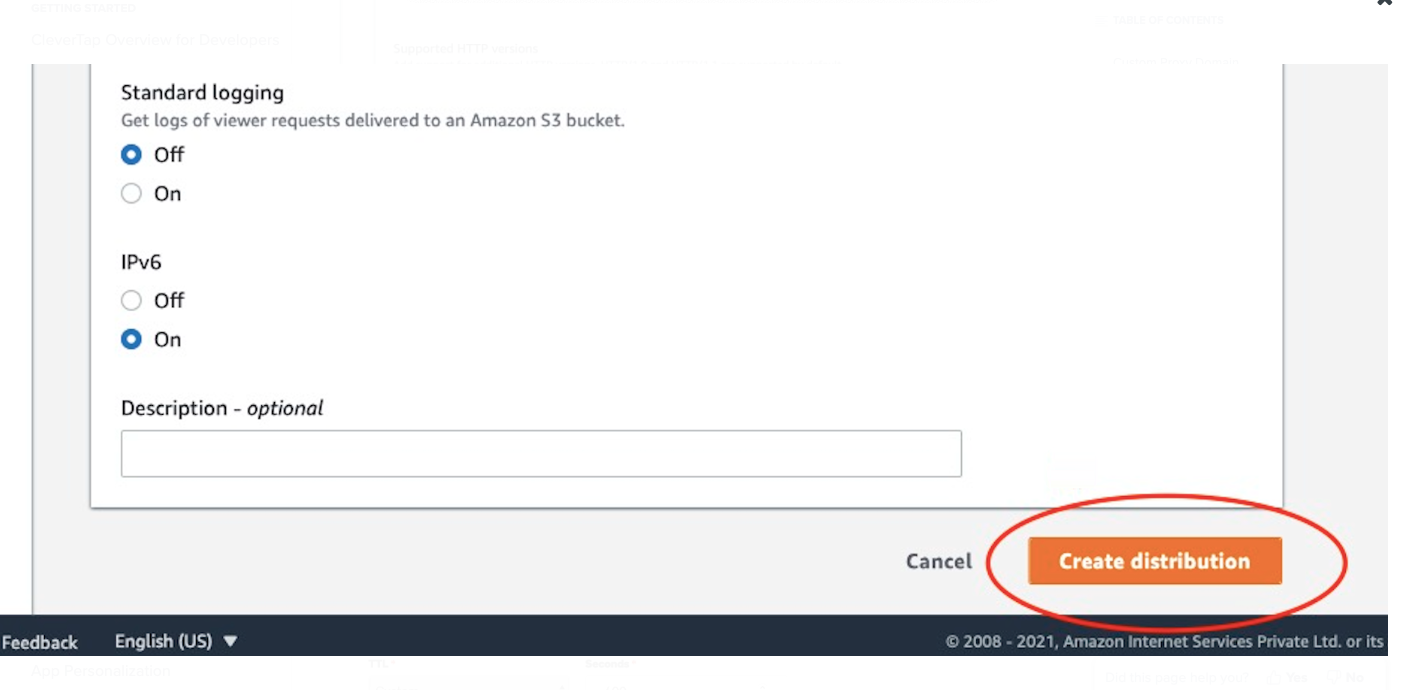
Create Distribution
- Add another CNAME in DNS Settings to point your subdomain (analytics in this case) to the CloudFront distribution, as shown in the following image:

Add CNAME in DNS Settings
- After the CloudFront distribution is deployed, enter the proxy domain in the browser address to check if the settings are working correctly.
Integrate CleverTap to use Proxy Domain
Using Manifest File
- Add your CleverTap Account credentials in the Manifest file against the
CLEVERTAP_ACCOUNT_IDandCLEVERTAP_TOKENkeys. - Add the
CLEVERTAP_PROXY_DOMAINkey with the proxy domain value for handling events through the custom proxy domain. - Add the
CLEVERTAP_SPIKY_PROXY_DOMAINkey with the spiky proxy domain value for handling push impression events.
<meta-data
    android:name="CLEVERTAP_ACCOUNT_ID"
    android:value="YOUR_ACCOUNT_ID" />
<meta-data
    android:name="CLEVERTAP_TOKEN"
    android:value="YOUR_ACCOUNT_TOKEN" />
<meta-data
    android:name="CLEVERTAP_PROXY_DOMAIN"
    android:value="YOUR_PROXY_DOMAIN" />   <!-- e.g., analytics.sdktesting.xyz -->
<meta-data
    android:name="CLEVERTAP_SPIKY_PROXY_DOMAIN"
android:value="YOUR_SPIKY_PROXY_DOMAIN" /> <!-- e.g., spiky-analytics.sdktesting.xyz -->- Use CleverTap's defaultInstance to raise the custom events.
clevertapDefaultInstance.pushEvent("Product viewed");clevertapDefaultInstance?.pushEvent("Product viewed")Using changeCredentials API
changeCredentials API- Call the
changeCredentials(String accountID, String token, String proxyDomain, String spikyProxyDomain)method.
CleverTapAPI.changeCredentials(
     "YOUR_CLEVERTAP_ACCOUNT_ID",
     "YOUR_CLEVERTAP_TOKEN",
     "YOUR_PROXY_DOMAIN",       //e.g., analytics.sdktesting.xyz
     "YOUR_SPIKY_PROXY_DOMAIN"  //e.g., spiky-analytics.sdktesting.xyz
);
CleverTapAPI.changeCredentials(
"YOUR CLEVERTAP ACCOUNT ID",
"YOUR CLEVERTAP TOKEN",
"YOUR PROXY DOMAIN", //e.g., analytics.sdktesting.xyz
"YOUR SPIKY PROXY DOMAIN" //e.g., spiky-analytics.sdktesting.xyz
)- Use CleverTap's defaultInstance to log the events.
clevertapDefaultInstance.pushEvent("Product viewed");clevertapDefaultInstance?.pushEvent("Product viewed")Using CleverTap's Additional Instance
- Create an instance of
CleverTapInstanceConfigclass :
CleverTapInstanceConfig cleverTapInstanceConfig = CleverTapInstanceConfig.createInstance(
        applicationContext,
        "YOUR_CLEVERTAP_ACCOUNT_ID",
        "YOUR_CLEVERTAP_TOKEN"
);
val cleverTapInstanceConfig = CleverTapInstanceConfig.createInstance(
applicationContext,
"YOUR_CLEVERTAP_ACCOUNT_ID",
"YOUR_CLEVERTAP_TOKEN"
)- Set the proxy domain(s) with the
CleverTapInstanceConfigobject you created earlier.
cleverTapInstanceConfig.setProxyDomain("YOUR_PROXY_DOMAIN");   //e.g., analytics.sdktesting.xyz
cleverTapInstanceConfig.setSpikyProxyDomain("YOUR_SPIKY_PROXY_DOMAIN"); //e.g., spiky-analytics.sdktesting.xyz
cleverTapInstanceConfig.proxyDomain = "YOUR_PROXY_DOMAIN"
cleverTapInstanceConfig.spikyProxyDomain = "YOUR_SPIKY_PROXY_DOMAIN"- Use CleverTap's defaultInstance to log the events.
clevertapDefaultInstance.pushEvent("Product viewed");clevertapDefaultInstance?.pushEvent("Product viewed")Debug and Test
After integration, the logged events will be accessible on the CleverTap dashboard. Use CleverTapAPI.setDebugLevel(VERBOSE) to debug network requests and responses from the CleverTap SDK.
Updated 2 months ago
