SCIM Provisioning Without SSO
Learn how to set up SCIM user provisioning in CleverTap without SSO.
Overview
CleverTap supports System for Cross-domain Identity Management (SCIM) to automate user provisioning when Single Sign-On (SSO) is not in use. Your Identity Provider (IdP), such as Okta or Azure AD, communicates directly with CleverTap to synchronize user creation, updates, and deactivation.
This guide covers SCIM provisioning using an Identity Provider (IdP) without SSO. For SCIM provisioning using an IdP with SSO (SAML enabled), refer to SCIM Provisioning With SSO (SAML Enabled).
Prerequisites
Before configuring SCIM provisioning, ensure the following:
- A CleverTap Admin has generated a SCIM token for your account.
- You have generated a SCIM token. For more information, refer to Generate SCIM Token for IdP-Based Provisioning.
- Your IdP supports SCIM 2.0.
Ensuring all this helps your IdP authenticate and sync users correctly with CleverTap.
Integrate SCIM Provisioning Without SSO
To automate user provisioning without Single Sign-On (SSO), perform the following steps:
- Configure SCIM Application in Okta
- Configure SCIM Token
- Configure Required Attributes
- Add and Assign Users
- Managed Users
- Verify Provisioning Status
This document uses Okta to illustrate the SCIM setup process. You can follow the same steps for other SCIM-compatible IdPs such as Azure AD or OneLogin.
Configure SCIM Application in Okta
Set up an application in Okta that connects to CleverTap’s SCIM endpoint by performing the following steps:
- In Okta, go to Applications > Browse App Integration Catalog.
- Search for SCIM 2.0 Test App (Header Auth) and click + Add Integration.
- Enter your Application label and click Next.
- Keep the default setting as is and click Done.
Okta SCIM Integration
Configure SCIM Token
Link your Okta SCIM application to CleverTap using your SCIM token by performing the following steps:
-
In Okta, open the SCIM app created in the Configure SCIM Application in Okta step, and go to Provisioning > Configure API Integration.
-
Enable API Integration, and enter the following:
- Base URL:
https://<your_clevertap_domain>/nx/v2/scim/v2/idp
(Example:https://us1.dashboard.clevertap.com/nx/v2/scim/v2/idp)
Region-SpecificThe CleverTap domain is environment- and region-specific. Do not copy the example URL directly. Always replace
<your_clevertap_domain>with the domain for your region. Refer Region for more details.- API Token:
Bearer <SCIM_TOKEN>(include the prefix and space)
For more information, refer to Generate SCIM Token for IdP-Based Provisioning.
- Base URL:
Configure SCIM Token
- Click Test API Credentials.
-
Green indicator: Successful connection
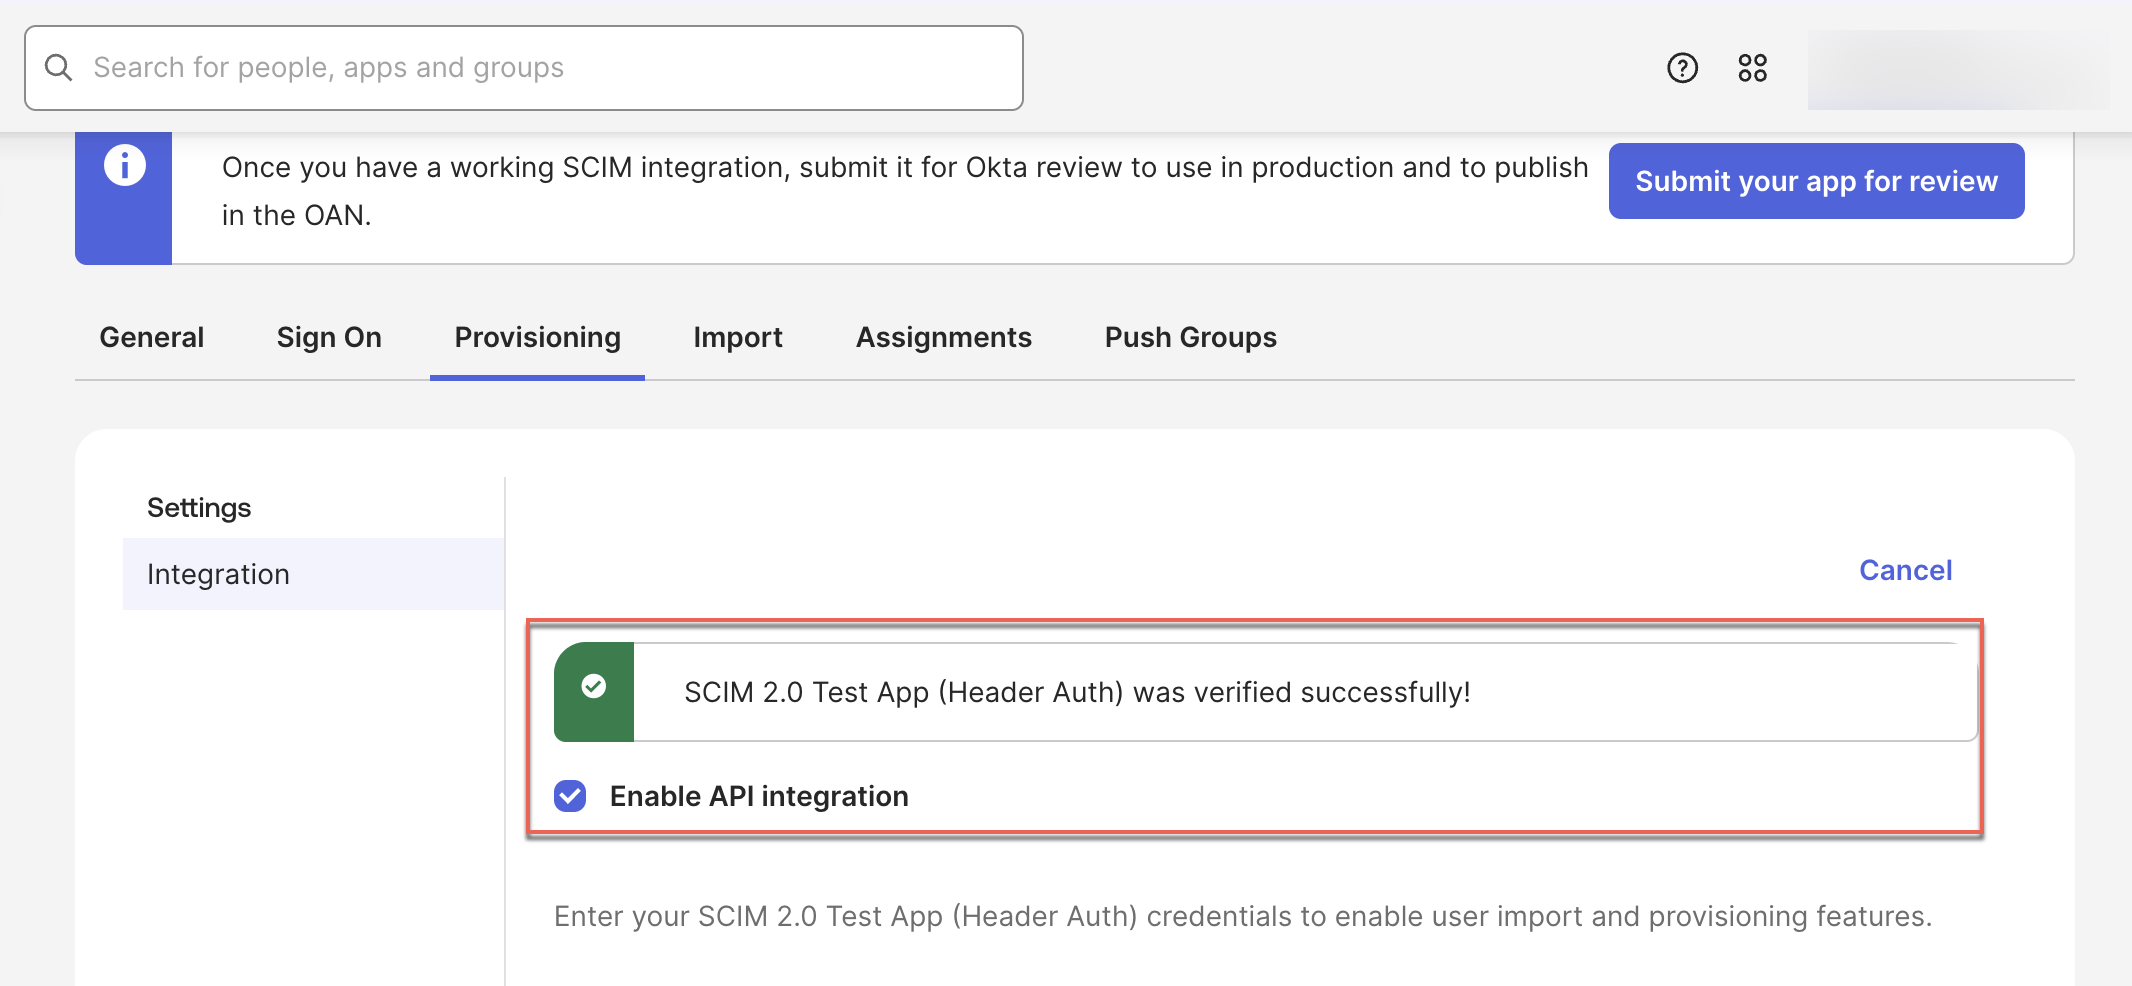
Successful connection
-
Red indicator: Configuration error

Configuration error
-
- Click Save
- Go to To App and click on Edit
- Enable the following provisioning actions supported by CleverTap by selecting the corresponding checkboxes and click Save:
- Create Users
- Update Users Attributes
- Deactivate Users
Provisioning Actions
Security and Login NotesCleverTap never stores or synchronizes IdP passwords. Authentication is managed exclusively through your Identity Provider.
Configure Required Attributes
In this step, you’ll define which user attributes your Identity Provider (IdP) sends to CleverTap.
By default, your IdP may include many SCIM attributes, but CleverTap only requires a few for successful provisioning.
To configure attributes, follow these two key sub-steps:
- Add the
accountsAttribute: Create a custom field that defines user access to CleverTap accounts. - Remove Unnecessary Attributes: Unmap and delete attributes that CleverTap doesn’t use.
Required Attributes
Keep the following attributes mapped and active; these fields are mandatory for user provisioning in CleverTap.
| Attribute | Type | Description |
|---|---|---|
userName | String | Unique identifier for the user |
givenName | String | User’s first name |
familyName | String | User’s last name |
accounts | String array | Lists CleverTap account IDs (Mandatory) |
All other attributes can be safely unmapped and removed to simplify your SCIM configuration. To unmap and remove, refer to Remove Unnecessary Attributes.
Add accounts Attribute
accounts AttributeThe accounts attribute indicates CleverTap, which accounts for each user should have access to.
You need to create it manually in your IdP as a custom attribute.
-
Go to To App
-
Click on Go to Profile Editor > + Add Attribute.
-
Fill in the following details and click Save:
- Data type: string array
- Display name: Accounts
- Variable name:
accounts - External name:
urn:ietf:params:scim:schemas:core:2.0:User - Description: (Optional) add as needed or leave blank
- Enum: Leave empty
- Attribute required: Yes (In case of SCIM Provisioning With SSO (SAML Enabled) Not required)
- Attribute type: Personal
Add Attribute
RecommendationDefine this field as a String array so a single user can be linked to multiple CleverTap accounts, for example, a parent account and its associated child accounts.
When you add a parent account ID to a user, CleverTap automatically recognizes and links access to its related child accounts.
This ensures that user roles and permissions cascade properly across all connected accounts without requiring separate mappings.
Remove Unnecessary Attributes
Your IdP may include default attributes that CleverTap does not use. To remove them, follow these steps:
- In your IdP, go to Profile Editor > Mappings.
- From the dropdown menu, select Do not map for the specific attribute.
- Click Save Mappings to apply the changes.
- After unmapping, click the X (Remove) icon next to the attribute name to Delete Attribute.
- Click Save Attribute to confirm deletion.
Remove Attributes
Important
- You cannot delete an attribute while it is still mapped. Always unmap it first, then remove it.
Add and Assign Users
Add users in your organization’s IdP and assign them access to CleverTap. This ensures each user is automatically created, updated, and managed in CleverTap based on your IdP configuration.
Add User in IdP
Add new users in your IdP so they can be provisioned automatically in CleverTap through SCIM. To do so, perform the following steps:
- Go to Directory > People > Add Person.
- Enter the user’s details such as First Name, Last Name, Username, and Primary Email.
- Under Activation, select Activate now if you want the user to be active immediately.
- Select I will set password and optionally check User must change password on first login for added security.
- Click Save to create the user.

Add User in IdP
Assign User
Assigning a user links their IdP profile to CleverTap, allowing automatic provisioning of roles, permissions, and account access based on the JSON mapping. Assign users from your IdP to the CleverTap SCIM application by performing the following steps:
- Go to Applications > Assignments > then open the Assign dropdown and select Assign to People.
- A list of users in your application will appear. Click Assign next to the specific user you want to provision.
- In the Account, click Add Another and paste the JSON payload. Refer to the Example JSON payload.
If the user already exists, CleverTap automatically updates their details. If not, a new user record will be created in CleverTap.
Example JSON Payload:
{
  "accountId": "ACC123", // CleverTap ID
  "roles": "Editor",
  "teams": "Marketing",
  "status": "Active"
}
Assign User
Important
- Ensure valid JSON syntax (no trailing commas or spaces).
- Invalid payloads stop provisioning.
- Due to IdP limitations, you may need to trigger the provisioning workflow manually (for example, by editing and saving the JSON or removing a space in the UI).
Once users are assigned and provisioned, CleverTap continues to manage user access based on IdP changes. The following section explains how add, update, and revoke actions work after provisioning.
Managed Users
Managed Users define how CleverTap adds, updates, and deactivates users based on assignments made in your Identity Provider (IdP).
User lifecycle management is fully controlled by the IdP. CleverTap does not require manual user management once SCIM provisioning is configured.
Add or Update a User in CleverTap
You can add a new user or update an existing user by editing the user assignment in your IdP.
- Go to Applications > Assignments.
- Click the Edit icon next to the assigned user.
- Update the JSON payload as required. For example, you can:
- Add or modify roles.
- Change the user status.
- Click Save.
After saving:
- The IdP fetches the user data from CleverTap.
- If the user already exists, CleverTap updates the user.
- If the user does not exist, CleverTap creates a new user.
No manual action is required in the CleverTap dashboard.
Add or Update a User in CleverTap
Verify User Provisioning StatusAfter saving the assignment:
- If you see a red error indicator, the provisioning request has failed.
- If you do not see any red indicator, the user has been successfully added or updated in CleverTap.
Delete User
To delete a user from the CleverTap dashboard, remove the user’s assignment from your IdP.
- Go to Applications > Assignments.
- Click the X icon next to the assigned user to delete the user.
Once the user is removed:
- The user will be removed from the CleverTap dashboard.

Delete User Access
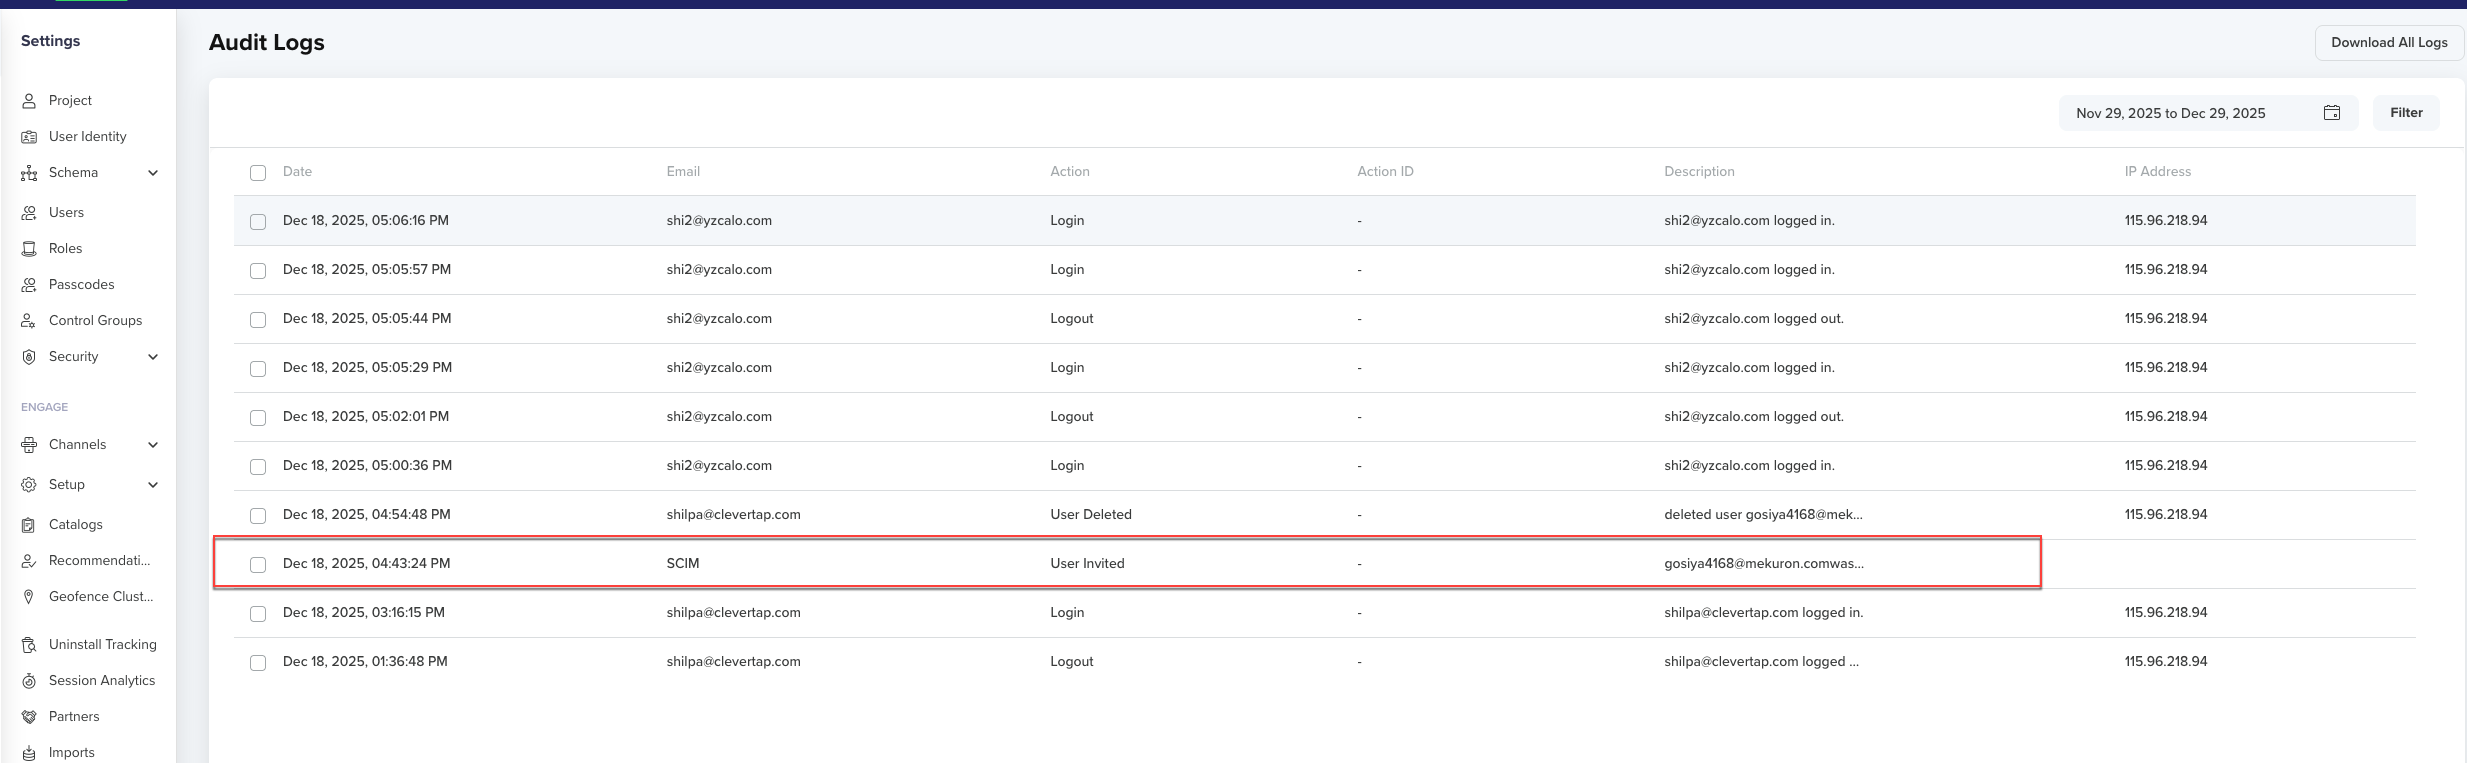
Verify Provisioning Status
After assigning users, verify that provisioning is working correctly and that CleverTap reflects your IdP updates in real time.
- In the CleverTap dashboard, go to Settings > Users.
- Search for the user you just assigned to check their provisioning status. The user’s status should display as Active once provisioning is successful.
- Confirm that updates in Okta (or your IdP) automatically sync and appear in CleverTap.
Verify User Sync and Login
If changes made in your IdP (for example, user deactivation or role updates) do not appear immediately in CleverTap, wait a few minutes for SCIM synchronization or trigger a manual sync in your IdP.
Troubleshooting
| Issue | Cause | Resolution |
|---|---|---|
| Red test indicator | Wrong URL or token | Verify SCIM endpoint and token |
| User missing | Invalid JSON | Correct payload |
| Token error | Expired token | Regenerate and update in IdP |
Updated 6 months ago