SCIM User Provisioning using API
Learn how to use CleverTap’s SCIM endpoints to provision users programmatically.
Overview
CleverTap supports automated user provisioning through SCIM, allowing developers to create, update, and remove dashboard users. The SCIM API accepts structured requests that define user details, roles, teams, and account access.
CleverTap validates all SCIM requests to ensure that accounts, roles, and teams are valid and the provisioning rules for the account are followed. By integrating SCIM, developers can keep CleverTap user access aligned with their organization’s identity systems, thereby reducing the need for manual onboarding and offboarding.
With the SCIM API, you can do the following:
- Provision and manage roles and teams at scale using REST API endpoints.
- Maintain consistent, policy-aligned access without manual intervention.
RegionsYour base URL depends on your account’s region (e.g.,
https://in1.api.clevertap.com). To identify your region, refer to Region Details.
SCIM API Endpoint
CleverTap provides the following SCIM API endpoint:
/nx/v2/scim/v2/Users
Authenticate API Requests
SCIM endpoints require a token instead of standard dashboard authentication. You must generate the token in the CleverTap dashboard before making any SCIM requests.
Token Behavior
The following guidelines outline the process for generating, maintaining, and utilizing SCIM tokens within the system.
- Only one SCIM token exists per account.
- Tokens remain valid for one year if not regenerated. Regenerating a token at any time immediately invalidates the existing token.
- SCIM APIs and IdP APIs are not interchangeable and must be used only for their respective purposes.
Generate SCIM Token for API-Based Provisioning
Before making SCIM API calls, you must generate a token in the CleverTap dashboard. The SCIM token authenticates all provisioning requests made by your API client.
To generate a SCIM token:
- Go to Organization > SCIM Management in the CleverTap dashboard.
- In Configuration Type, select API.
- Click Generate Endpoint & Token.
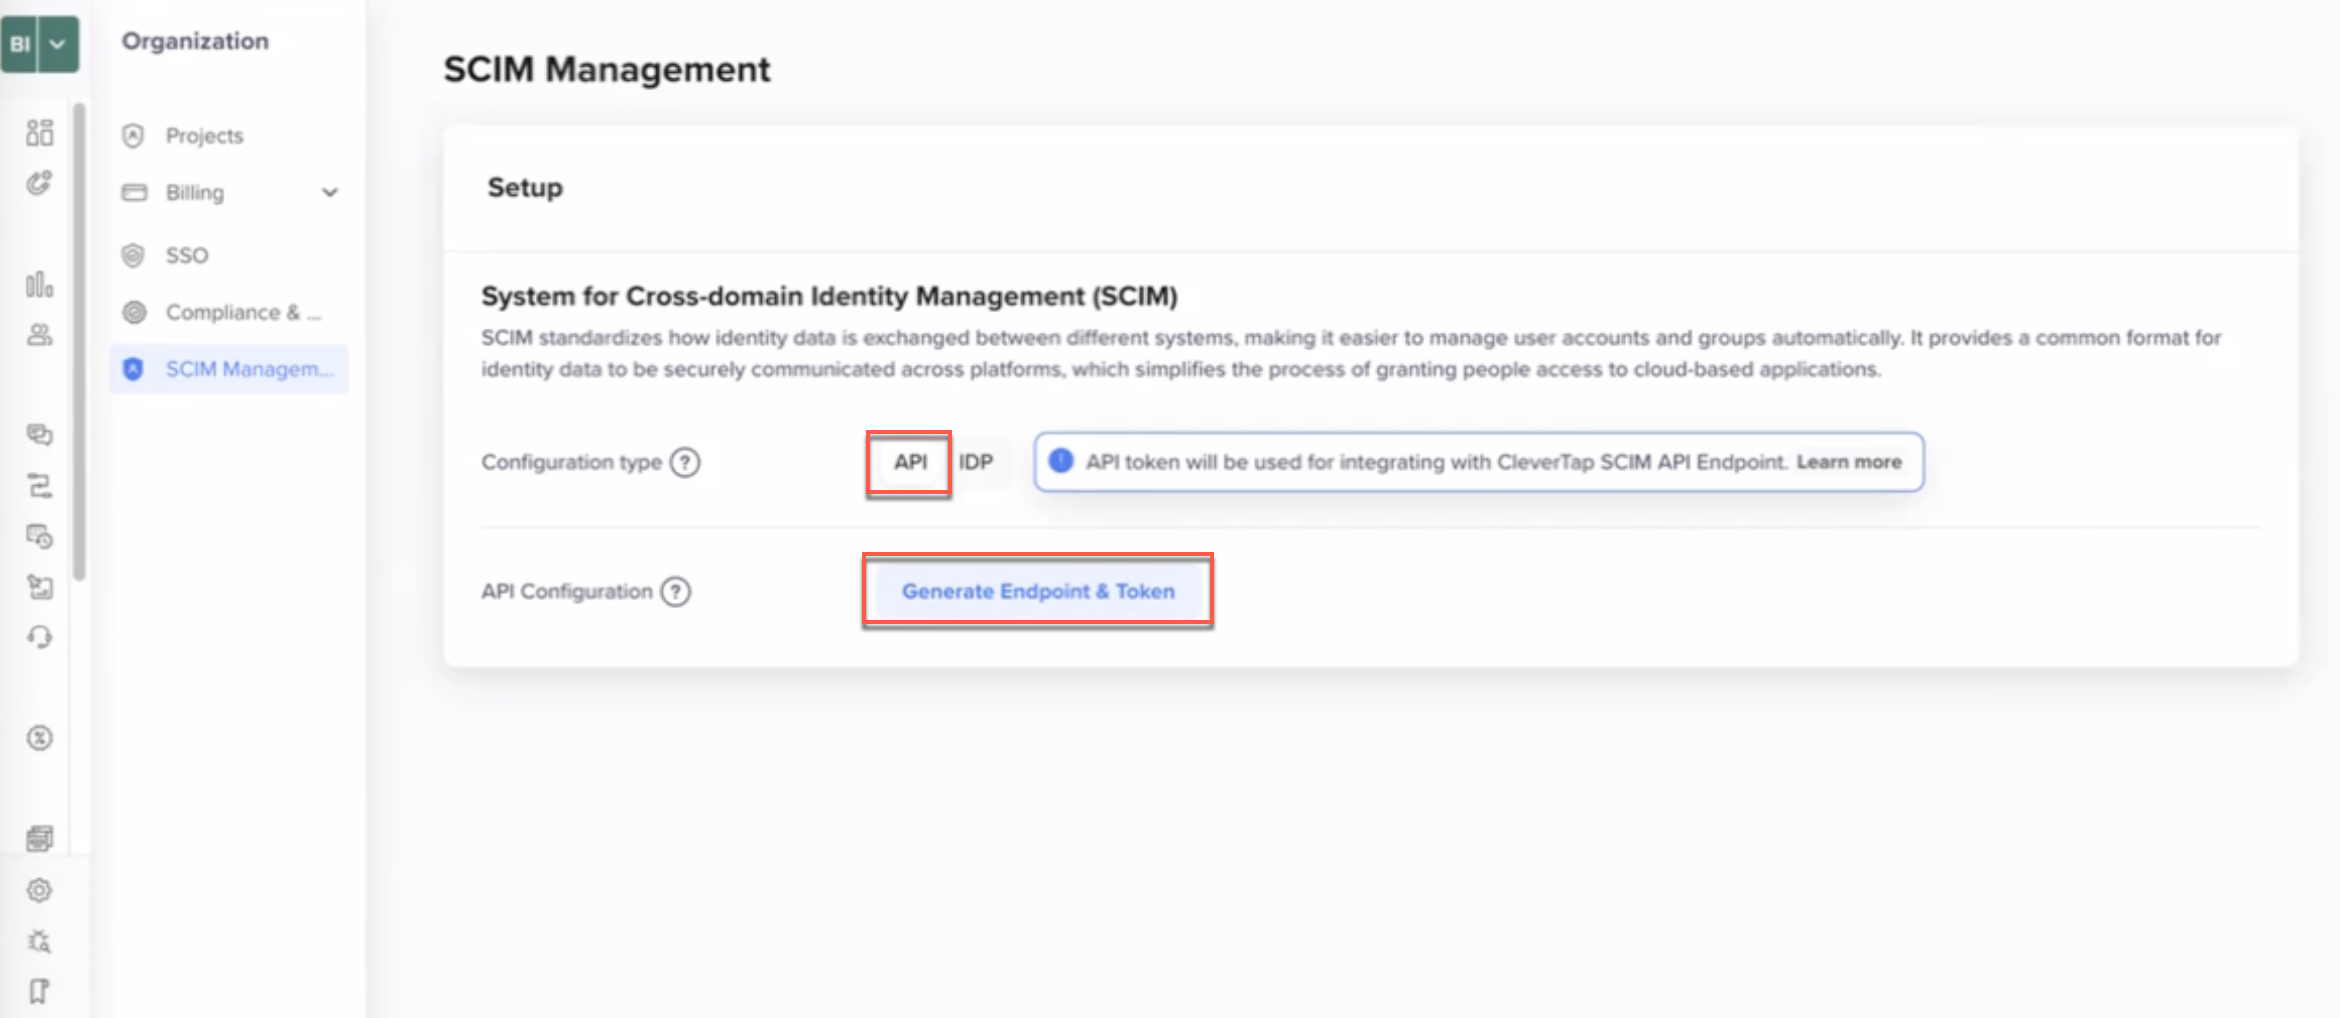
Generate Endpoint & Token
- Copy the displayed SCIM Token and store it securely.
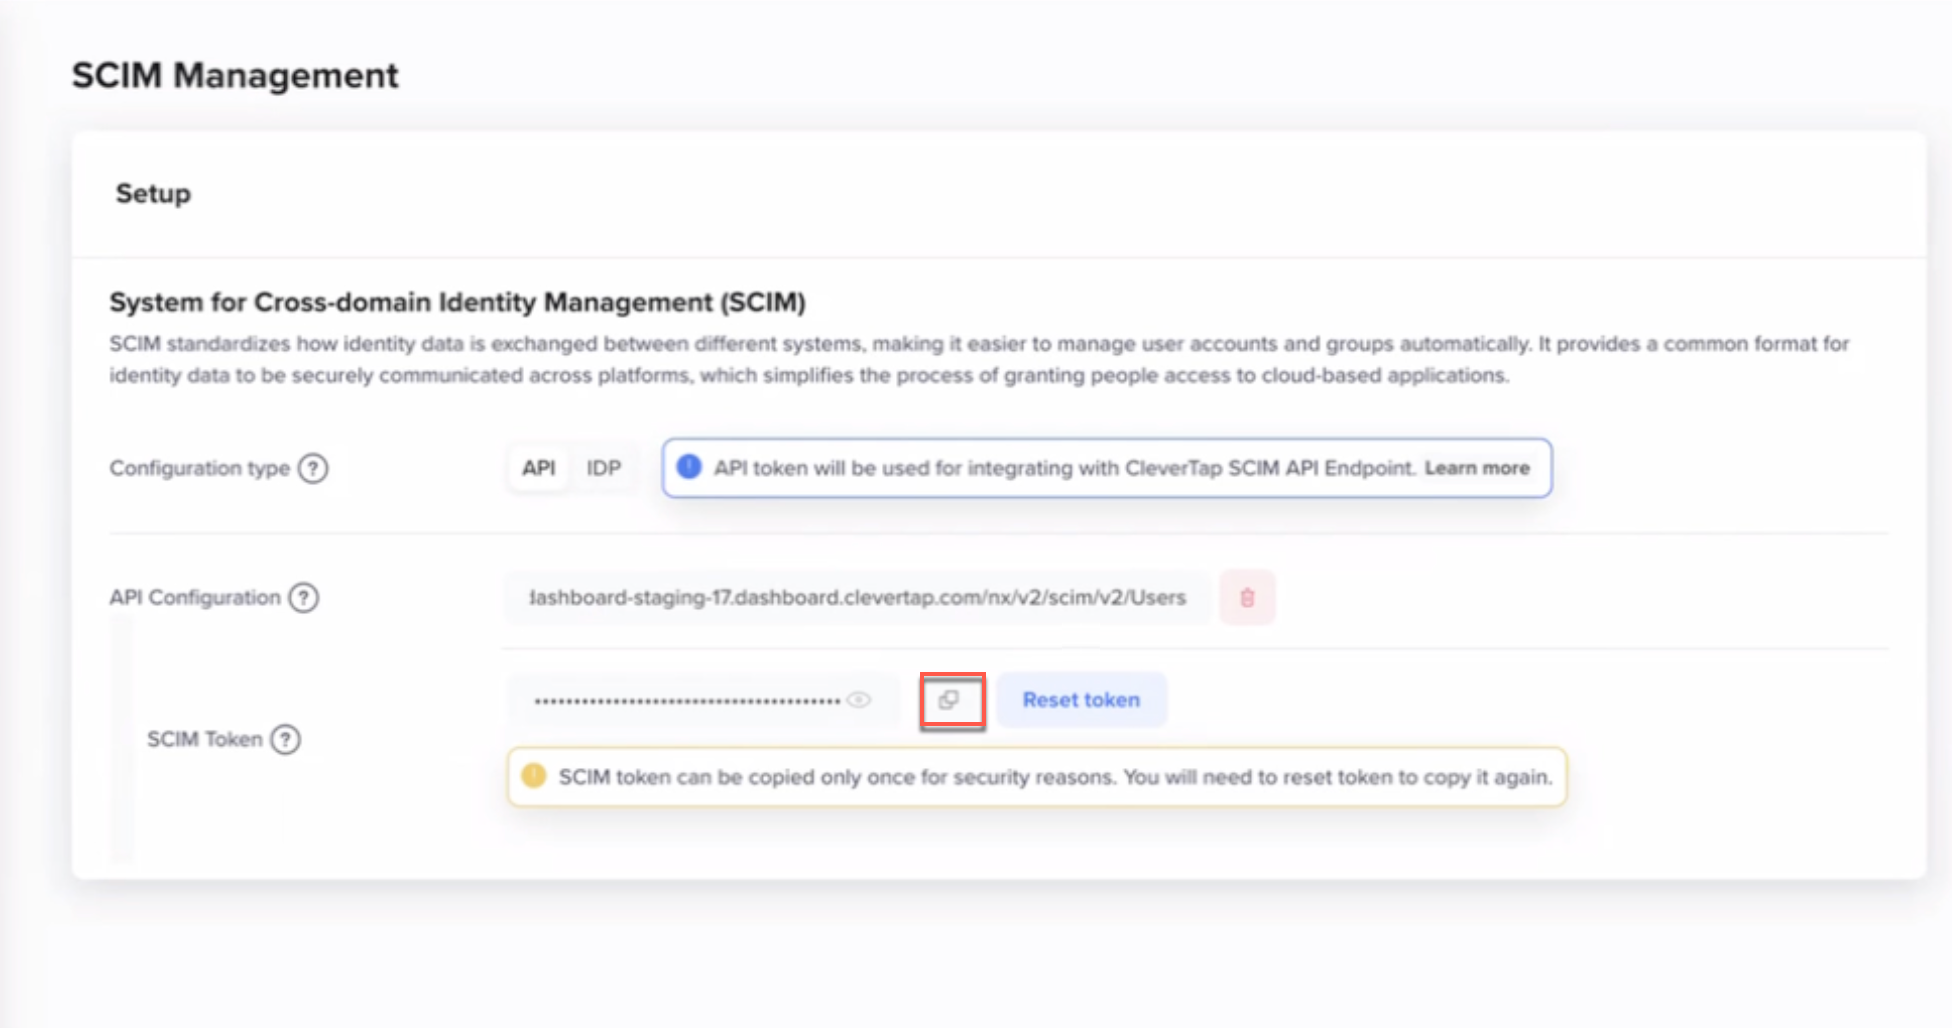
Generated SCIM Token and API Endpoint
ImportantThe SCIM token is displayed only once. If you lose the token, you must regenerate it by clicking Reset Token, which will invalidate the existing token.
- Use the generated API Configuration endpoint (ending with
/nx/v2/scim/v2/Users) in your SCIM API requests.
Header
All SCIM api endpoints require Bearer token authentication. Include the token in the Authorization header with every request. The following is the request header format:
Authorization: Bearer <SCIM_TOKEN>
Content-Type: application/json
Rate Limits
To maintain predictable performance, SCIM requests follow rate limits:
- Up to 3 requests per second
- Use exponential backoff for 429 responses
Audit Logs and Notifications
Every API call that modifies Role-Based Access Control (RBAC) is recorded, and the following logs are monitored:
- Target user email
- Action performed and status
Admins and users receive email alerts when roles are added, updated, or deleted.
Best Practices
Protect your credentials and ensure secure API communication at all times.
- Use
HTTPSfor all requests - Restrict token visibility to trusted automation systems
- Configure monitoring alerts for failed requests or unusual activity
FAQs
The following are the common questions and answers on SCIM:
What happens when a user is deleted?
The user’s dashboard access is revoked immediately, admins are notified by email, and the event is logged for compliance.
Updated 6 months ago